For the purposes of learning to connect to and interact with a database from within Python, we will use SQLite because installation of SQLite and working with it is fairly easy. However, the concepts we cover here will work with all relational database systems with only minor changes to the code. So, on this page, we'll get SQLite and SQLite Studio installed and we'll also set up a sample database to work with over the next several sections.
What is SQLite?
SQLite is a file-based database tool. In this context, file-based means that databases are stored in a file (with a .db file extension). This fact makes SQLite databases very portable and easy to manage. We also should recognize that SQLite is not a "server," like SQL Server, MySQL, etc. This means that I can use SQLite on nearly any kind of computer and many "smart" devices such as phones, tablets, etc. This makes SQLite very flexible. On the other hand, SQLite does have limitations for large applications where multiple users need to connect to the database simultaneously, large quantities of data, etc. These limitations will not affect what we're studying here and as mentioned above, the concepts of connecting to a database, querying a database, updating data in a database, etc. are conceptually the same regardless of the database product in use.
Installing SQLite & SQLite Studio
Choose your operating system for detailed installation instructions.
The following instructions were written using Windows 10. If you have a different version of Windows these instructions should still work, however there may be some differences.
Also, the SQLite installation is a bit different from most software installations you may be familiar with. There is no installer program, instead we need to manually download SQLite files, unzip them, move them to a storage location on the computer and set up the system path so they can be found.
To download the files we need, click on the two files shown on the screen capture below under the Precompiled Binaries for Windows section of the page : sqlite-dll-win64-x64-______.zip and sqlite-tools-win32-x86-______.zip. If you're using the Chrome browser, the files will appear at the bottom of the browser. However, I do not recommend opening the files from the browser though, continue with the instructions below instead.
Note: The actual version you see on this page may be different. The screen capture below is accurate as of April 2022.
Next, we'll download the SQLite Studio software. Navigate to this address: https://sqlitestudio.pl/. The following screen will appear.
Click the Download button. If you're using the Chrome browser, the file will appear at the bottom of the browser. However, I do not recommend opening the files from the browser though, continue with the instructions below instead.
Now that we have downloaded the files we need, open Windows Explorer and navigate to the Downloads folder. You should see three files there, like this ...
Extract the three .zip files. After they are extracted, you should see two new folders and two files, as indicated here ...
You can delete the three .zip files now.
Next, decide where you want to store these files on your computer. In my example, I will create a new folder directly on my C: drive called SQLite, and then move the files from the Downloads folder to the new folder. Here are the steps I took to set up my new folder:
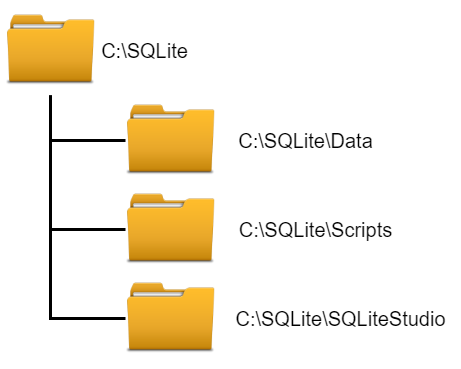
In Windows Explorer, I right-clicked the C:\ drive, selected New - Folder and named it SQLite.
I right-clicked on the new c:\SQLite folder, selected New - Folder and named it Data (we'll use this later).
I navigated to the Downloads folder, selected the following files and folders:
SQLiteStudio
sqlite-tools-win32-x86-3380200 (the version number on the end may be different on yours)
sqlite3.dll
sqlite3.def
I right-clicked the group of files and selected Cut.
I navigated to the C:\SQLite folder, right-clicked on the folder name and selected Paste.
The files move to the C:\SQLite folder.
I double-clicked the sqlite-tools-win32-x86-3380200 folder to open it.
I selected all of the files in this folder, right-clicked the group of files and selected Cut.
I returned to the C:\SQLite folder, right-clicked the folder name and selected Paste.
The files move from the subfolder to the SQLite folder.
I right-clicked the sqlite-tools-win32-x86-3380200 folder and selected Delete.
After those steps, my C:\SQLite folder contents looks like this ...
Next, we need to add the new C:\SQLite folder to the System Path. To do this, follow these steps:
In the Windows Search bar type Path and press enter.
The System Properties dialog opens ...
Click the Environment Variables button.
The Environment Variables dialog opens ...
Next, in the System Variable list (not the User Variables list) double-click the Path entry.
The Edit Environment Variables dialog will open
Click the New button
Then enter the full path to the SQLite folder we just created above. In my example, I entered C:\SQLite
Then press Enter and click Ok on each of the 3 dialogs to close them all.
To confirm SQLite is set up correctly complete the following steps ...
In the Windows Search bar type cmd and press Enter.
The Command Prompt opens ...
At the command prompt type sqlite3 and press Enter
SQLite should start and its prompt (sqlite>) should appear awaiting a SQLite command, like this ...
At the sqlite> prompt type .exit (include the .) and press Enter
SQLite will Close
Close the Command Prompt window.
Note: If SQLite does not open, you may need to restart your computer and then try starting it again.
SQLite Studio
Next, we'll set up SQLite Studio for use. We already downloaded the studio software above, so to run it we just launch the SQLiteStudio.exe program. To make this easier, we could pin it to our Taskbar or create a desktop icon for it. To demonstate, I'll create a desktop icon for it so it's easy to launch whenever I want to use it.
Right-click on the Windows desktop and select New and then Shortcut,
The Create Shortcut dialog will open,
Use the Browse button to navigate to the C:\SQLite\SQLiteStudio folder and double-click the SQLiteStudio.exe file,
Then click the Next button.
Next, type a name you want to appear on your desktop icon, I named it SQLite Studio,
Then click the Finish button.
Now there is a new icon on the desktop ...
When I double-click the icon SQLite Studio opens ...
Now SQLite and SQLite Studio are installed and configured for use with programming languages and software.
The following instructions were written using Mac OS Big Sur. If you have a different version of Mac OS these instructions should still work, however there may be some differences.
Instructions
All modern versions of the Mac OS comes with SQLite pre-installed. To confirm you already have it, open a Terminal window, type sqlite3 --version and press Enter. If it is installed, the output will look something like this ...
Notice that the output indicates I have version 3.36 on this Mac. If it could not find SQLite it would have displayed an error.
If you get an error indicating you can install SQLite using the following command at the Terminal prompt ...
If you get an error stating that brew is invalid, it means you do not have Homebrew installed on your Mac. You can get it for free by going to brew.sh first, install it and then run the brew command above in your terminal.
SQLite Studio
Next, we'll download the SQLite Studio software. Navigate to this address: https://sqlitestudio.pl/. The following screen will appear. Click the Download button. If you're using the Chrome browser, the file will appear at the bottom of the browser.
If you do not see the downloaded file at the bottom of the browser, locate it in your Downloads folder. Double-click the downloaded installer file. When it is installed, the app package will appear in a window, like this ...
Next, open a Finder window and navigate to Applications and you should find a SQLite folder there. Drag the newly installed SQLiteStudio.app file to the Applications folder.
You can close the SQLiteStudio window.
Now you can run the SQLiteStudio.app to confirm it works correctly by double-clicking it.
You may see a warning message like this ...
If you do, open System Settings and navigate to the General tab of the Security & Privacy settings and click the Open Anyway button.
The warning dialog will change. Click the Open button.
SQLite Studio will open. You should only have to clear the above warnings once.
Now SQLite and SQLite Studio are installed and configured for use with programming languages and software.
The following instructions were written using Linux Mint. If you have a different Linux distribution and/or version of Linux you may need to use other command line tools, but the steps will be similar.
Instructions
First, open a Terminal window.
Next, it's usually a good idea to run a general update of packages before installing new software, however this step is optional based on your preferences. If you want to update packages, enter the sudo apt update command.
After the package updates complete, then enter the sudo apt install sqlite3 command.
Next, confirm that the installation completed successfully. Enter the command sqlite3 --version, like this ...
Note that it displays a version number for SQLite, which indicates it is installed and functional.
SQLite Studio
Next, we'll download the SQLite Studio software. Navigate to this address: https://sqlitestudio.pl/. The following screen will appear. Click the Download button. If you're using the Chrome browser, the file will appear at the bottom of the browser.
If you do not see the downloaded file at the bottom of the browser, locate it in your Downloads folder. Double-click the downloaded installer file. When it is installed, the Extract window will appear, like this ...
Next, open a second Files window and navigate to the location where you want to install SQLite Studio. In the following example, I chose to install it in my personal folder. When I had that folder opened in the second Files window, I drag the SQLiteStudio folder from the Extract window to my personal folder area, like this ...
After the extract completes, the SQLiteStudio folder then appears in the destination folder (in this example, in my personal folder), like this ...
Next, we'll create a desktop launcher icon for the studio software so it is easy to start. Right-click the desktop and choose Create a new launcher here... ...
The Launcher Properties dialog will appear ...
In this dialog I entered SQLite Studio for the Name and used the Browse button to navigate to the SQLiteStudio application program where I extracted the program files as shown on the screen capture. You will need to navigate to the appropriate location on your computer where you extracted your copy of the application.
Then I clicked the Ok button and the desktop icon is created ...
Double-clicking the new icon launches the SQLite Studio application ...
Now SQLite and SQLite Studio are installed and configured for use with programming languages and software.
Sample Database
Be sure you have SQLite and SQLite Studio installed on your computer before proceeding.
Also, I will use the following configuration on my computer where I have SQLite and SQLite Studio software installed, as well as where I will store additional files as explained below. You can set up your computer any way you wish, you'll need to know the location of these items on your computer.
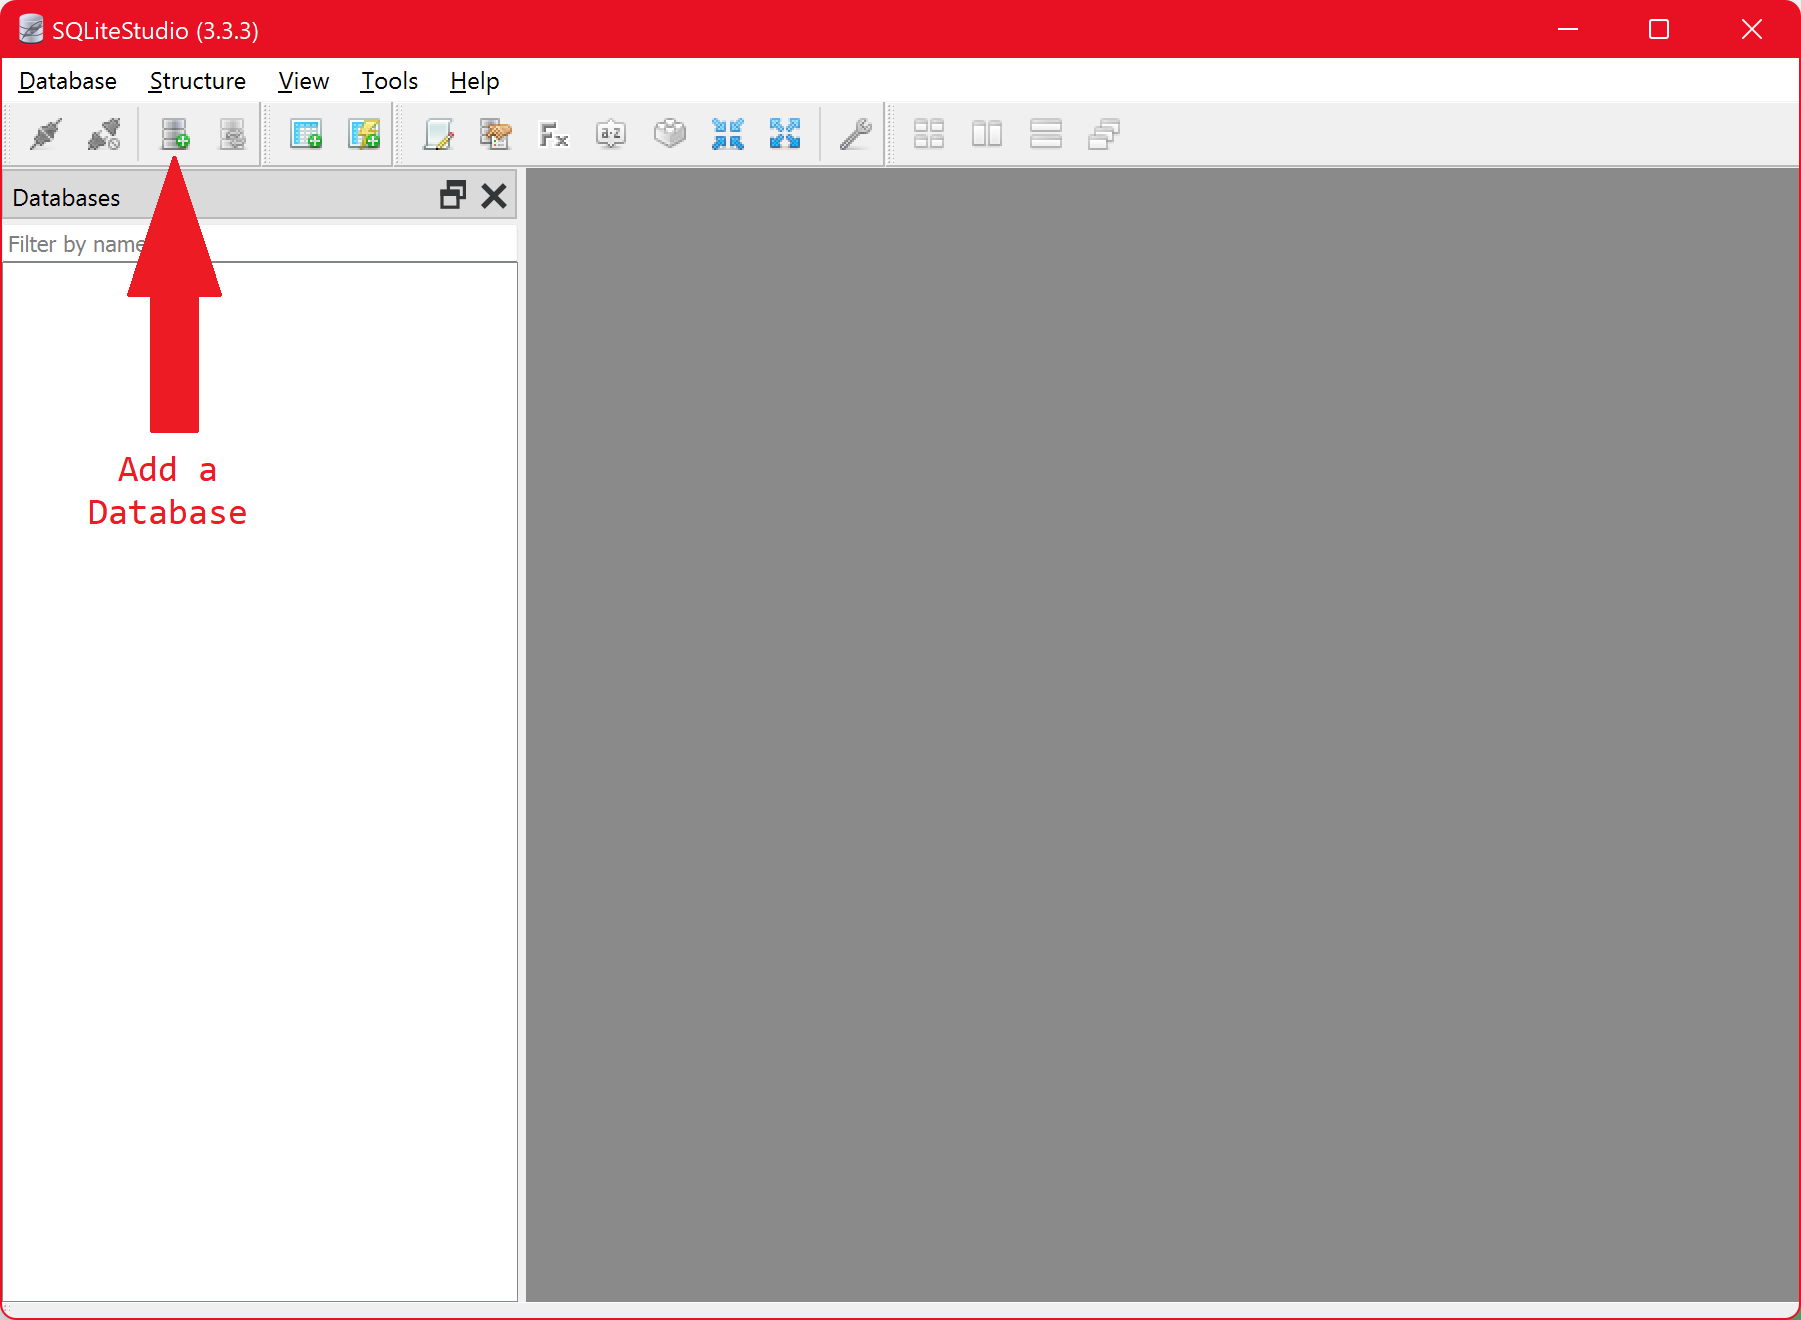
Next, open SQLite Studio and click the Add a Database button as shown here:
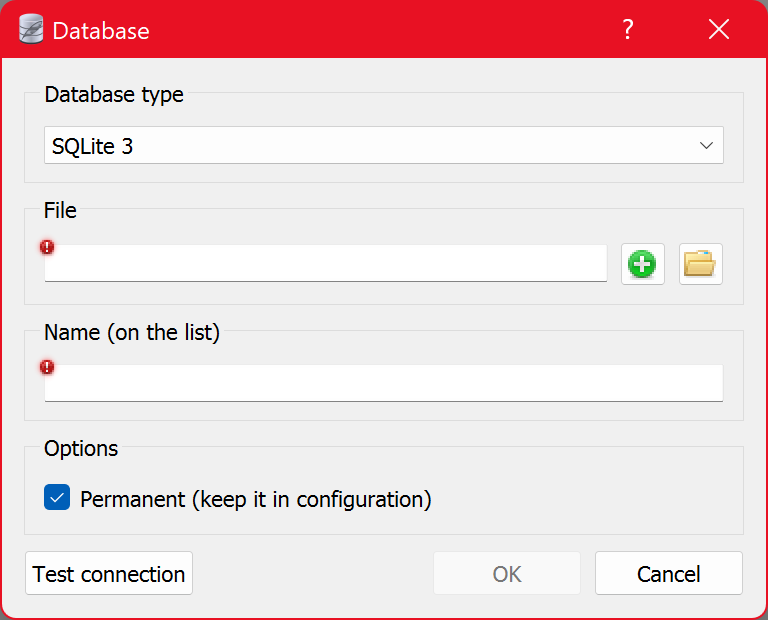
The Add Database dialog will open:
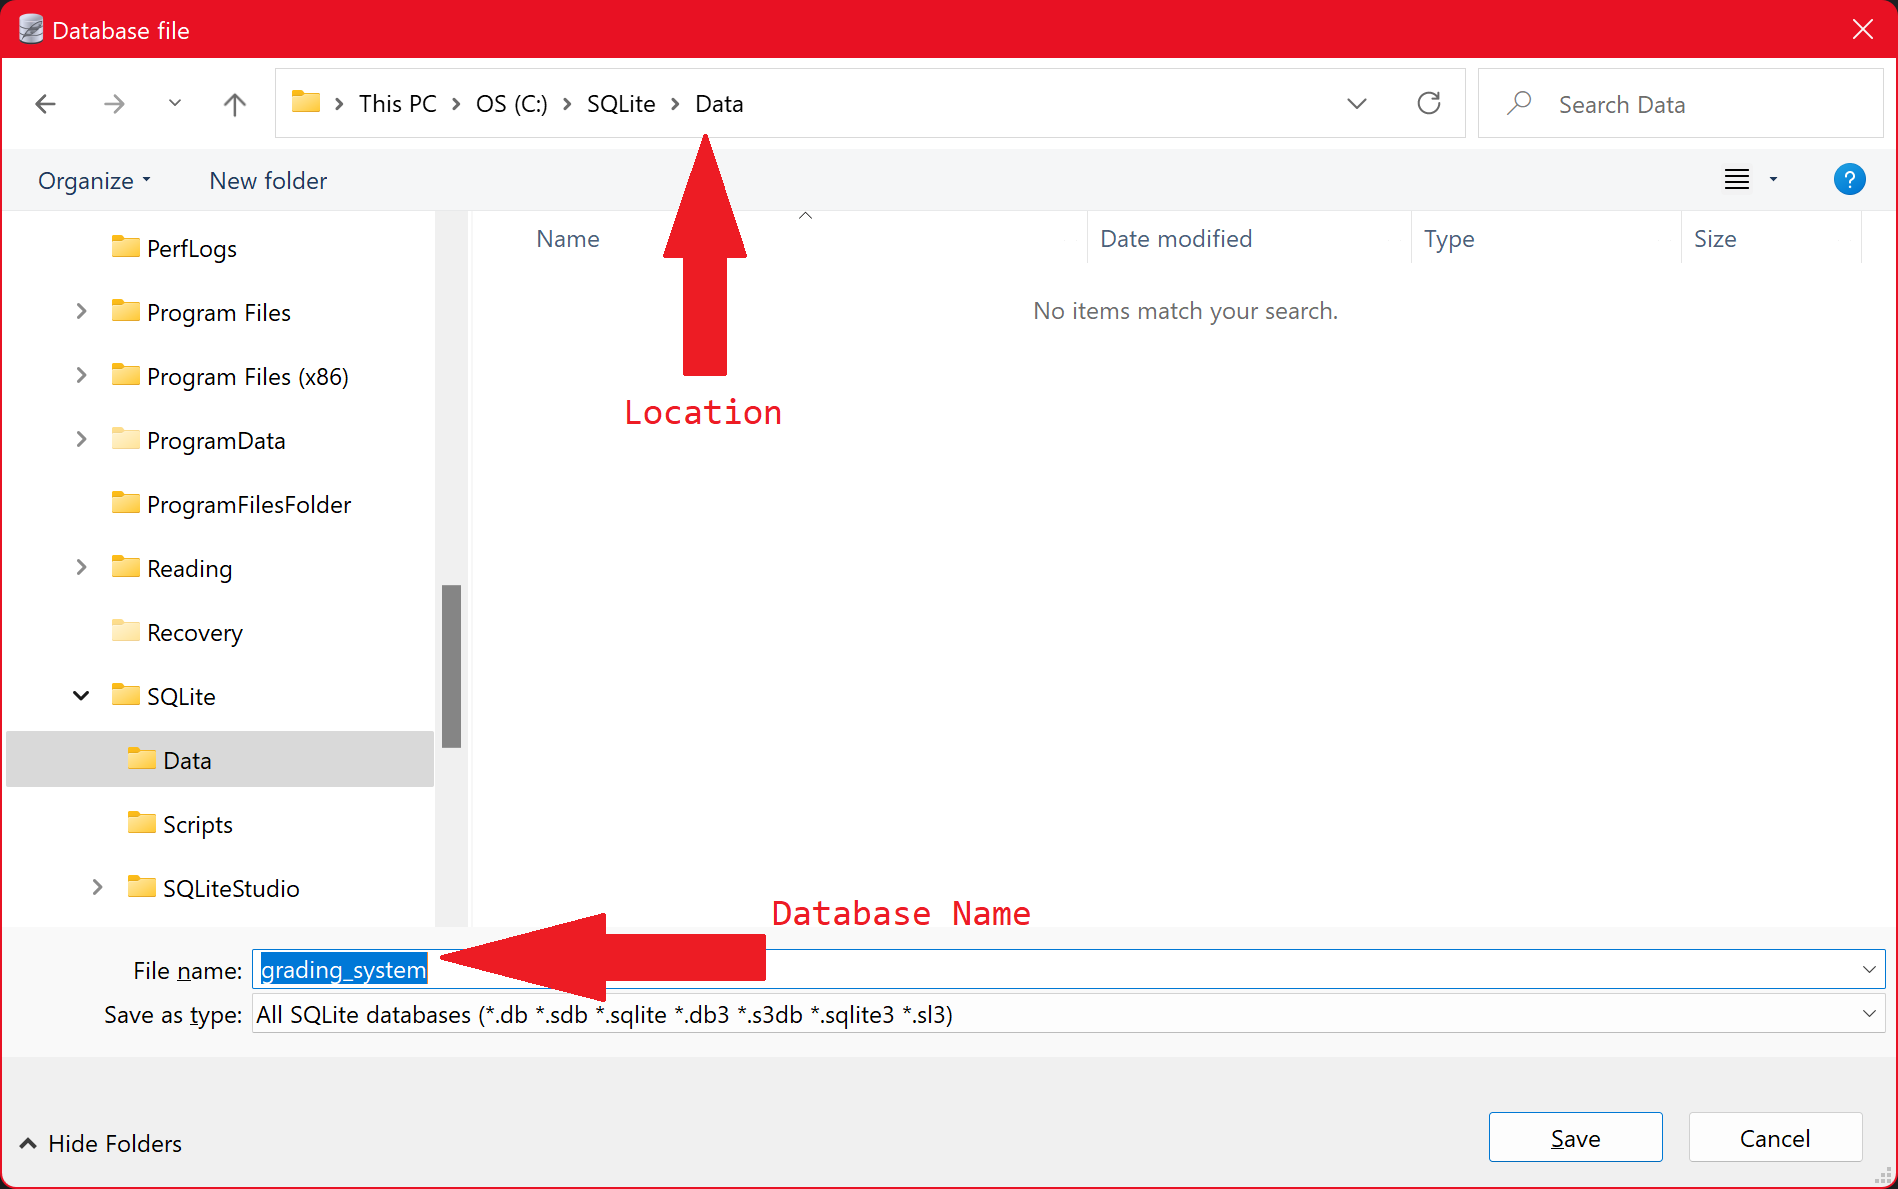
Click the green + button and the File Explorer will open in which you'll navigate to the location where you want the new database file to be created. In my example, I will navigate to my C:\SQLite\Data folder where I want to store all of my database files. After I have navigated to that folder I enter the name of the database in the File name: field of the dialog. In this case we want to name our database grading_system.
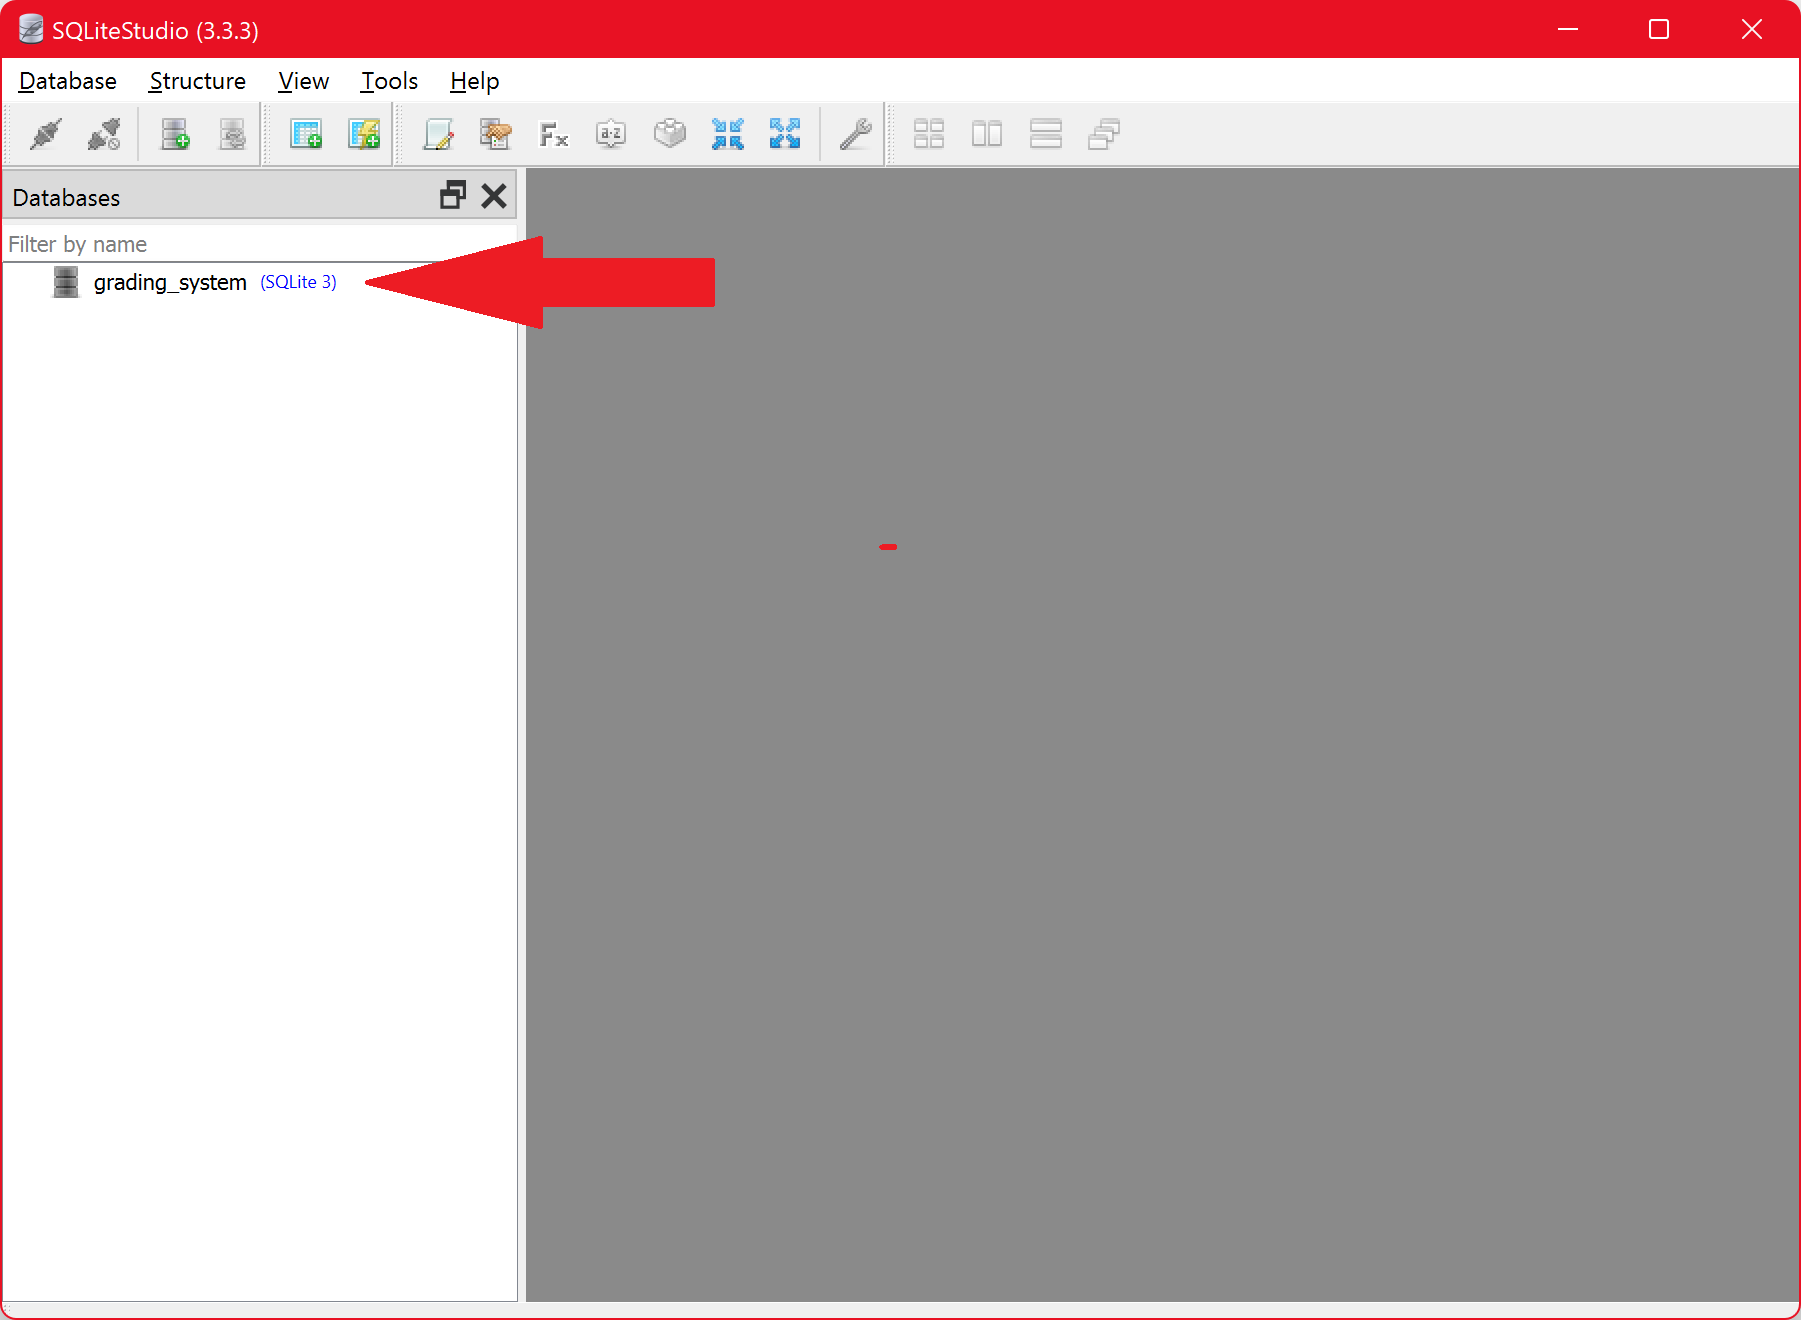
When we click the Save button and then Ok, we see that the new database is now listed in SQLite Studio:
At this point though the grading_system database is empty. There is no structure to the database and no data in it, yet. There are several options to load create the database structure and to load data. For our purposes, to make it easier to get started on Python coding, we'll use a script I wrote to populate this database automatically.
The script is a program written in Structured Query Language (SQL) that resets the grading_system database, that is, removes everything from it and rebuilds it to an original state. You can run this script as often as you like to rebuild the database. This is useful as you experiment with the database, you can modify and delete data all you want to try different SQL features. Then you can re-run this script to reset the database back to its original state any time.
I have packaged the script file, along with another file that contains sample queries you can use with the grading_system database, in a ZIP file you can download. Download the ZIP file using the download icon ...
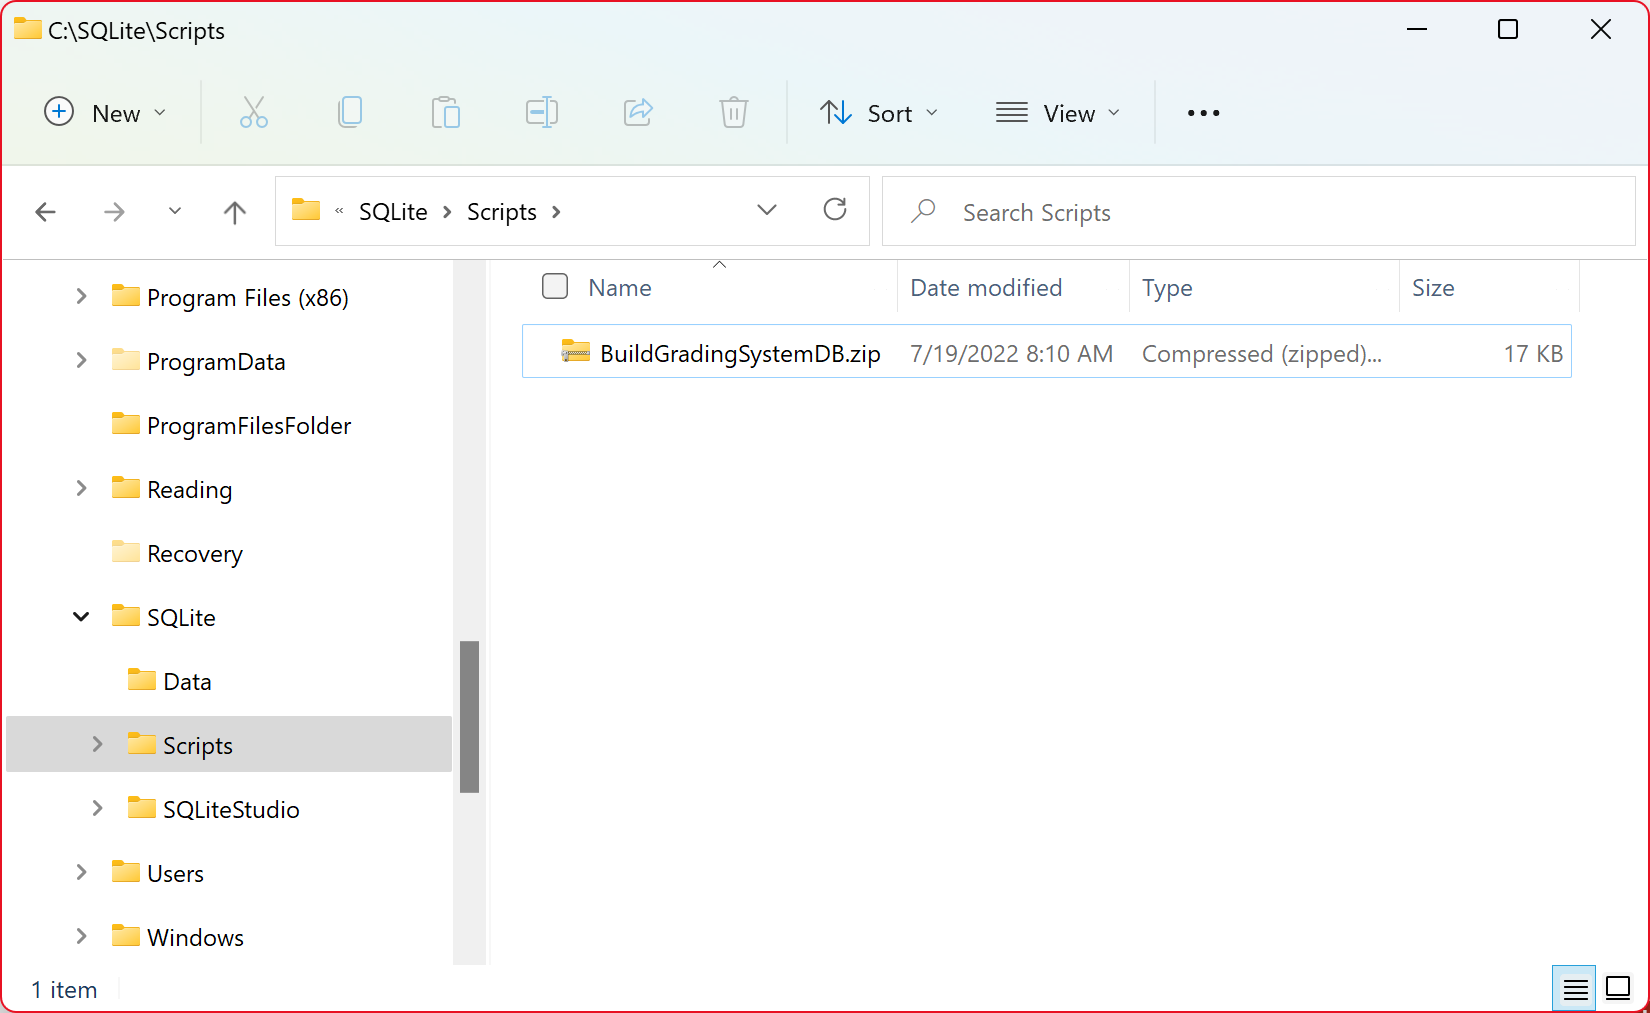
In my example, I will download the ZIP and then move the downloaded file from my Downloads folder to me my C:\SQLite\Scripts folder:
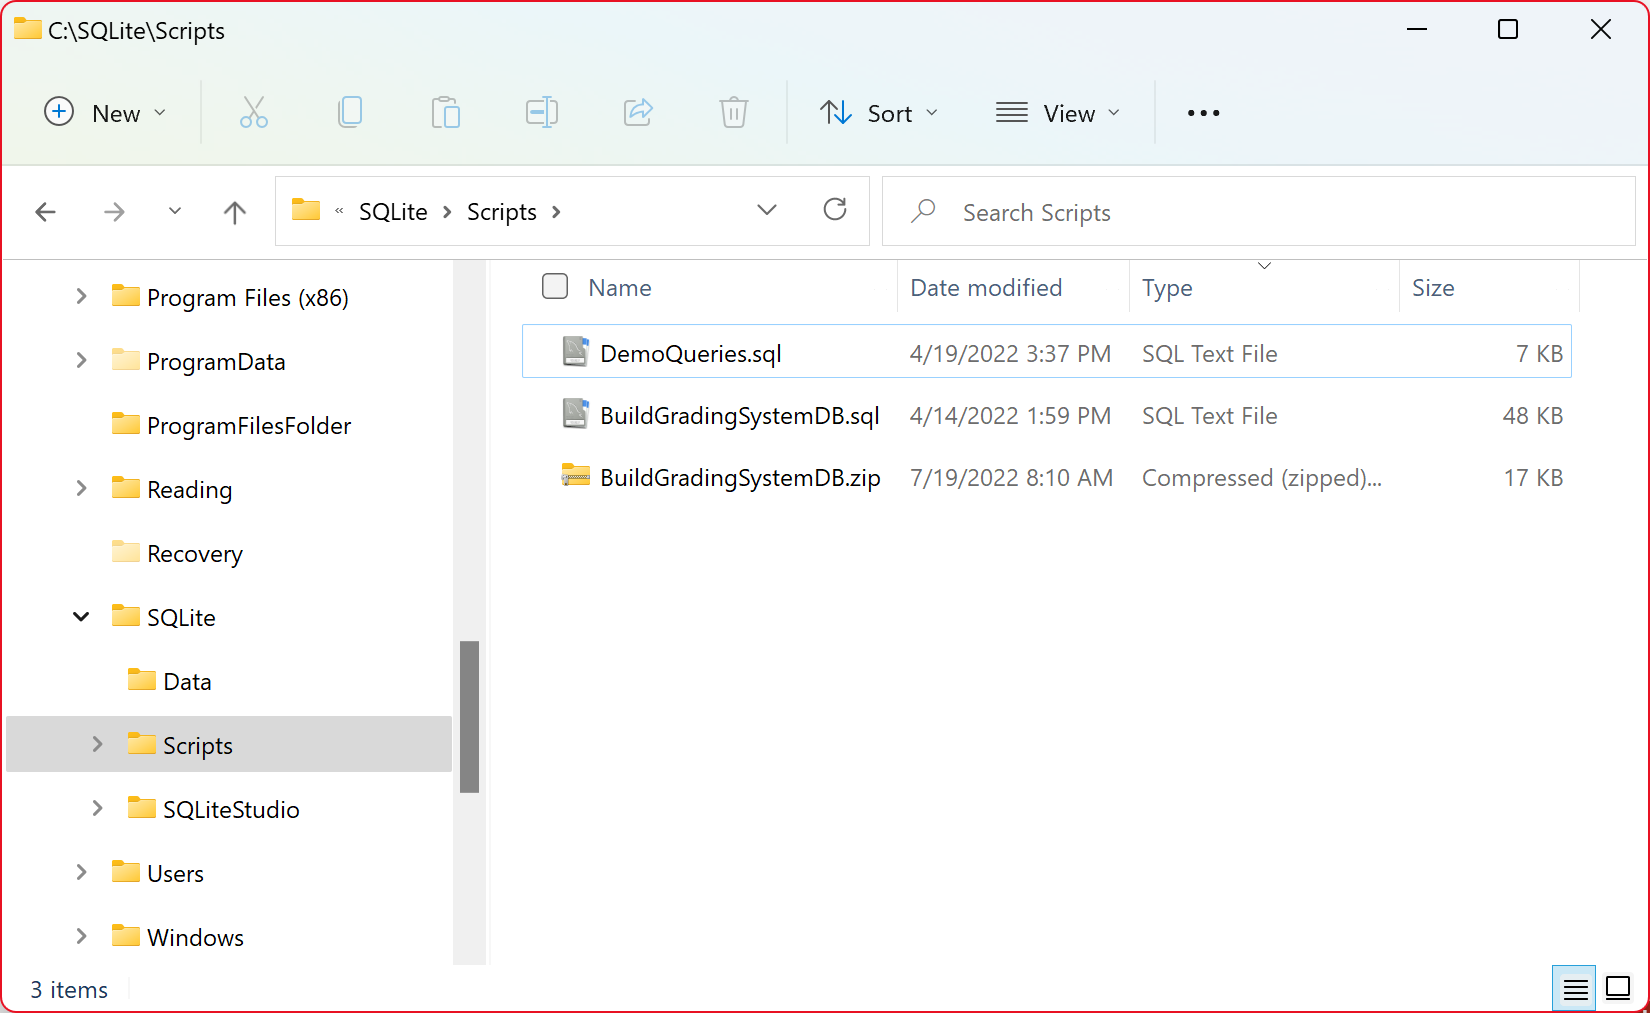
I then extract the ZIP file and now have two .sql files:
BuildGradingSystemDB.sql: This is the script file we'll use to populate our new grading_system database (see the instructions below).
DemoQueries.sql: This is a script file containing numerous example queries we can use with our database from inside of SQLite Studio and in our Python code.
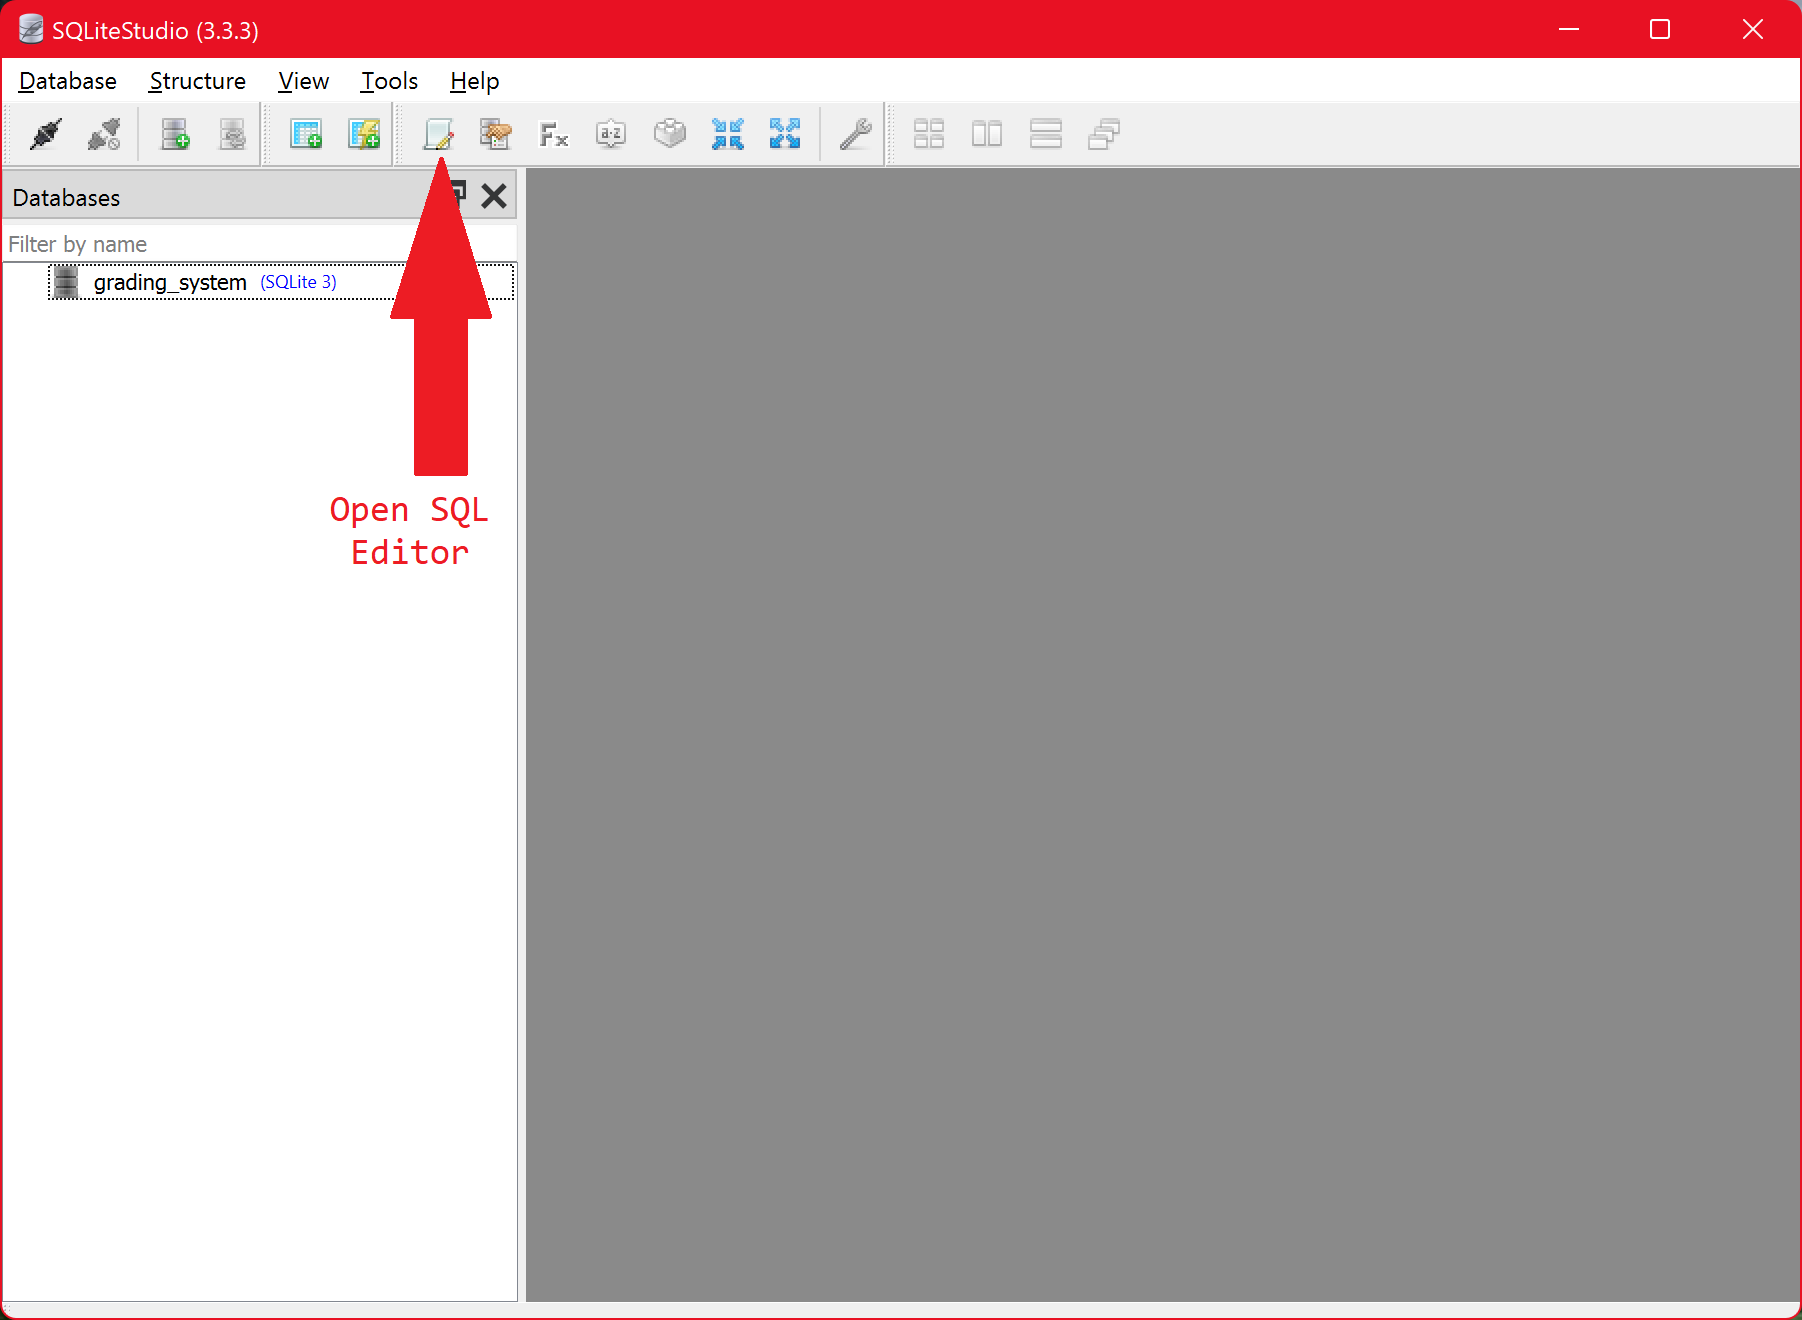
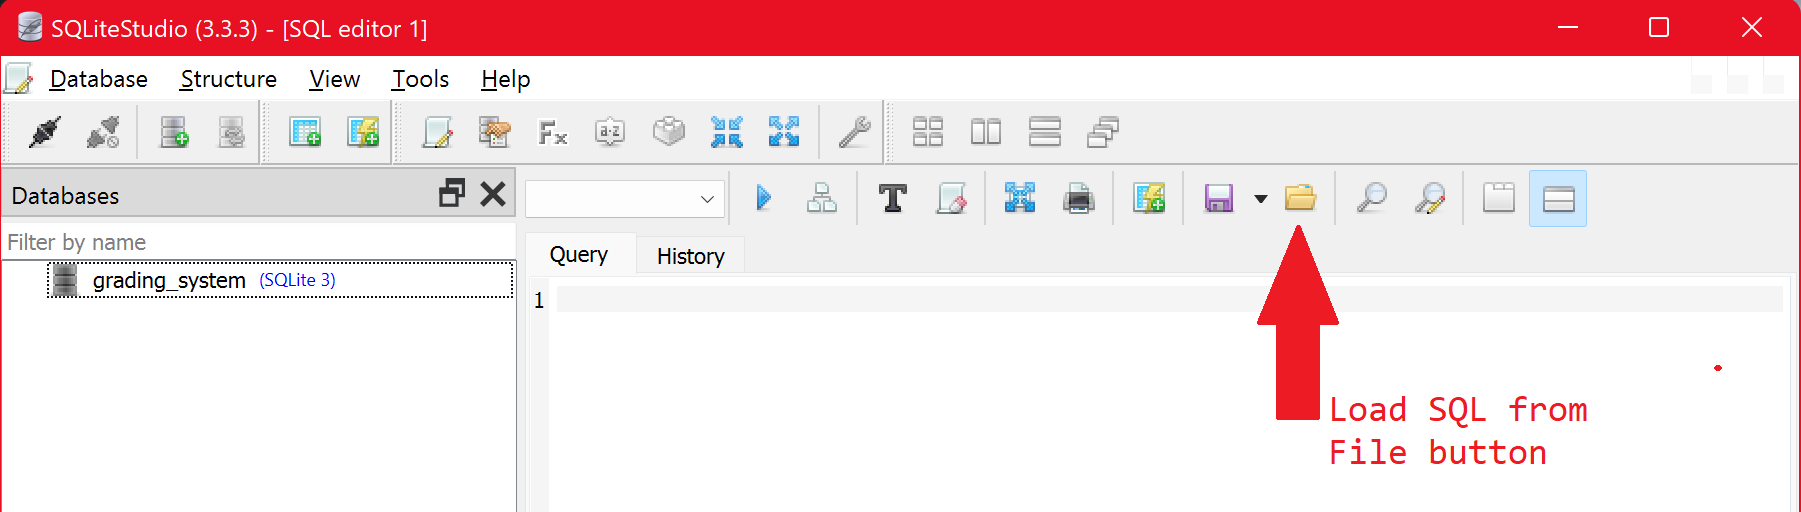
Next, inside of SQLite Studio, open the BuildGradingSystemDB.sql file by clicking the Open SQL Editor button:
Then click the Load SQL from File button:
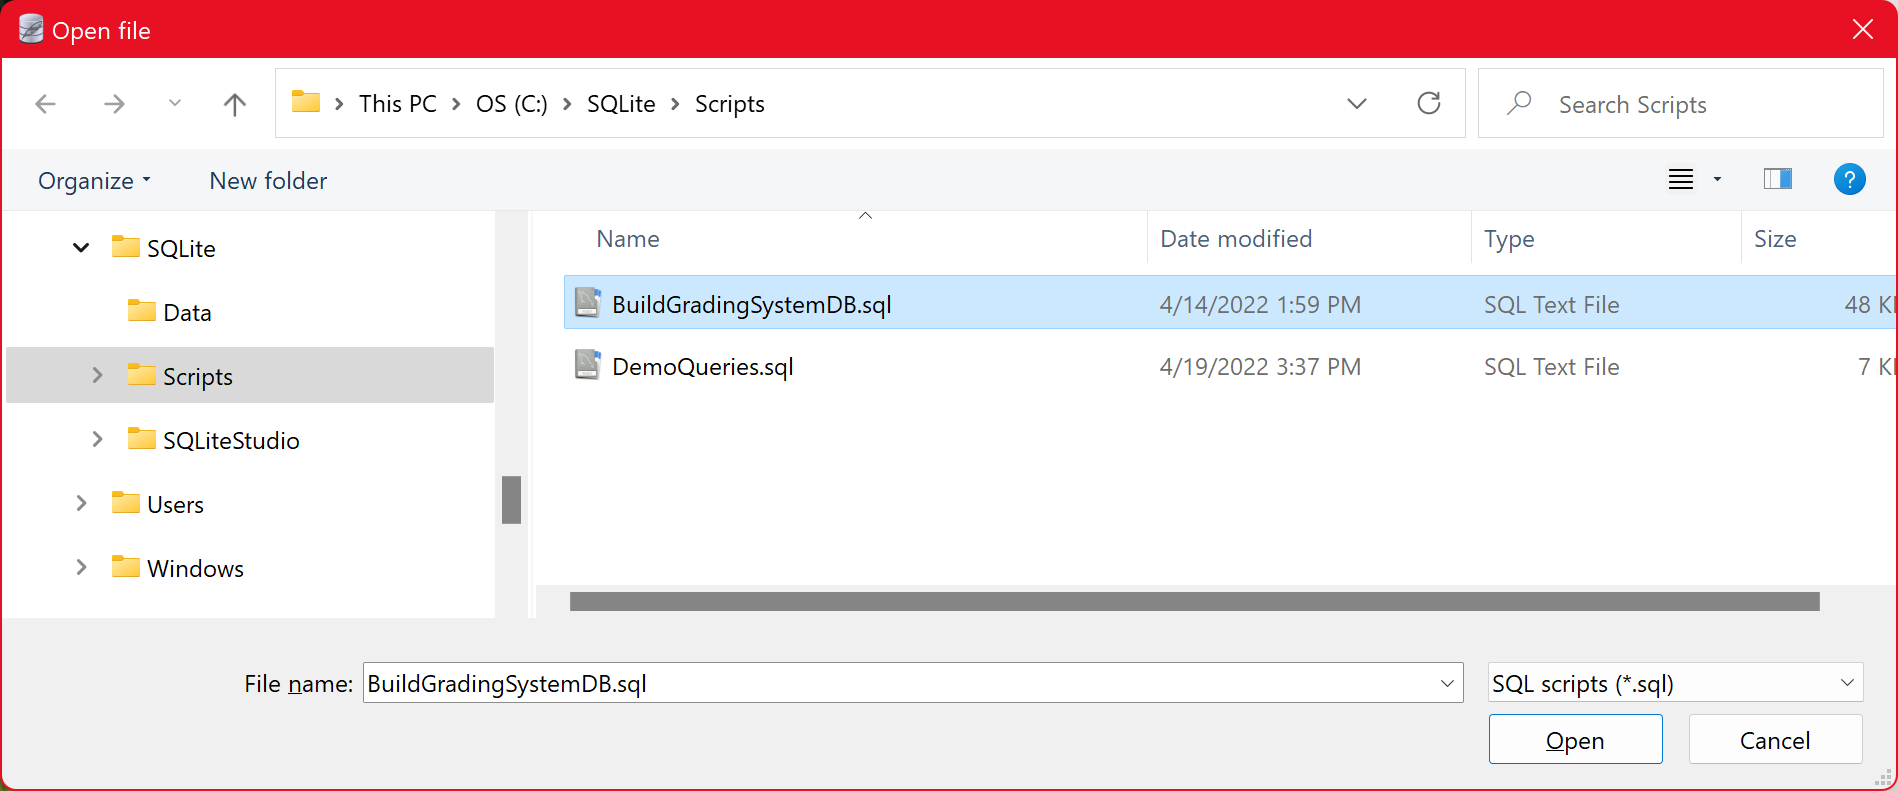
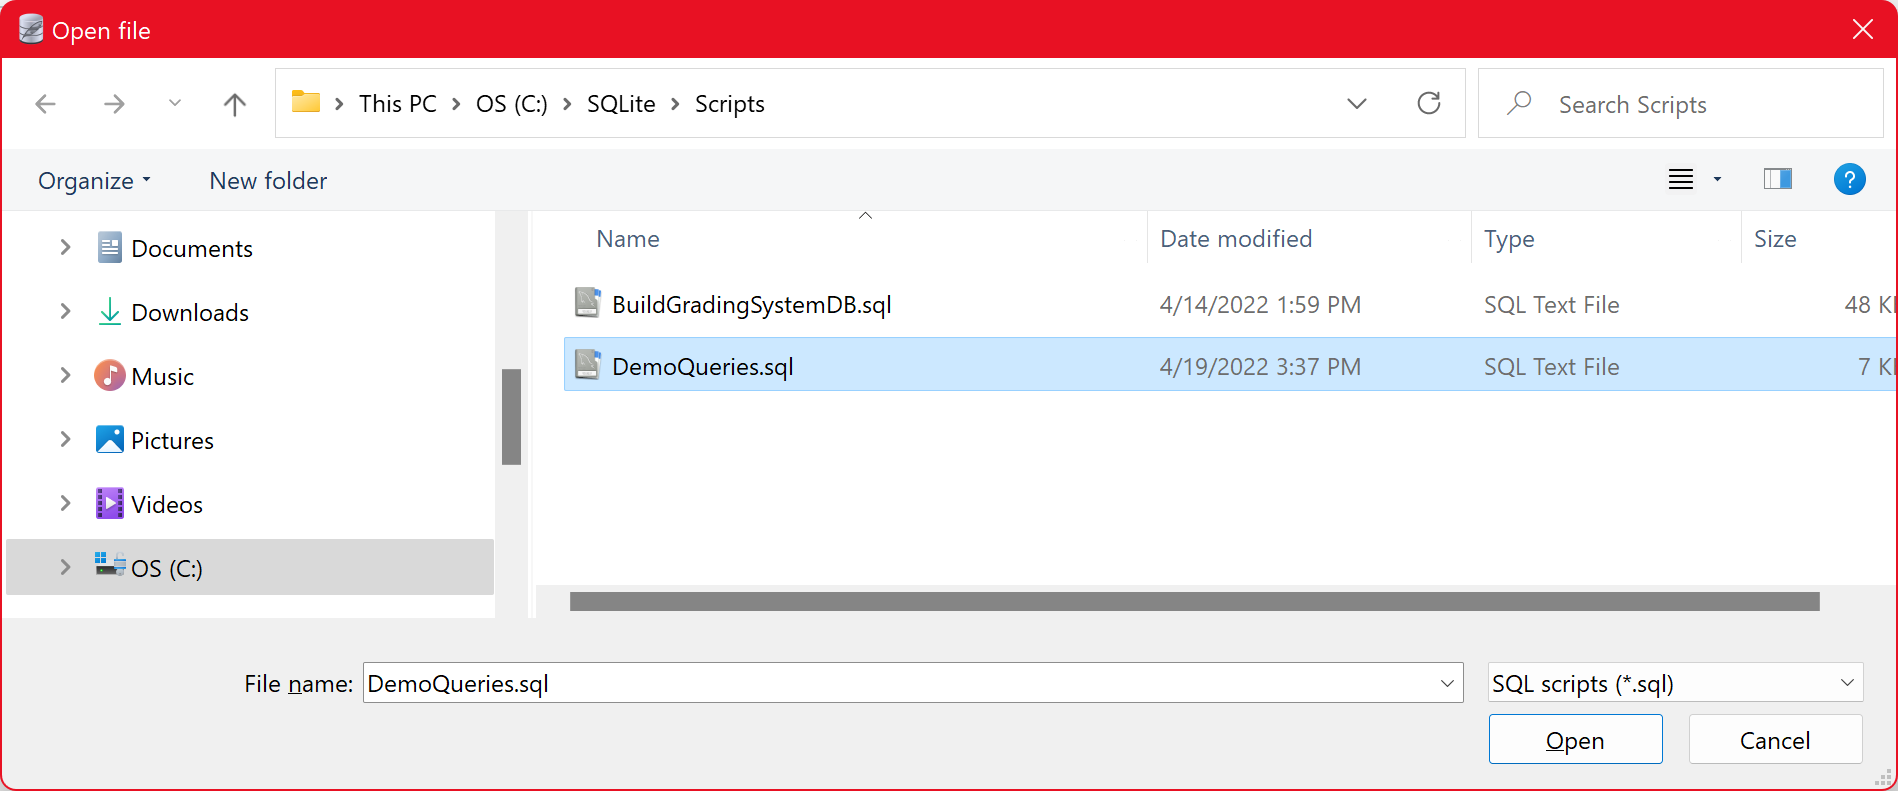
In the File Open dialog navigate to the location where you stored the script files, in my example that is the C:\SQLite\Scripts folder. Select the BuildGradingSystemDB.sql file and then click the Open button:
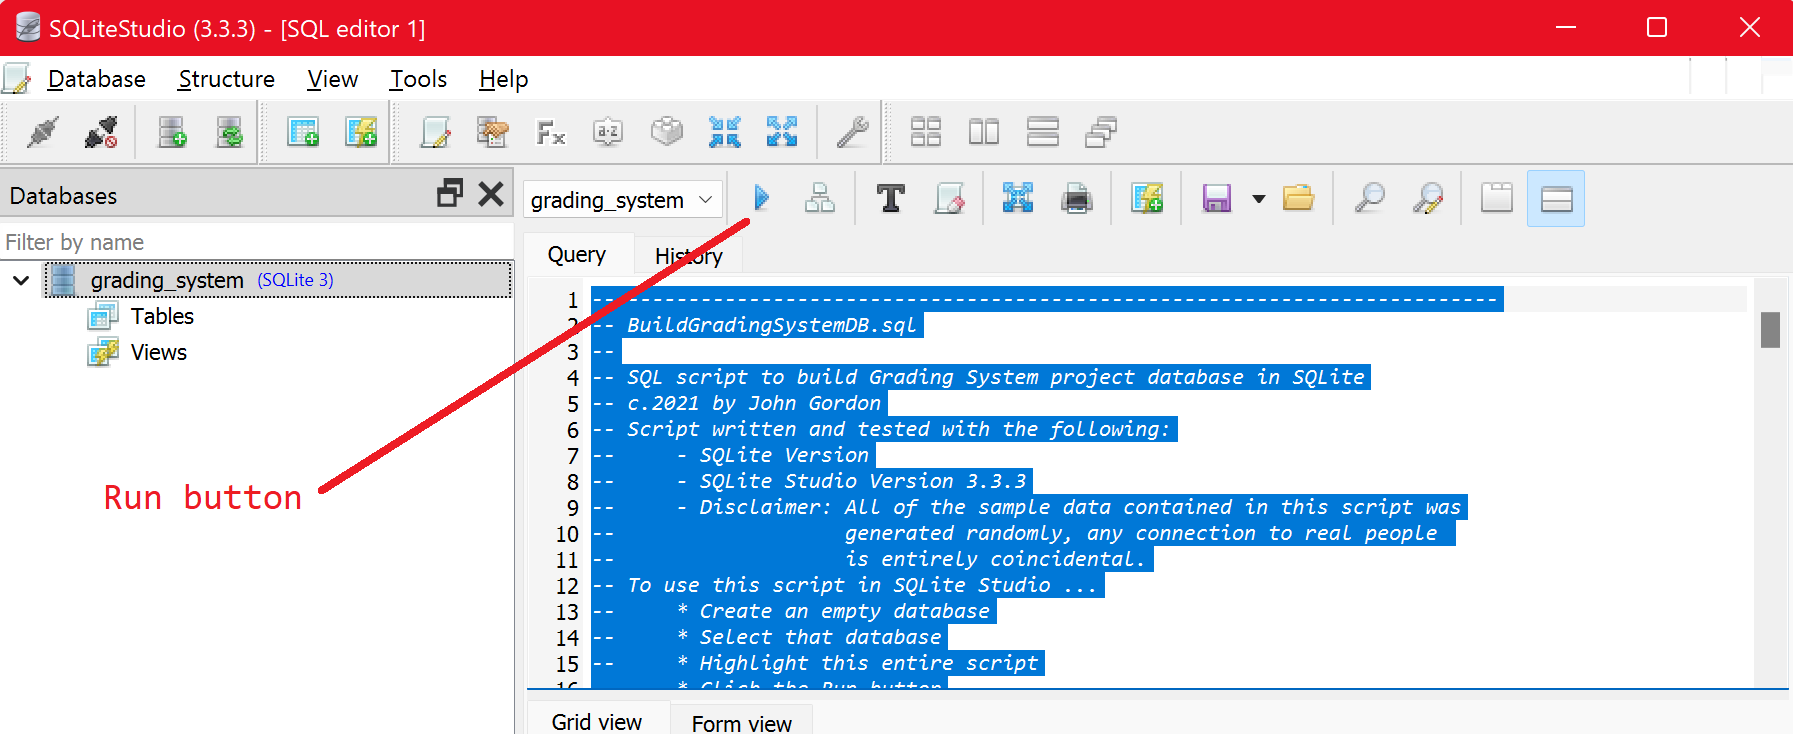
The script file will open in the editor and look like this:
To run the script, first double-click the grading_system database name to select it. Then, select all of the text (Windows & Linux: Ctrl + A, Macintosh: Cmd + A) in the editor window and then click the Run button:
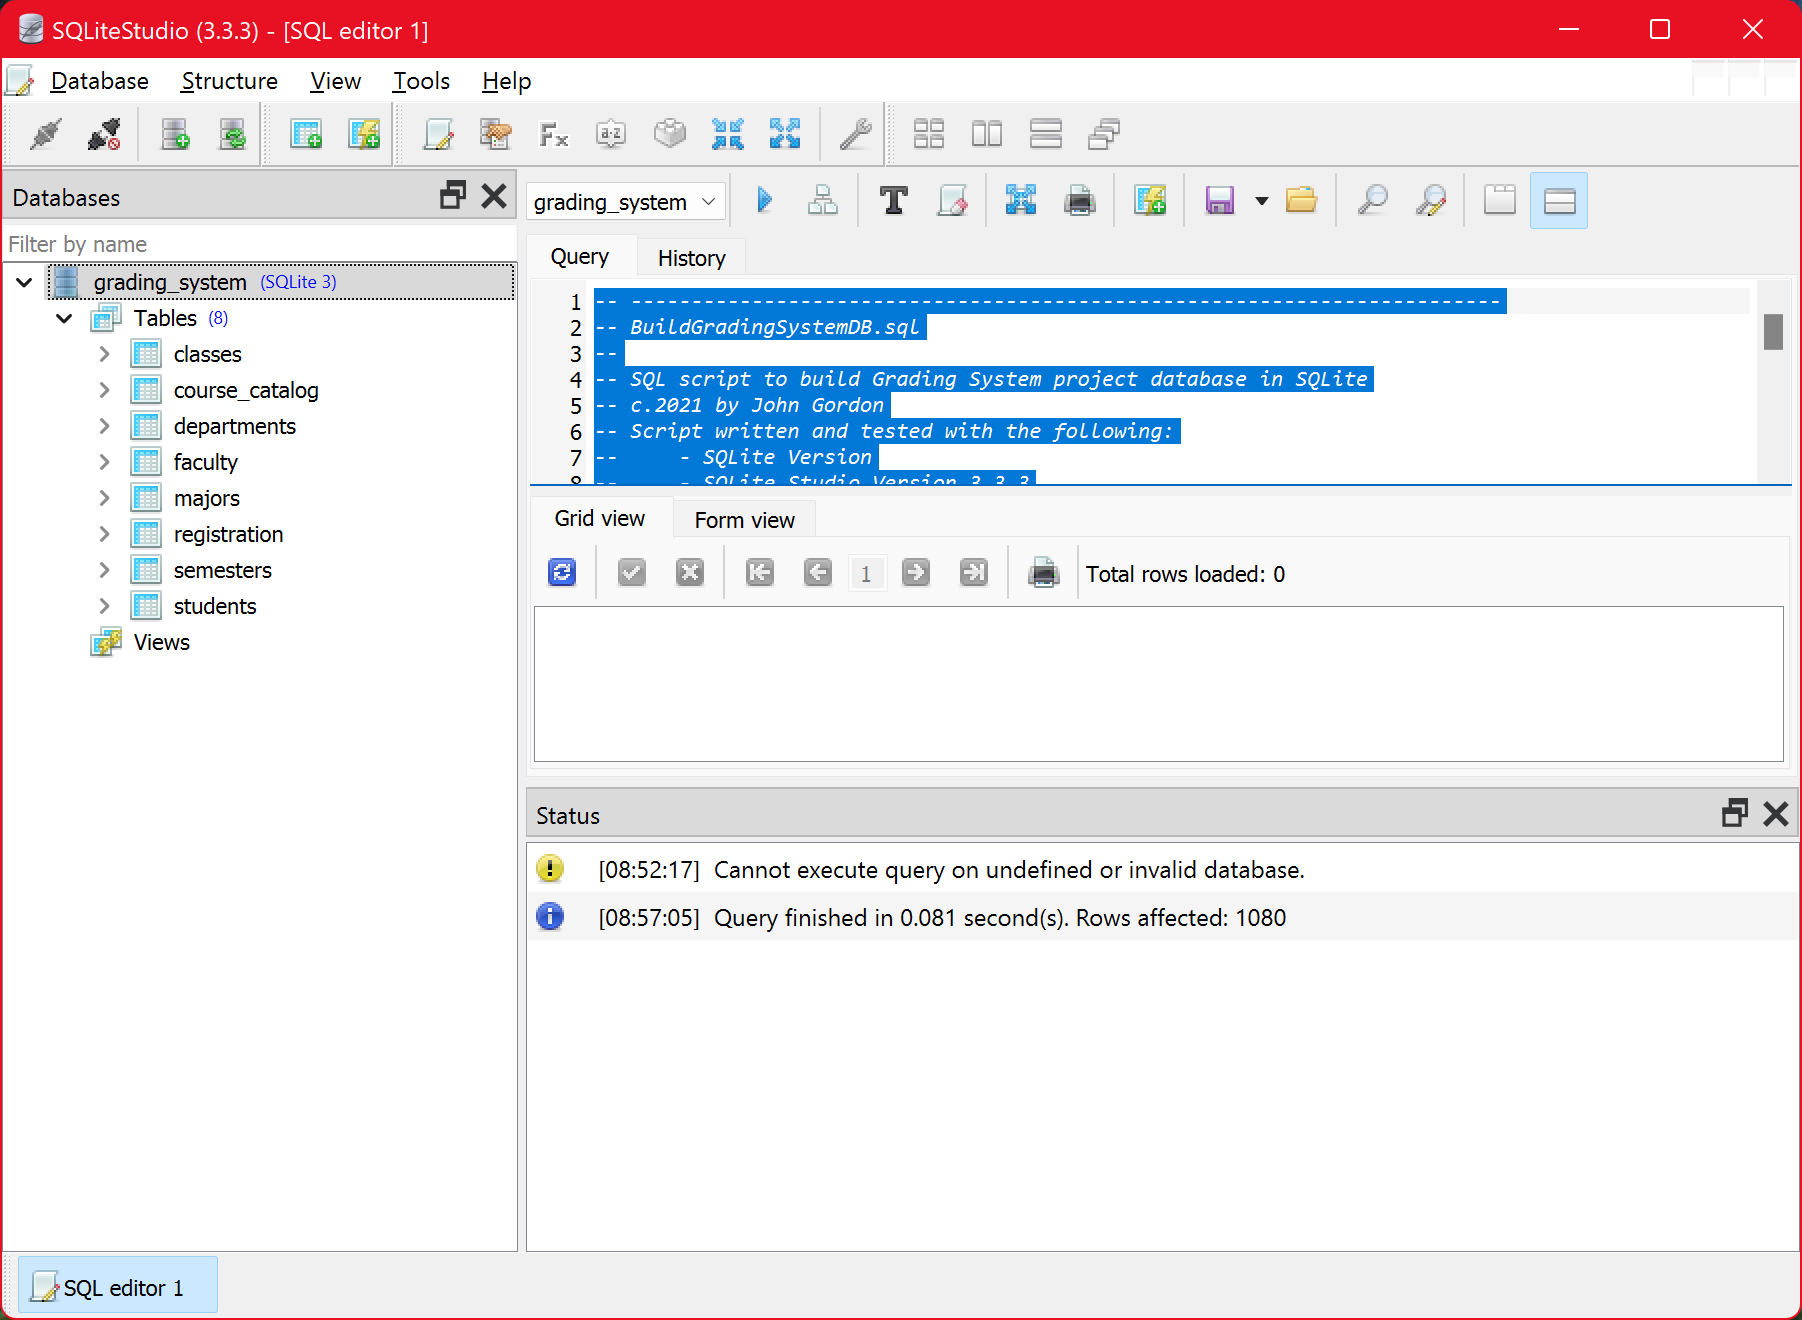
After the script runs we now see that there are tables in the database (you can see these by clicking the > arrow next to Tables under the database name):
Next, let's try a query to confirm that we also have data in the database. To do this, we'll open the DemoQueries.sql script file. To do this, click the Load SQL from file button again and this time select the DemoQueries.sql file and click the Open button:
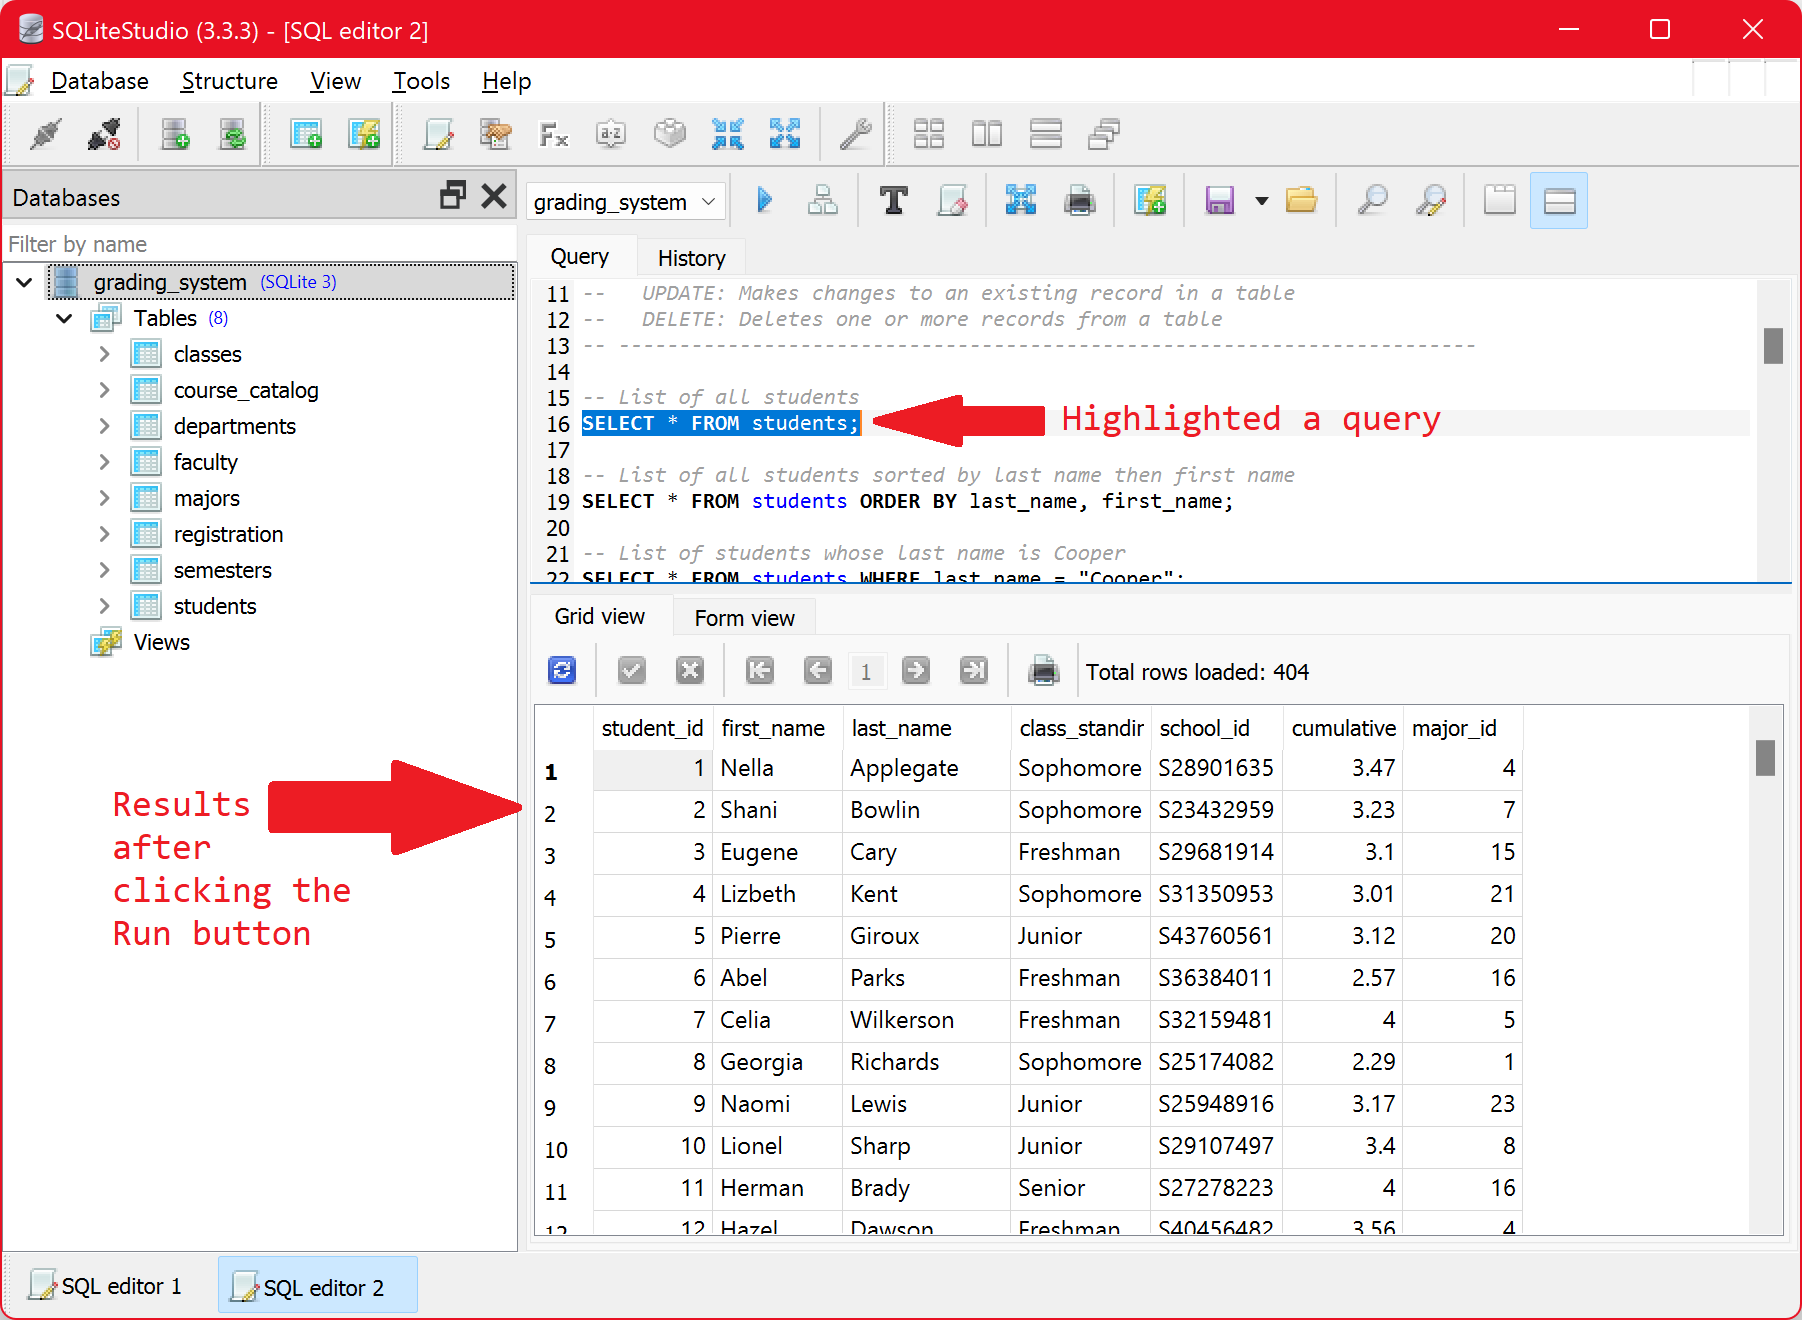
The script will open. If you look through the file there are numerous, separate, segments of SQL code, each starting with SELECT. Each of those are individual queries. To run one, highlight a query (which starts with SELECT and ends with a semi-colon ; character), and then click the Run button.
For example, in the following screen capture I highlighted the SELECT * FROM students; query and clicked the Run button:
The results of the query is called our result set. Getting a result set here indicates that our build script worked and we have data in the database.
For now, that completes the set up of SQLite and the sample database. We will continue to use the grading_system database in the sections that follow.


 for detailed installation instructions.