


Table of Contents » Appendices : PyCharm
Appendix
PyCharm is an Integrated Development Environment (IDE) developed by a company called JetBrains. It is designed to specifically support Python development. While PyCharm is more complex than a simple text editor, the time investment in learning PyCharm while learning Python will be well worth it. JetBrains provides different editions of PyCharm, Professional (fee-based) and Community (free open-source version). Also, PyCharm is available for Windows, Macintosh and Linux operating systems.
Choose your operating system  for detailed installation instructions.
The following instructions were written using Windows 10. If you have a previous version of Windows these instructions should still work, however there may be some differences.
InstructionsNote: You can click on the screenshots to enlarge them.
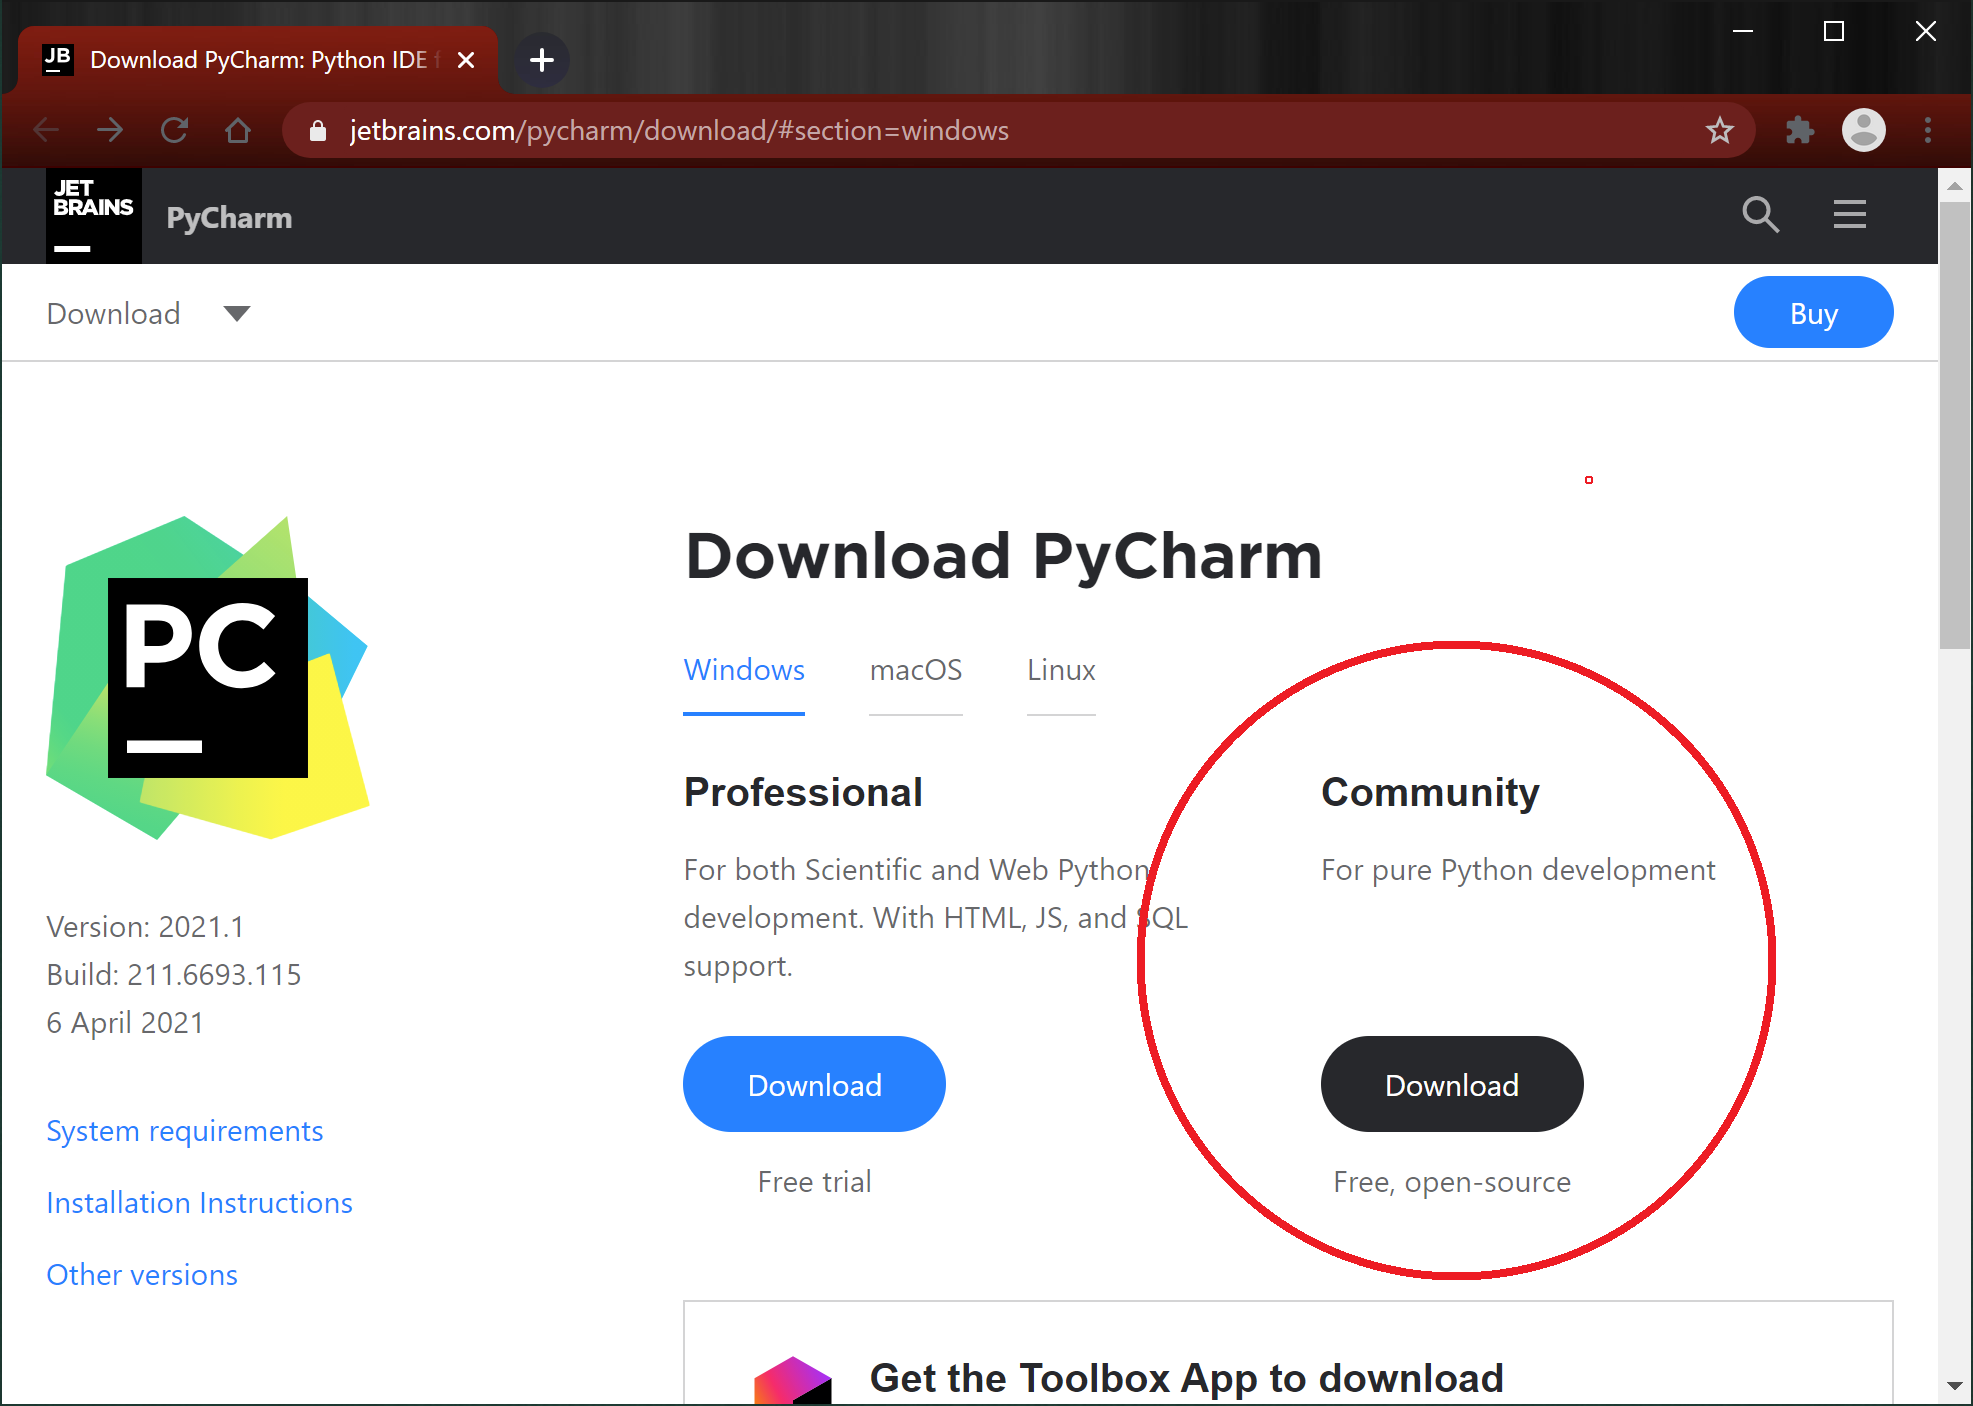
1. Go to the PyCharm downloads page here.
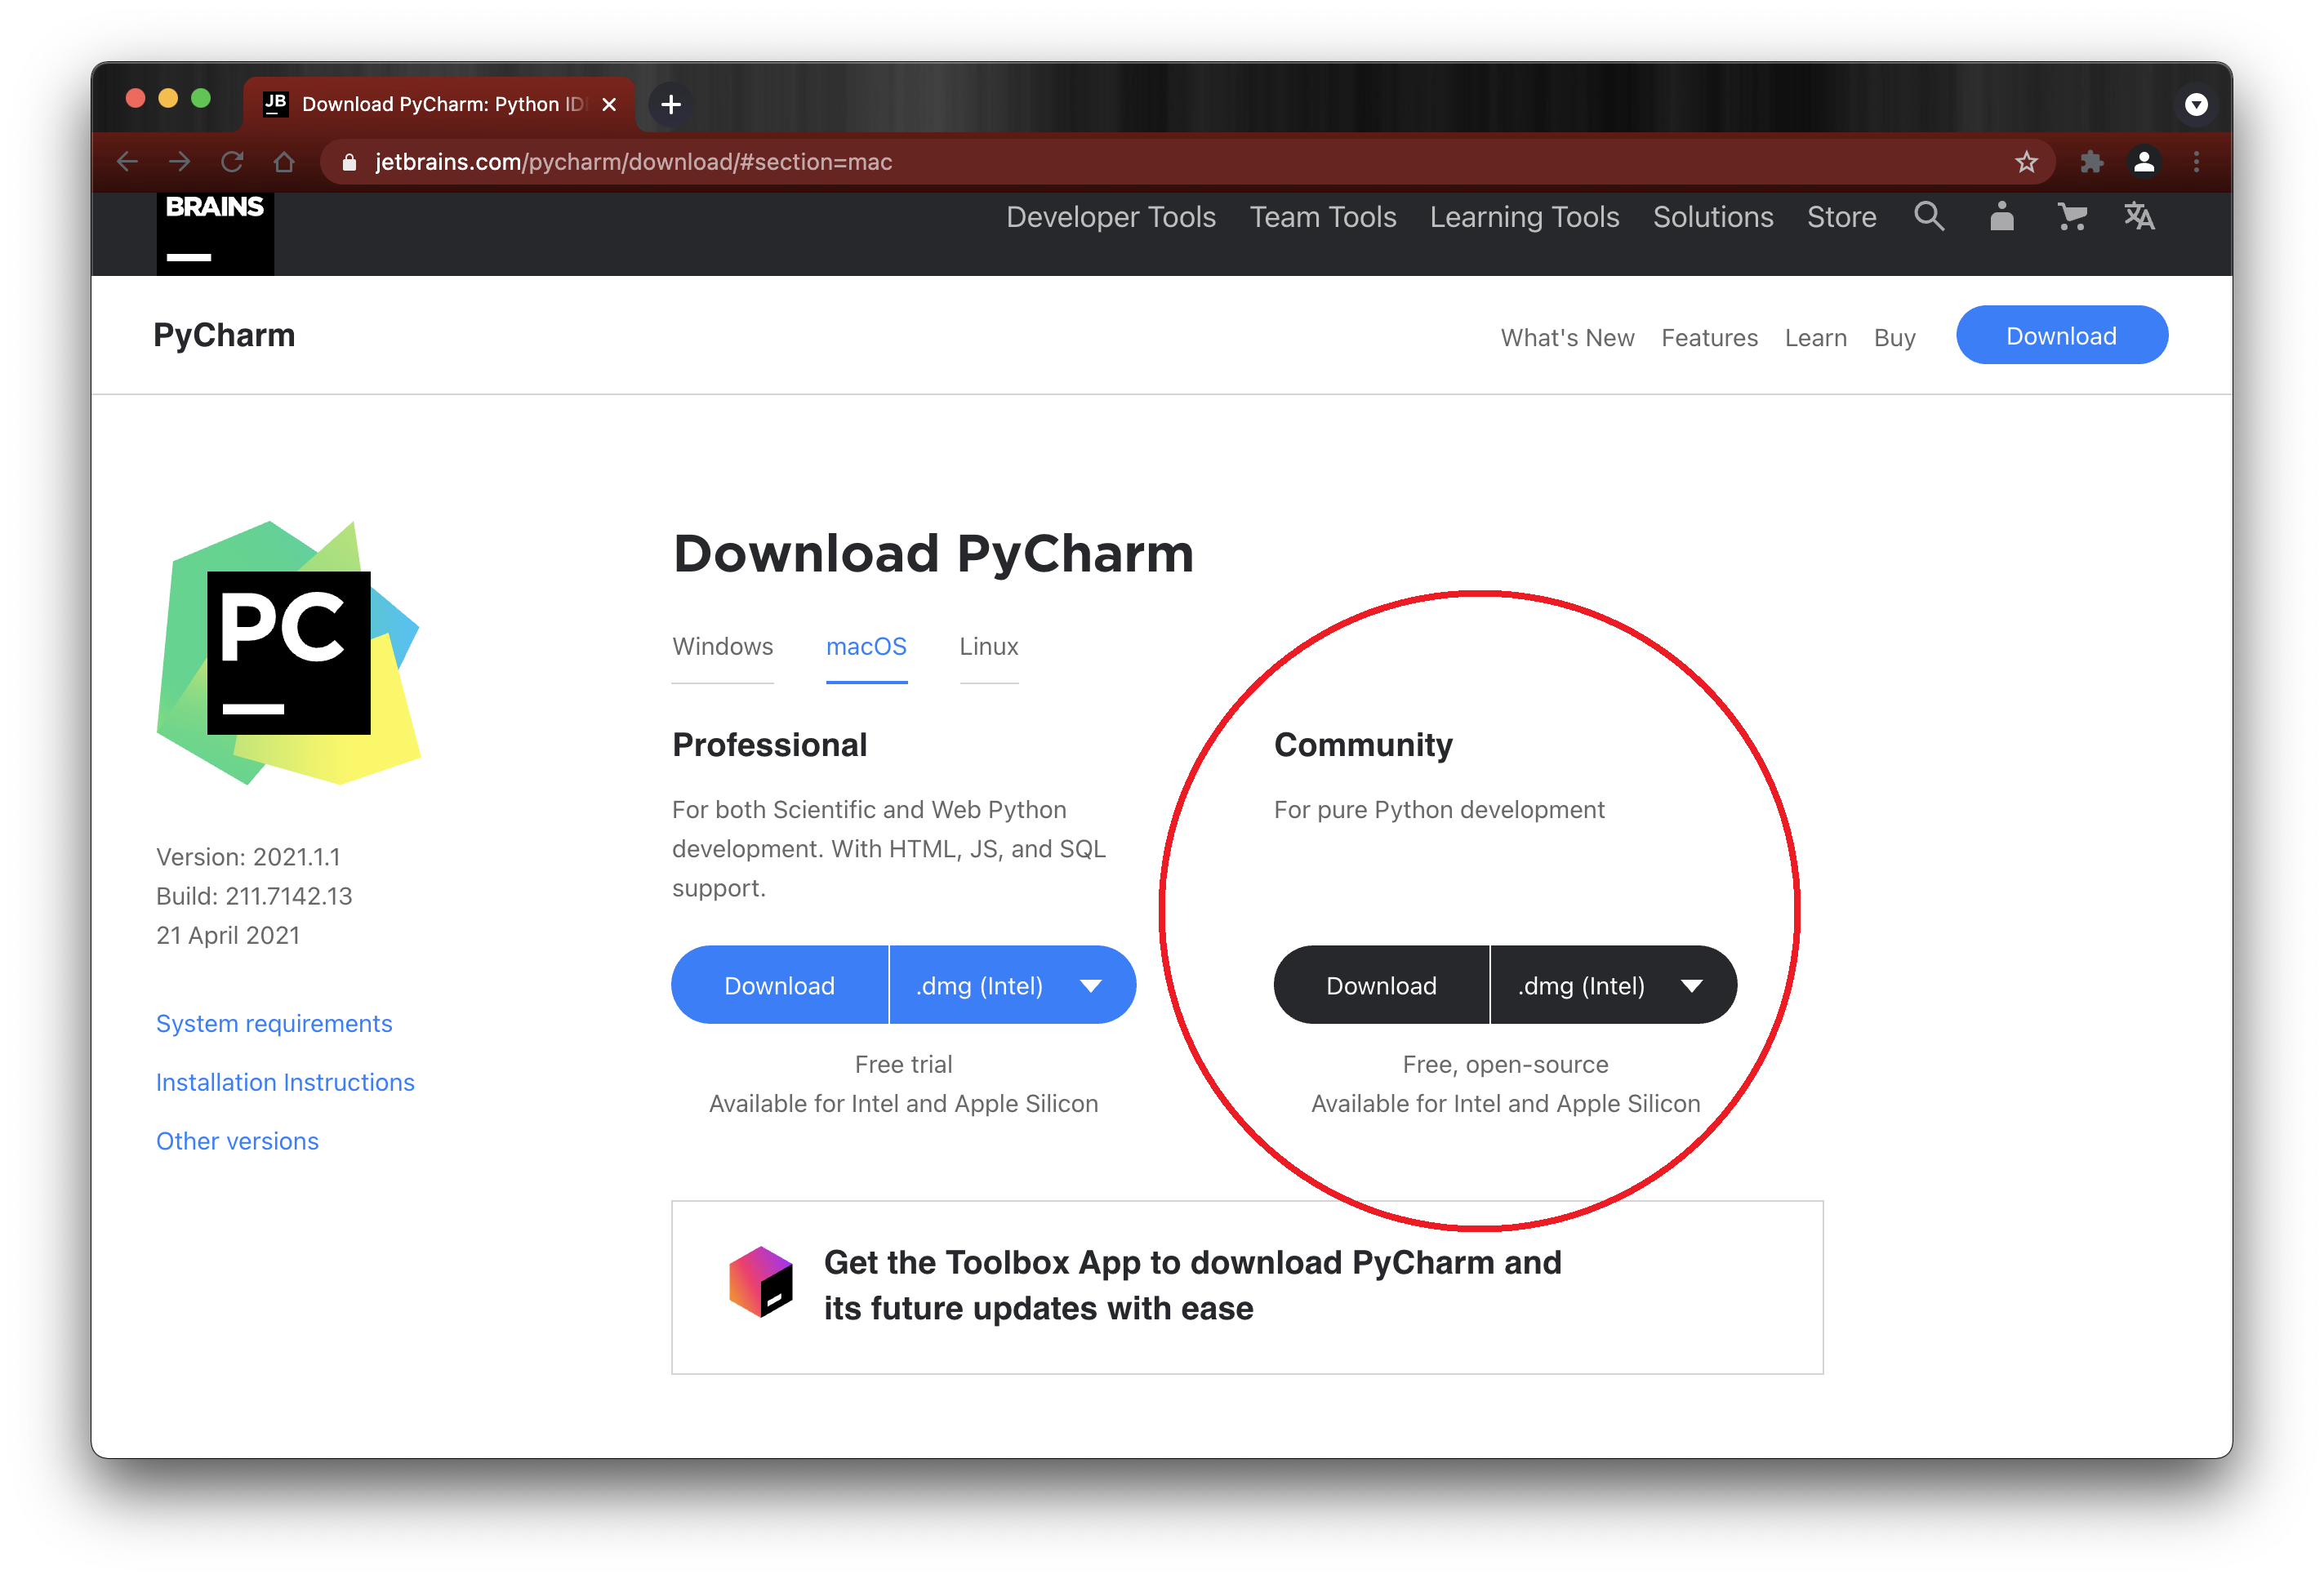
2. Download the Community Edition (not Professional)*.
3. Double-click the .exe installer (it should be in your Downloads folder).
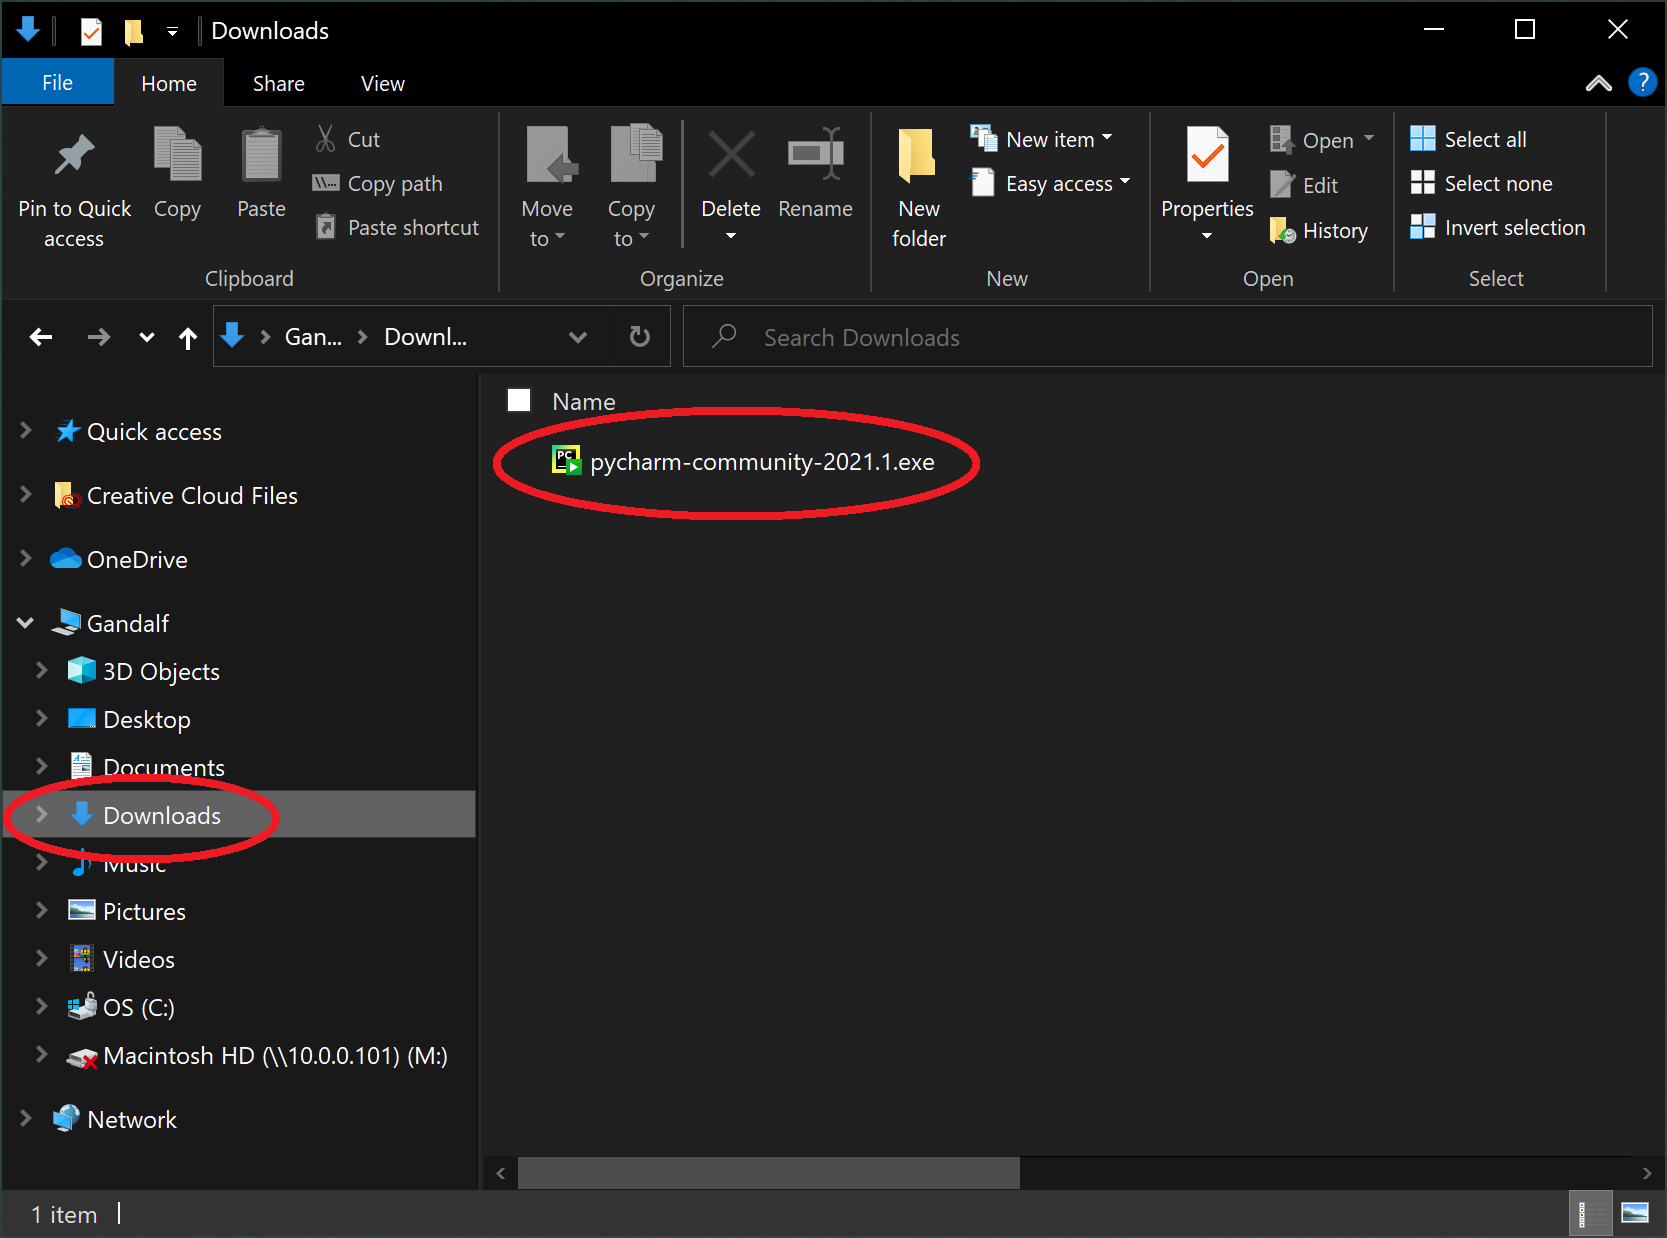
Note: The downloaded file name may be different for you.
4. When the installer opens click Next >
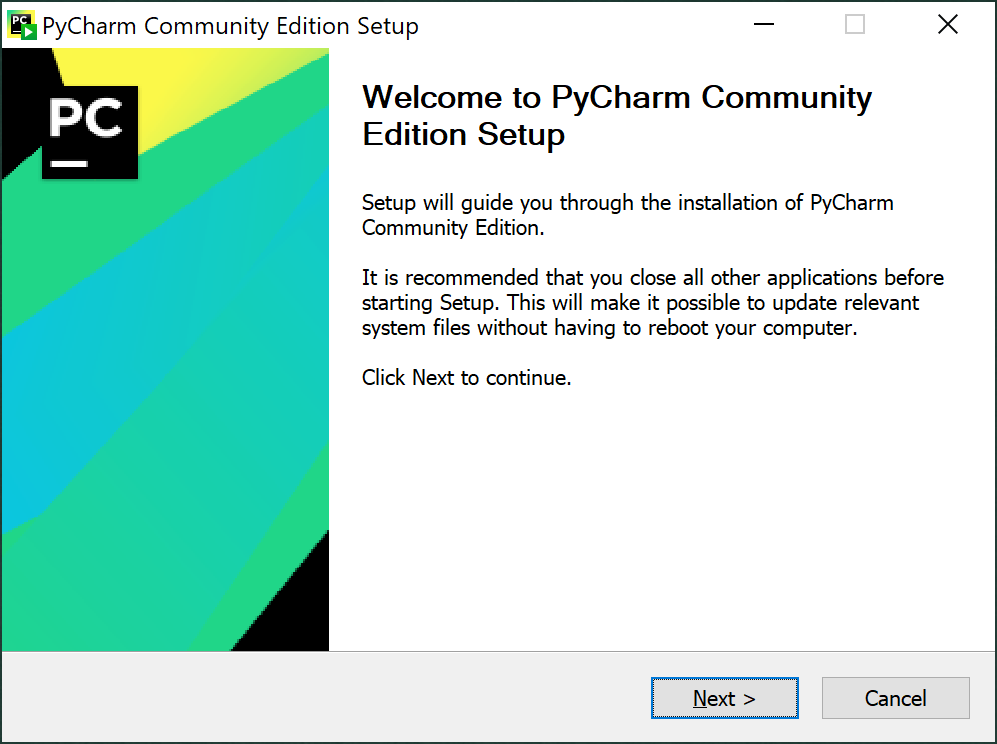
Note: The downloaded file name may be different for you.
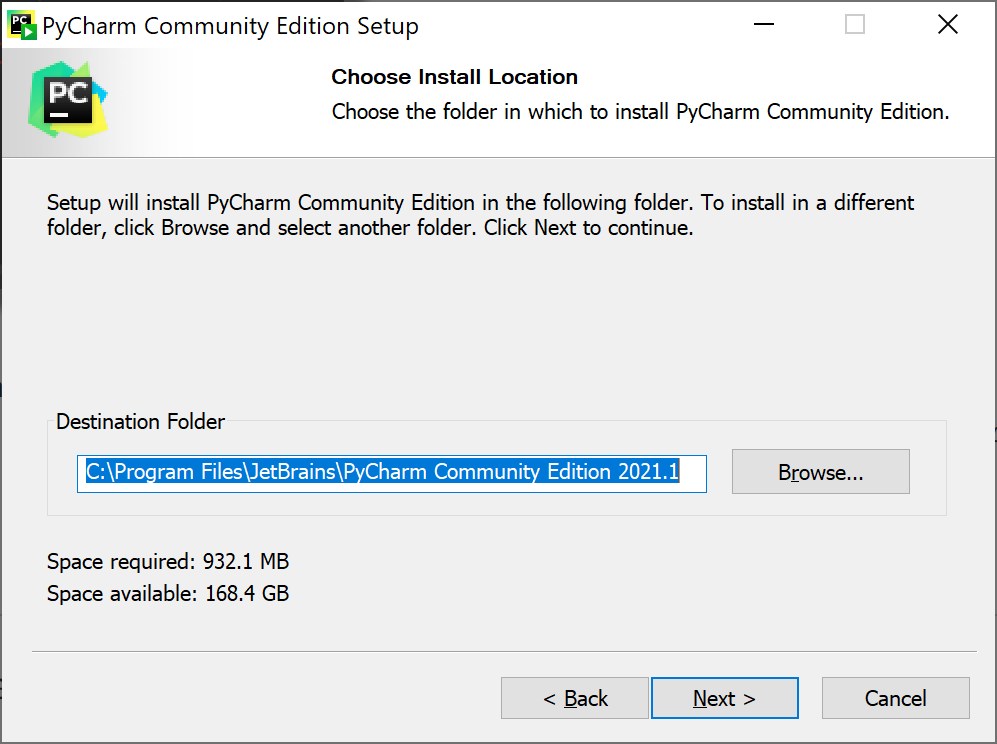
5. Click Next > to accept the Destination Folder where PyCharm will be installed. You can change the install location, however I recommend accepting its default.
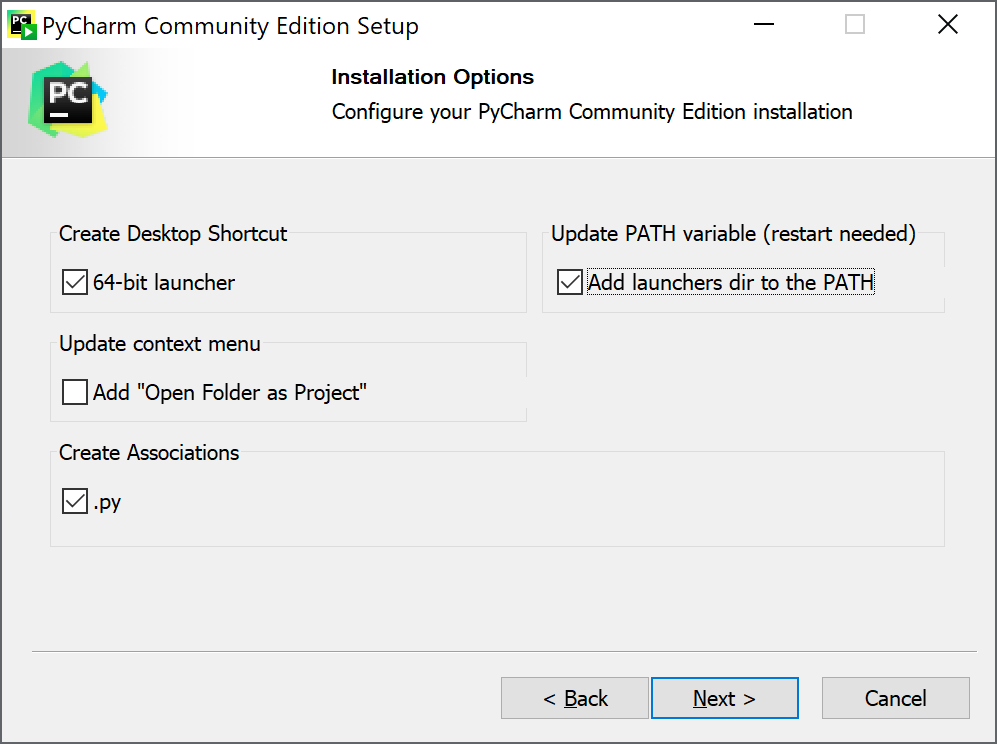
6. On the Installation Options screen you can choose from several options. In this example, I selected 64-bit launcher, .py associations and Add launchers dir to the PATH. When you have made your choices, click Next >
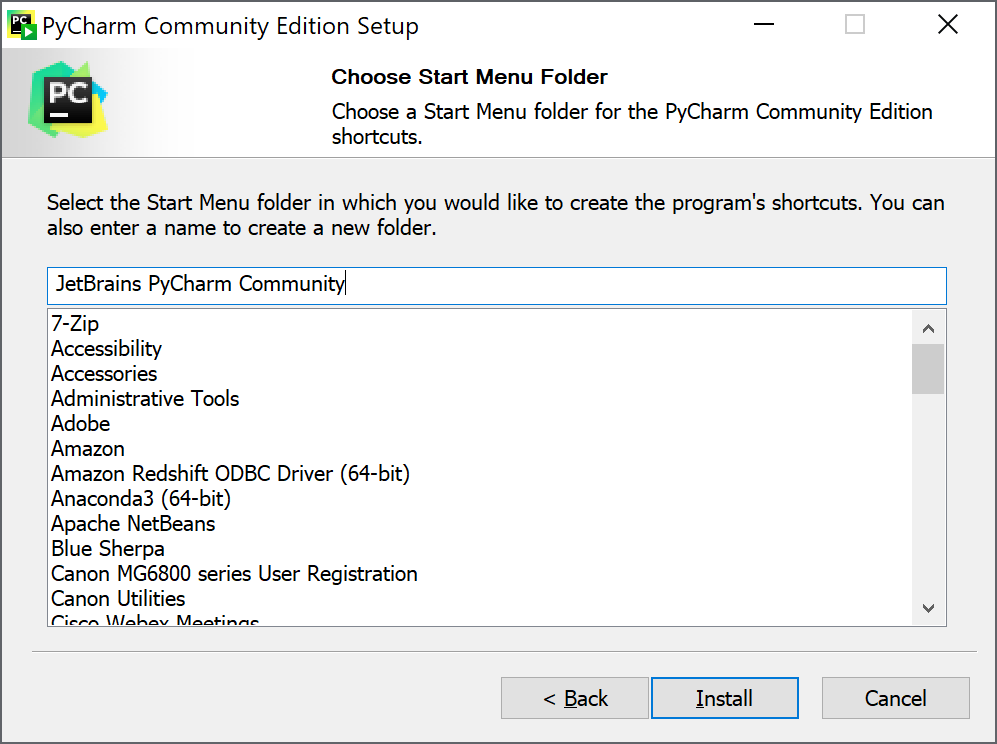
7. On the Choose Start Menu Folder screen you can set where PyCharm will appear in your Start menu, then click Install. The installation will begin.
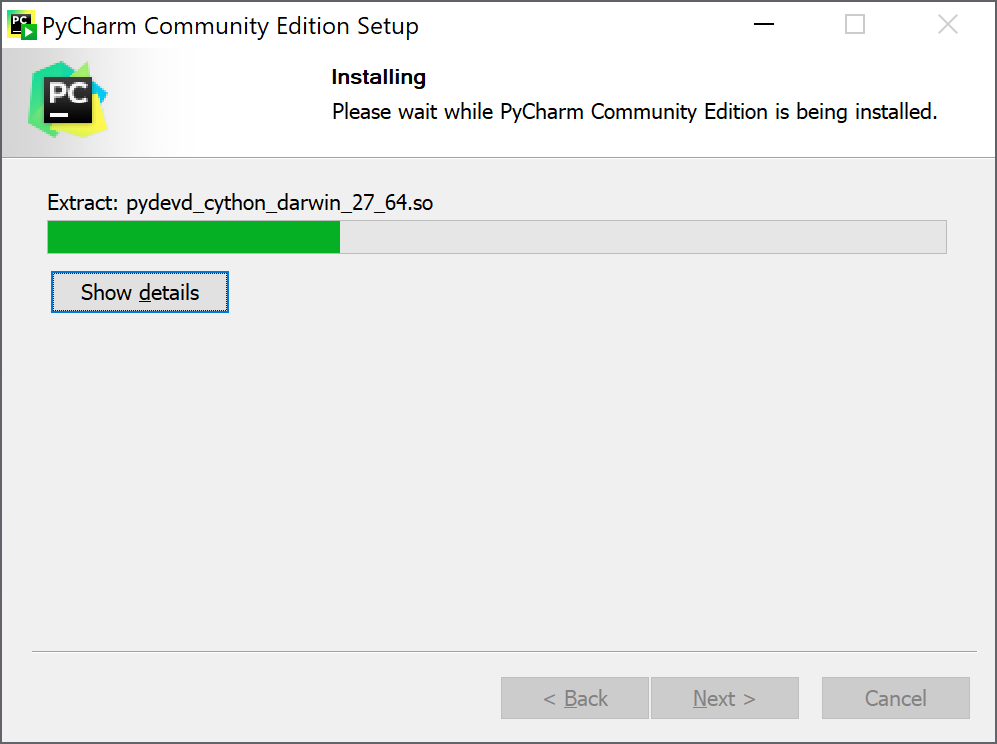
8. The installation progress will display and when installation finishes click Next >
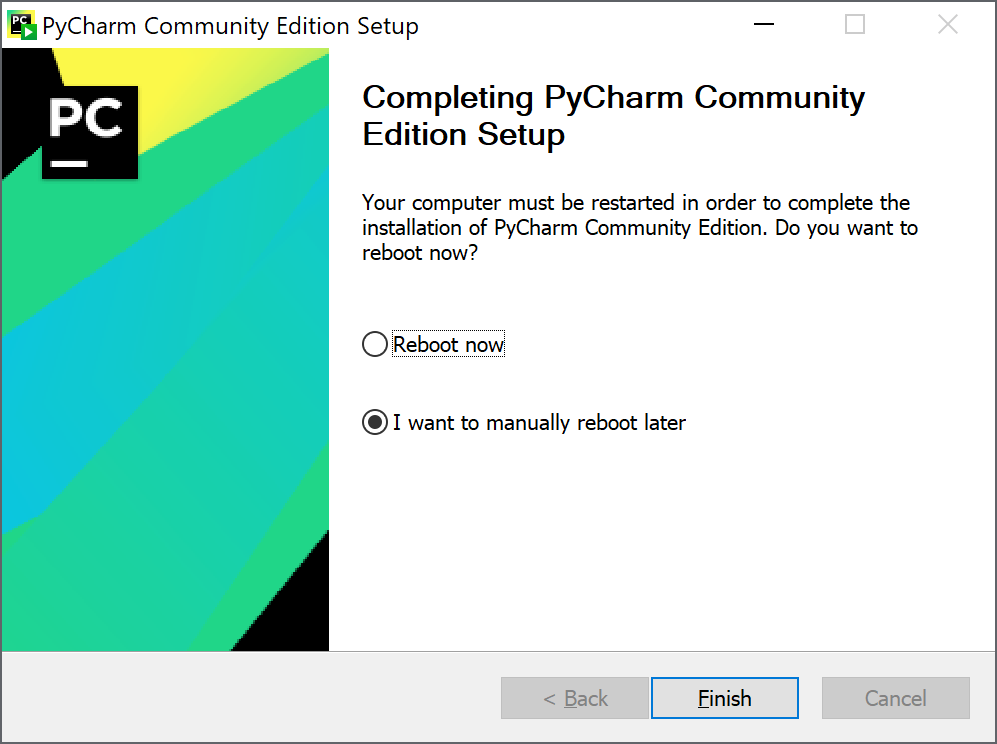
9. If you need to reboot your computer it will prompt you to reboot immediately or later, then click Finish >
10. When you are finished, continue with Step 2: Running & Setting Up PyCharm below.
The following instructions were written using Macintosh Big Sur. If you have a different version of iOS these instructions should still work, however there may be some differences.
InstructionsNote: You can click on the screenshots to enlarge them.
1. Go to the PyCharm downloads page here.
2. Download the Community Edition (not Professional)*.
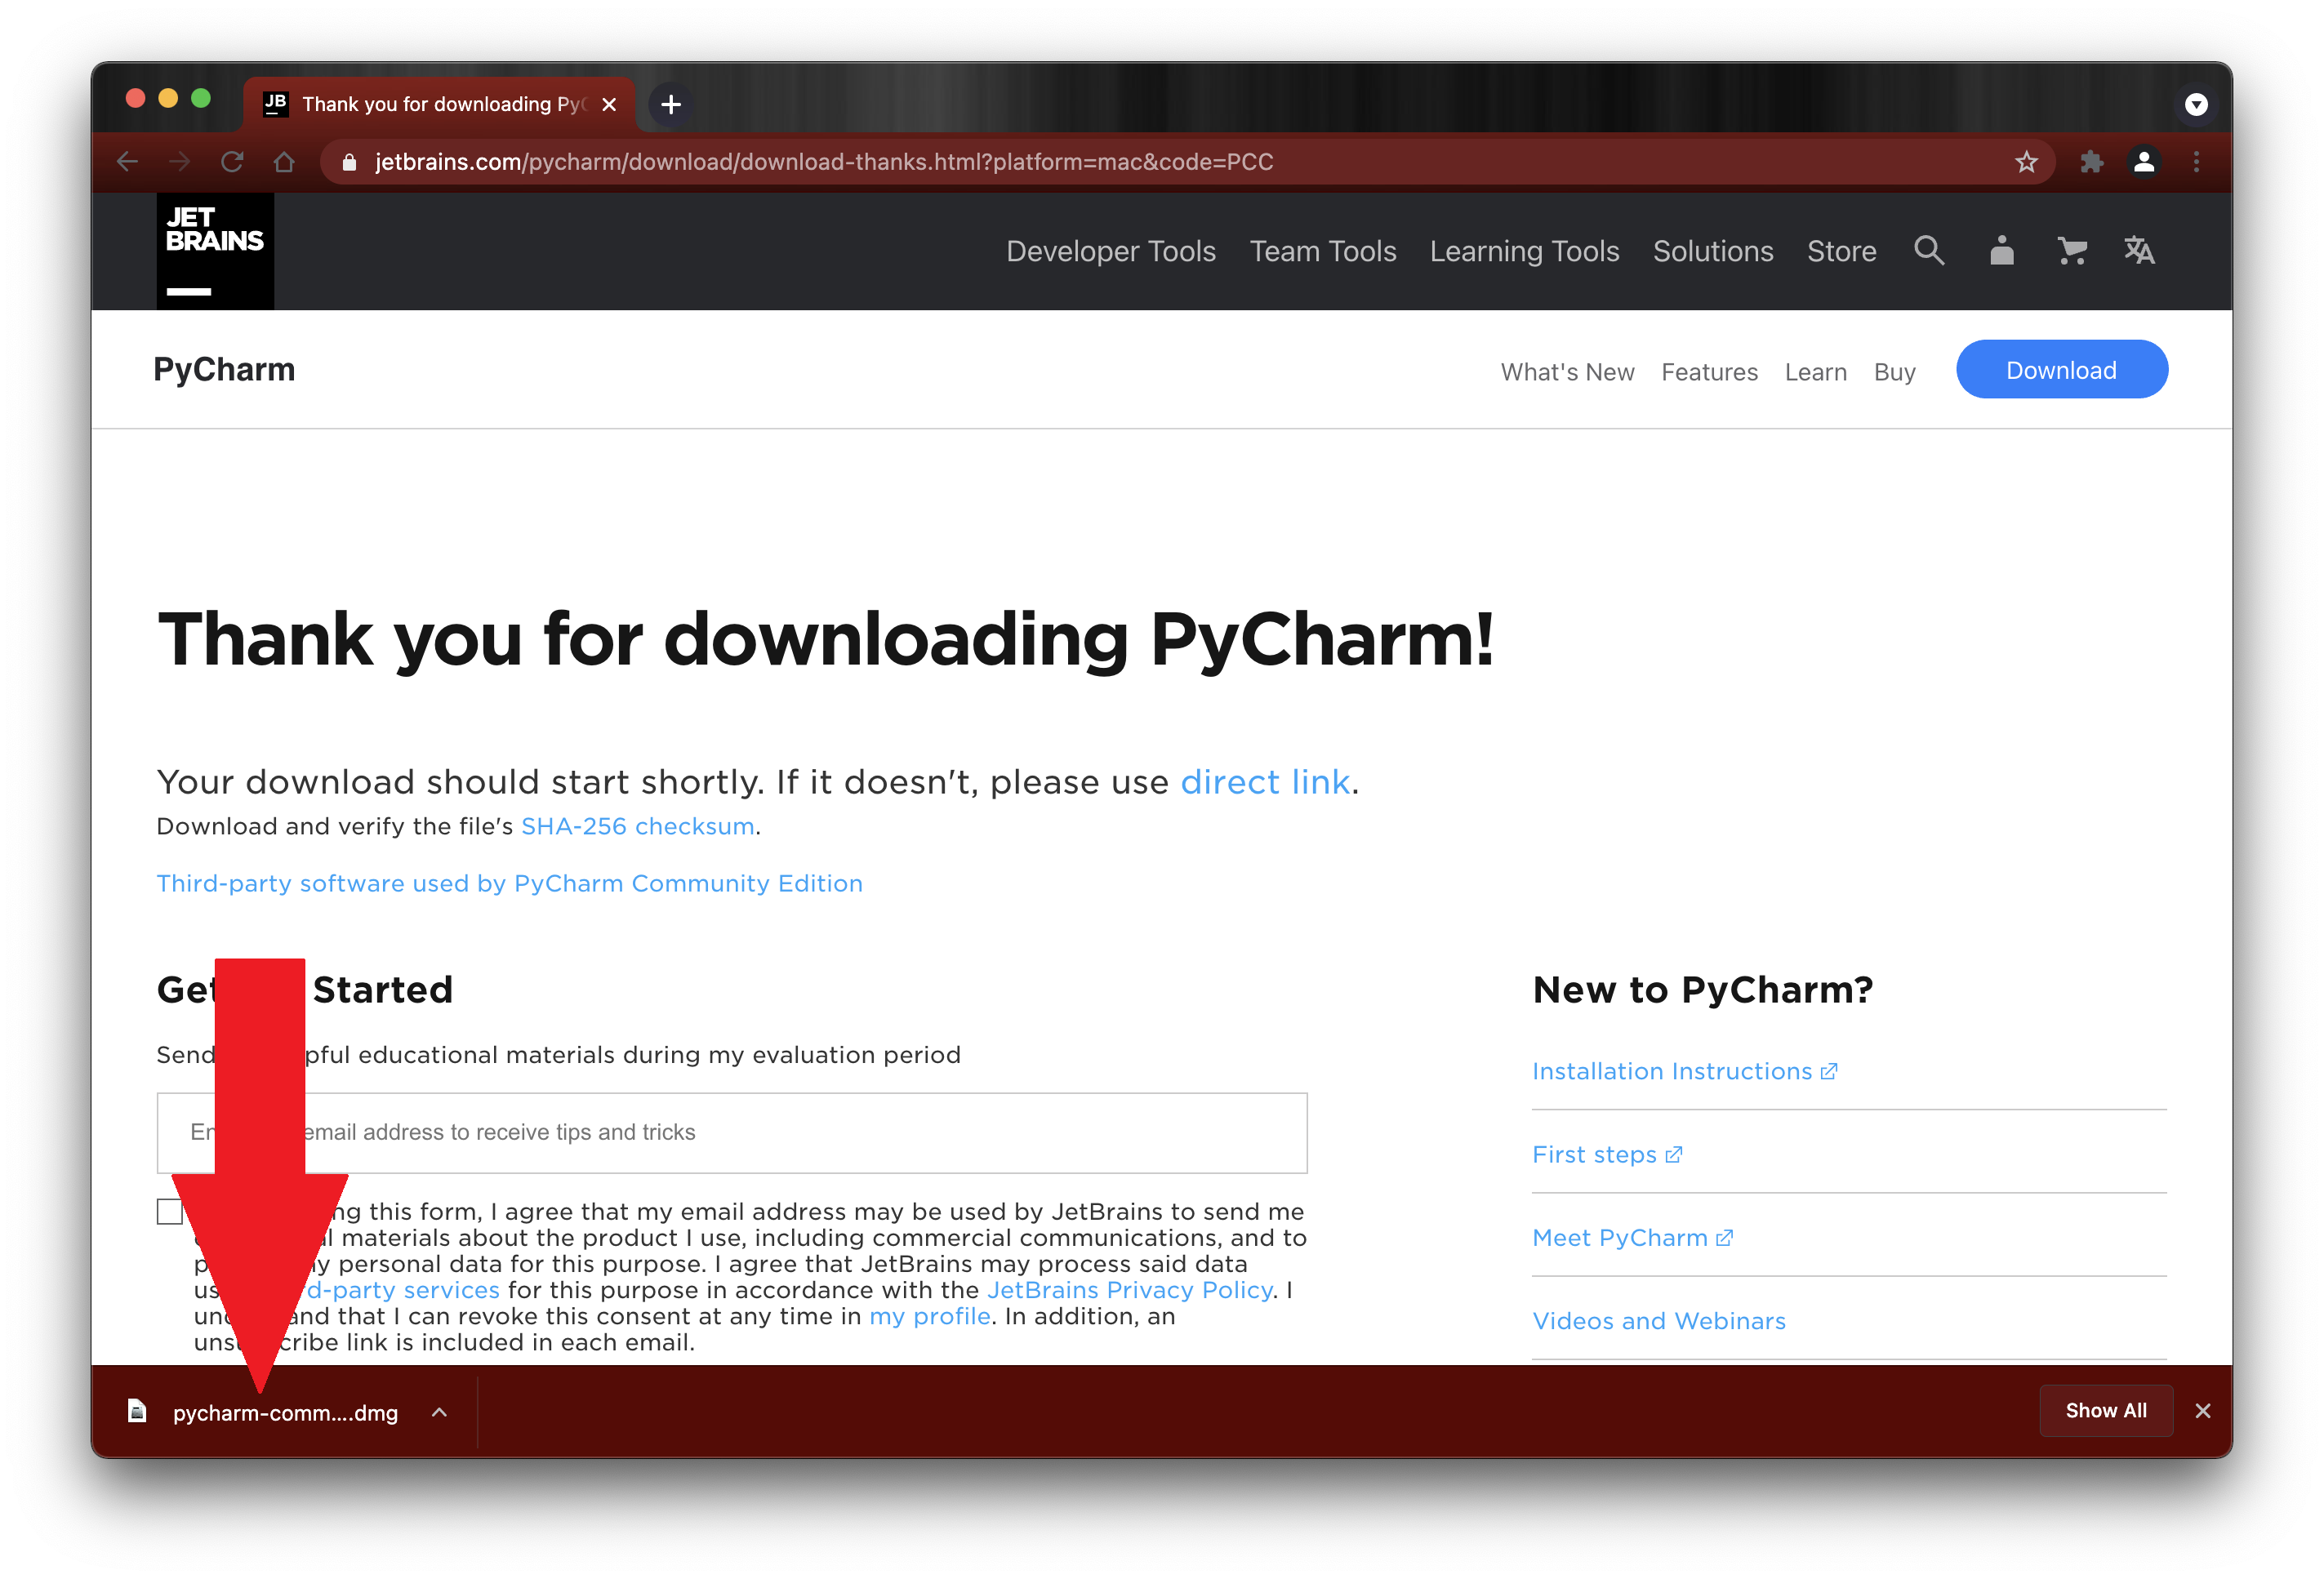
3. Click the Download button under the Community Edition. The download will take a few minutes. When it is finished you'll see the PyCharm thank you screen and the downloaded install file (.dmg) will appear as a button at the bottom-left of your browser window (see red arrow in screen capture below). If you are not using the Chrome browser, or don't see the button, check your Downloads folder for the .dmg install file.
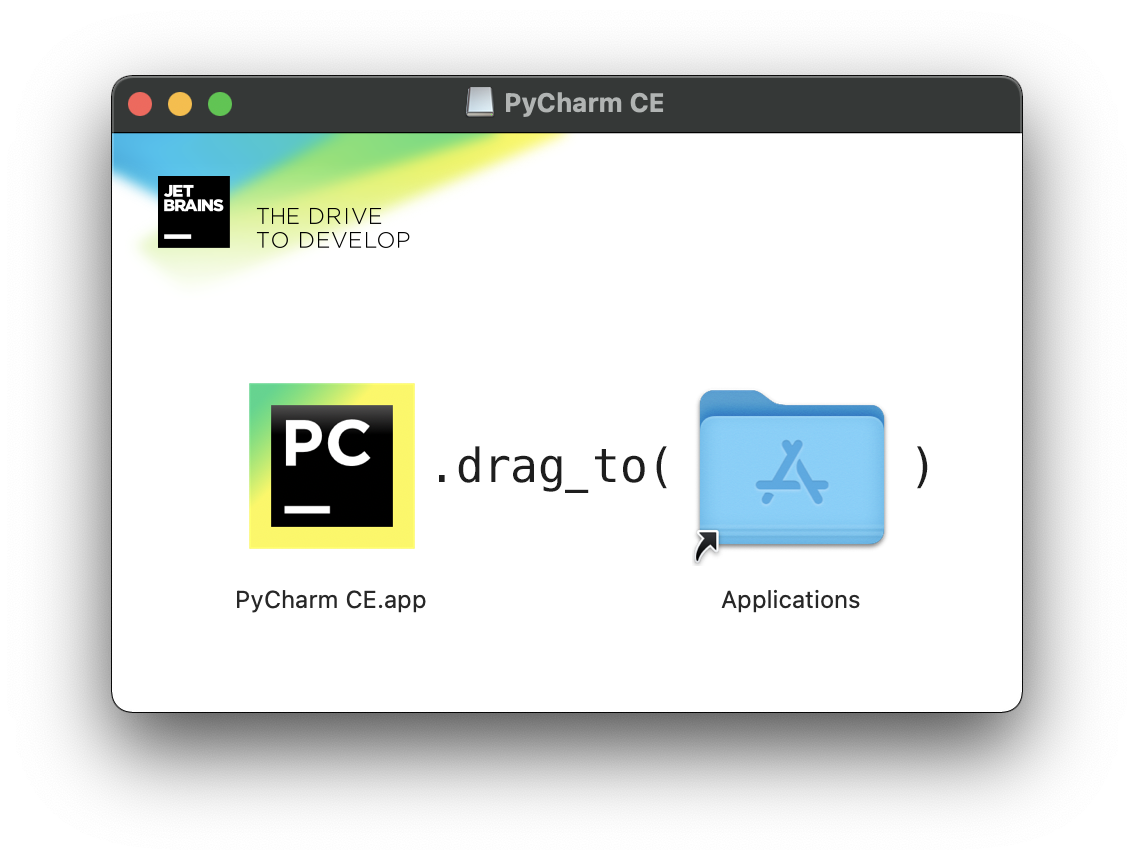
4. Next, the PyCharm CE Drag to Applications window will open. Drag the PC logo PyCharm CE.app to the Applications folder icon.
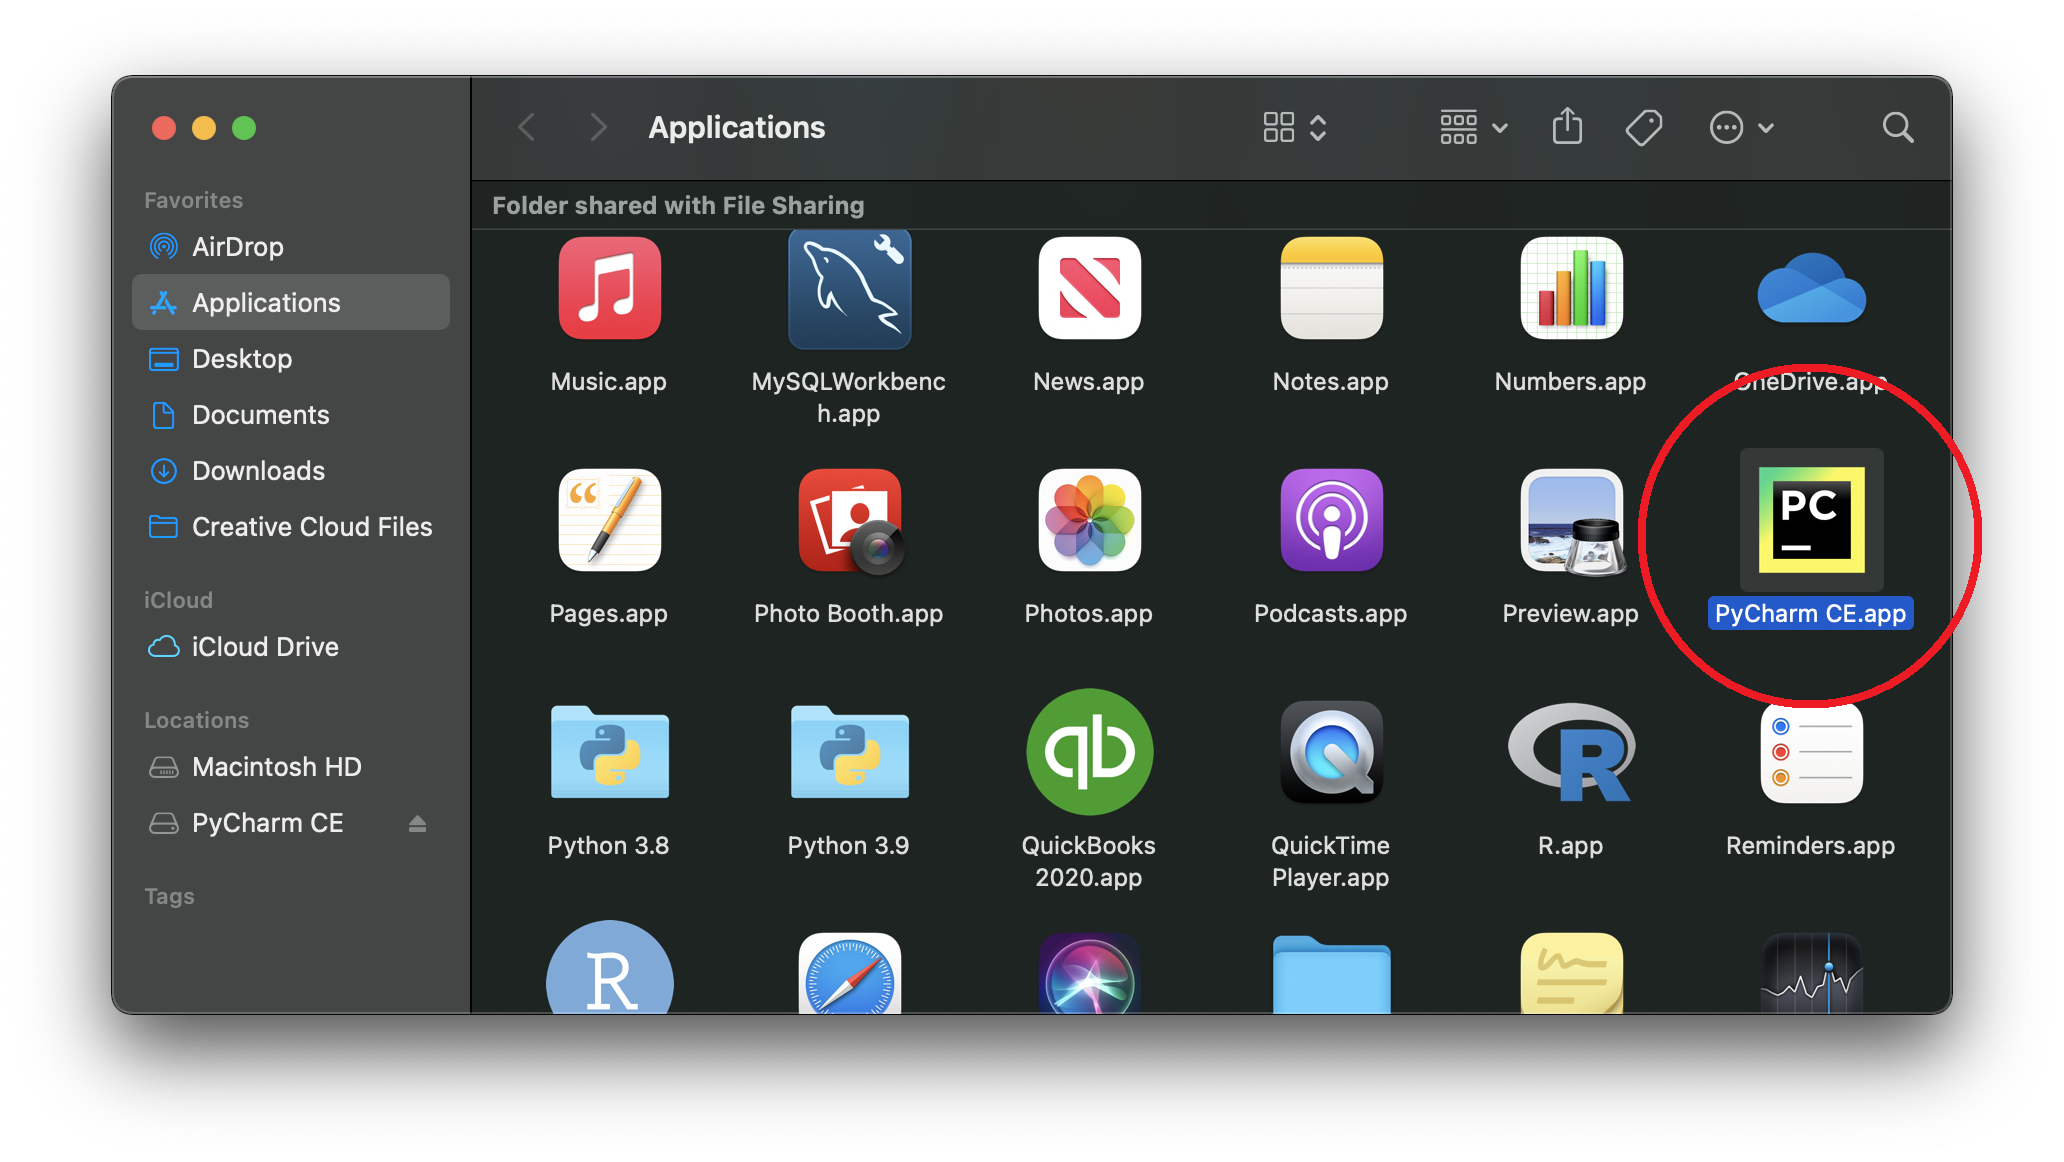
5. Next, Open your Applications folder and locate the PyCharm CE.app and double-click it to open PyCharm to confirm the installation worked.
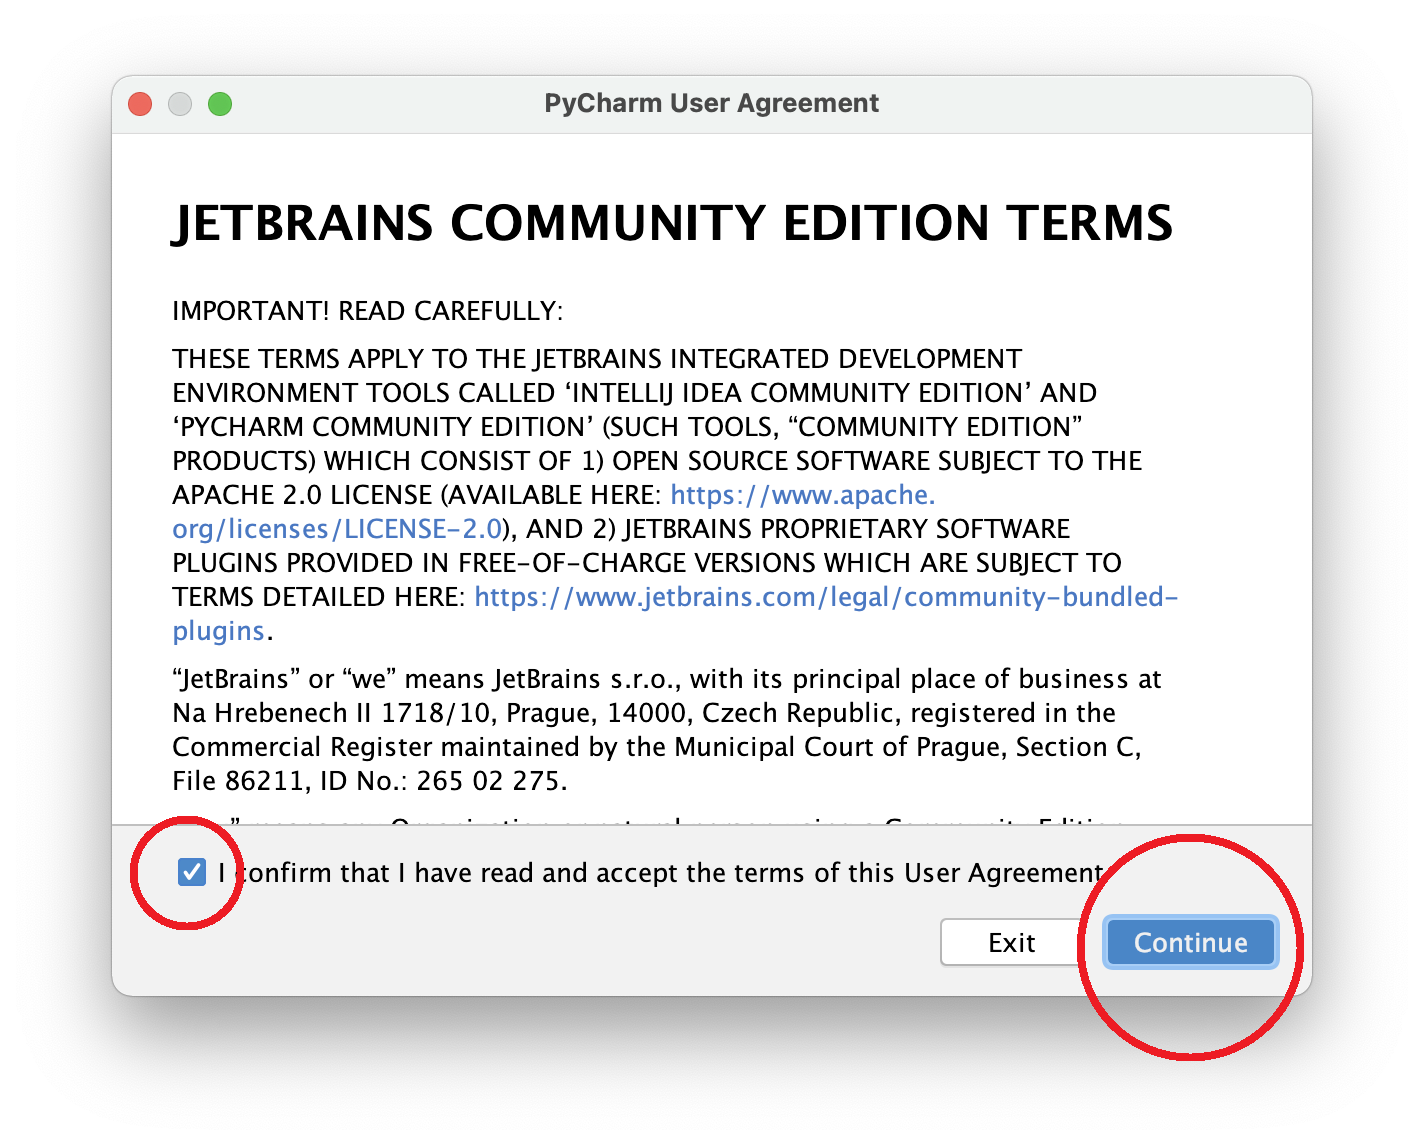
6. When the Terms & Conditions screen appears, click the Confirm checkbox and then click Continue.
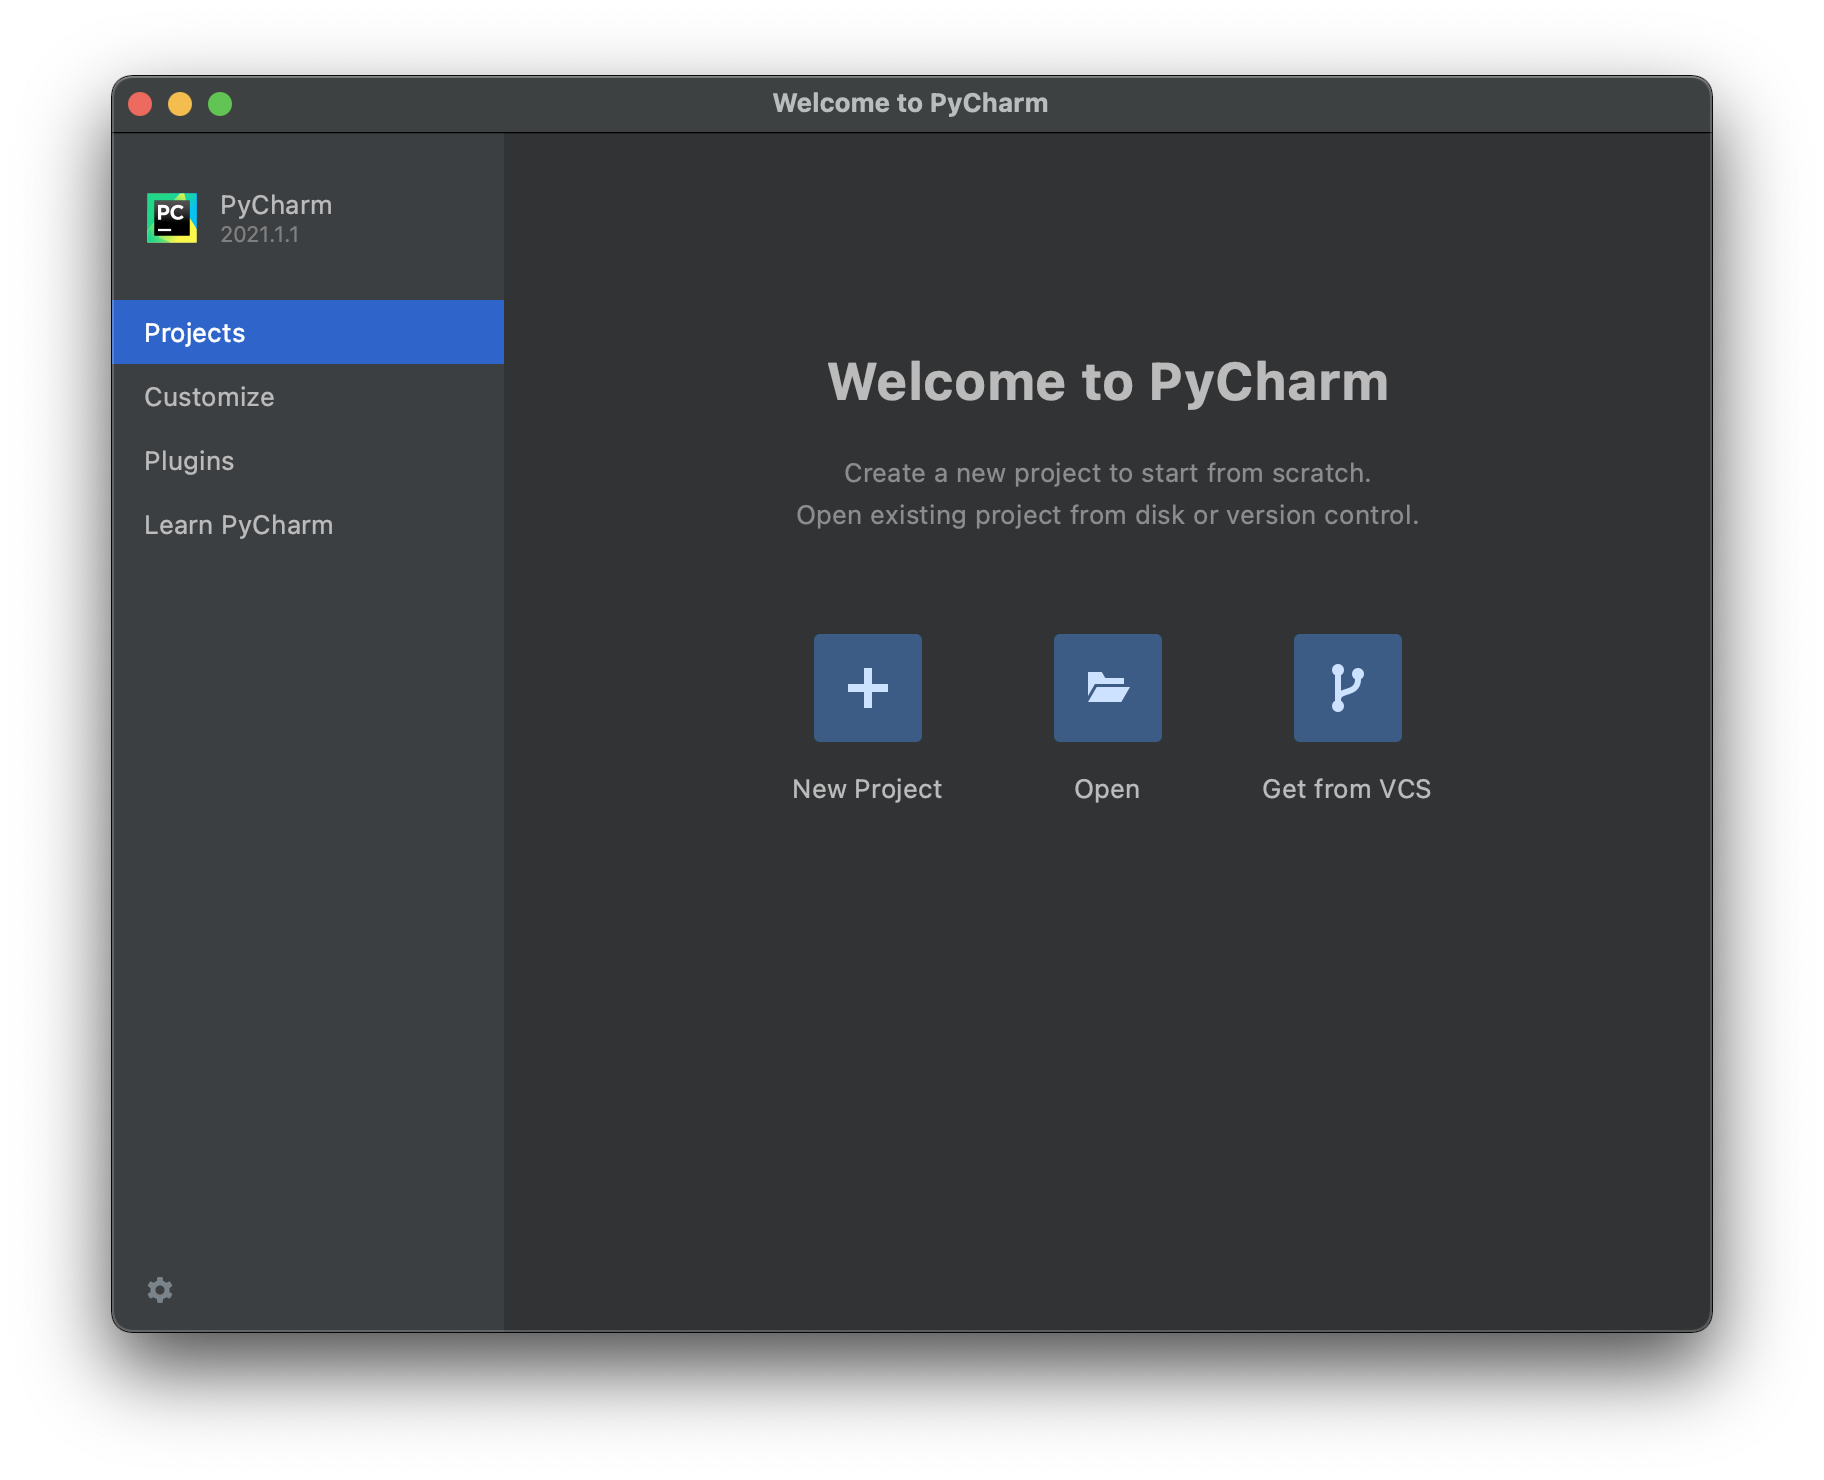
7. PyCharm will open to the initial screen.
8. When you are finished, continue with Step 2: Running & Setting Up PyCharm below.
The following instructions were written using Linux Mint. If you have a different Linux distribution and/or version of Linux these instructions should still work, however there may be some differences.
InstructionsNote: You can click on the screenshots to enlarge them.
1. Go to the PyCharm downloads page here.
2. Download the Community Edition (not Professional)*.

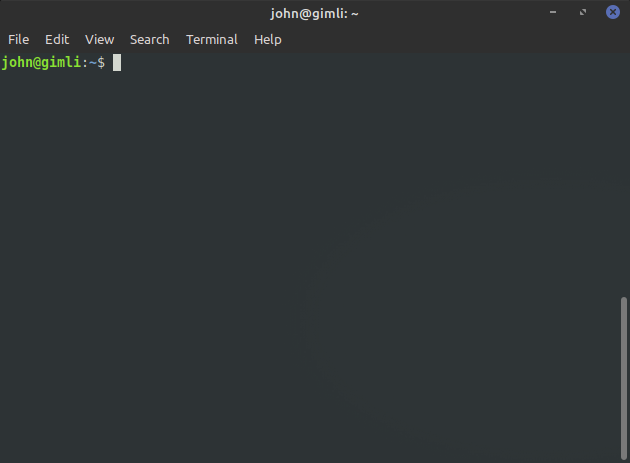
3. Open a Terminal window.
Using the keyboard press Ctrl+Alt+T, or use the GUI menu and locate Adminstration > Terminal, or right-click the desktop and select Open Terminal.
4. Enter the command:
cd Downloads
5. Now Enter:
ls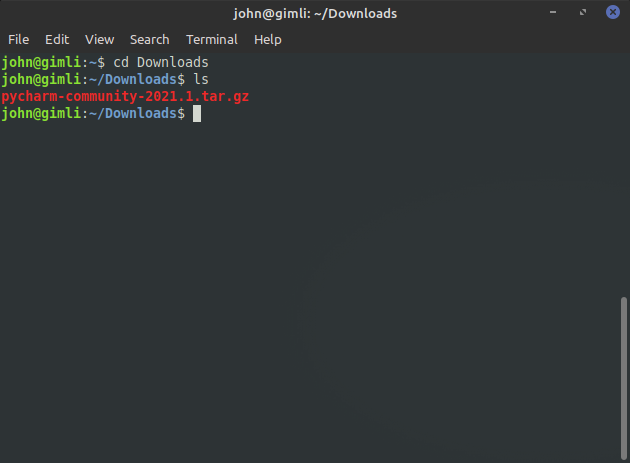
Note: The downloaded file name may be different for you.
You should now see the downloaded file. In this example, the file name pycharm-community-2021.1.tar.gz. Your downloaded file name may be a bit different due to changes in the version number (2021.1) or other factors. Next we'll create a directory where our PyCharm software will be stored.
Enter the following command:
mkdir PyCharm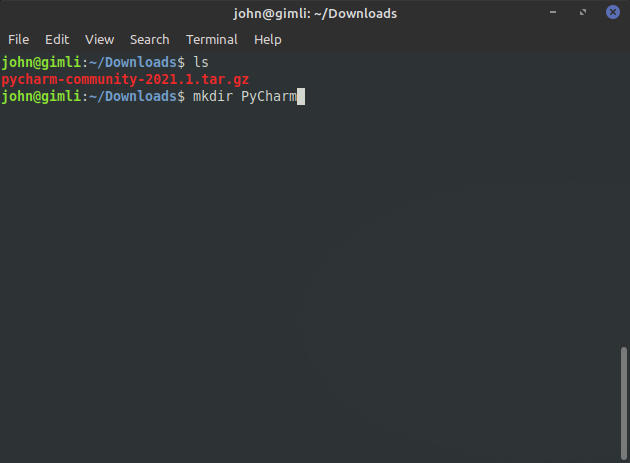
To confirm the new directory was created, enter the ls command again:
ls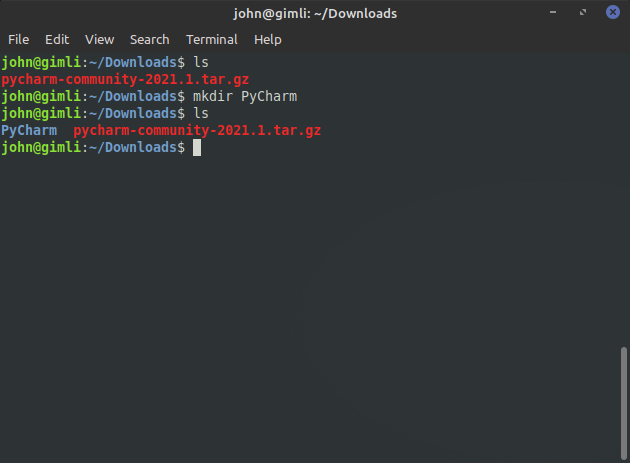
Now we can see the PyCharm directory, next we will extract the PyCharm files from our download file.
Enter the following command:
tar xzf pycharm.-*.tar.gz -C PyCharm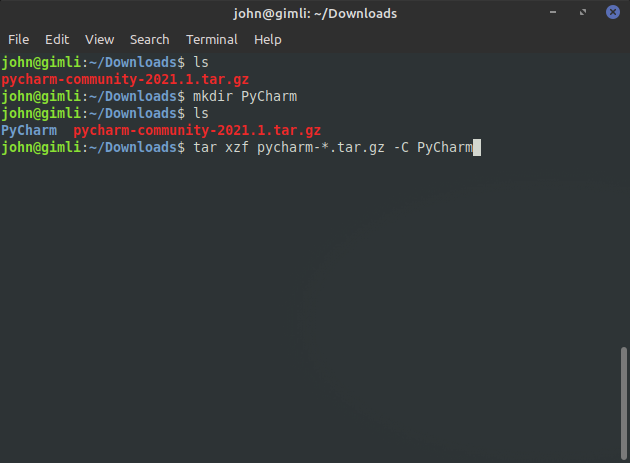
Next we'll move to the PyCharm bin directory.
Enter the following command:
cd PyCharm/pycharm-*/bin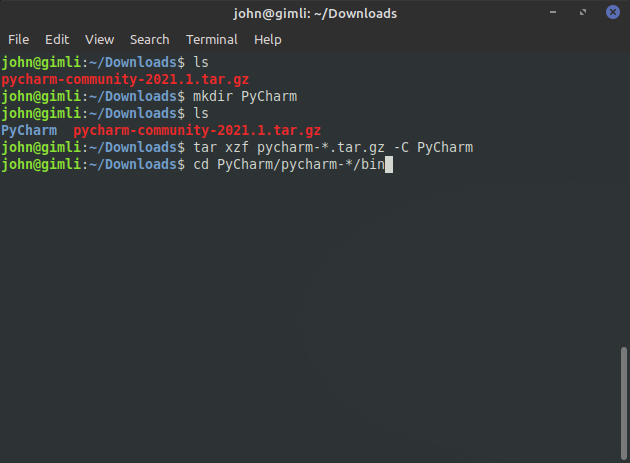
Then we can use ls to view the bin directory contents:
ls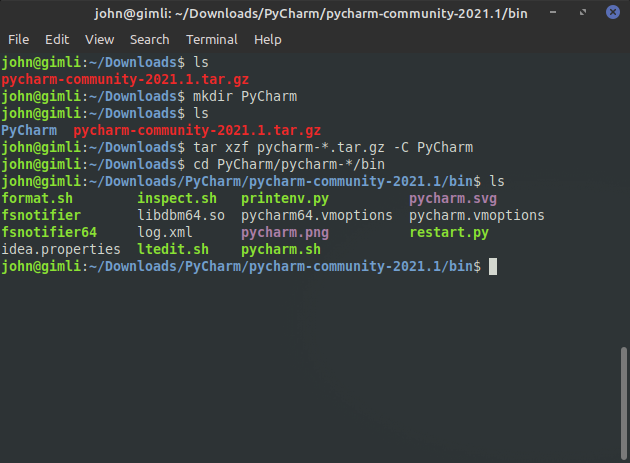
Next we'll run the PyCharm launch script.
Enter the following command:
sh pycharm.sh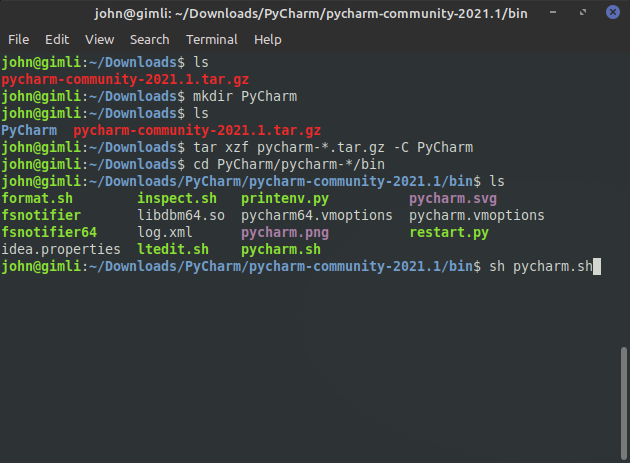
PyCharm will launch and will display the Terms & Conditions page.
Click the confirmation checkbox and then click Continue:
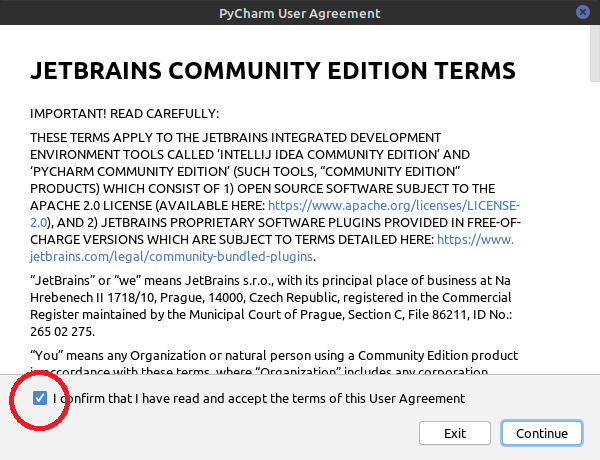
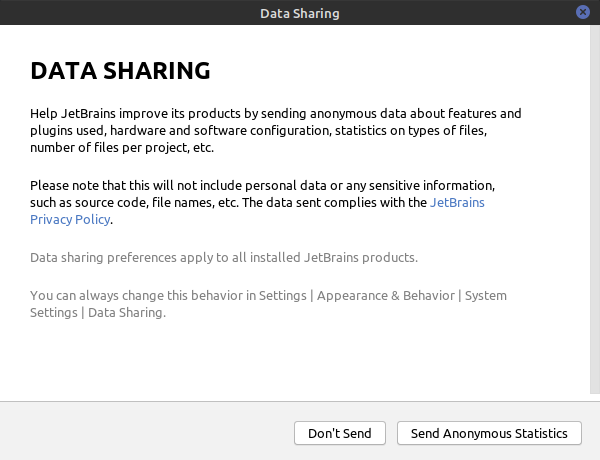
Next it will prompt if you want to share data with JetBrains. You can choose to either send or not send data:
The main PyCharm window will then appear. Before getting started, I recommend setting up a desktop icon, to do so continue to the additional instructions below.
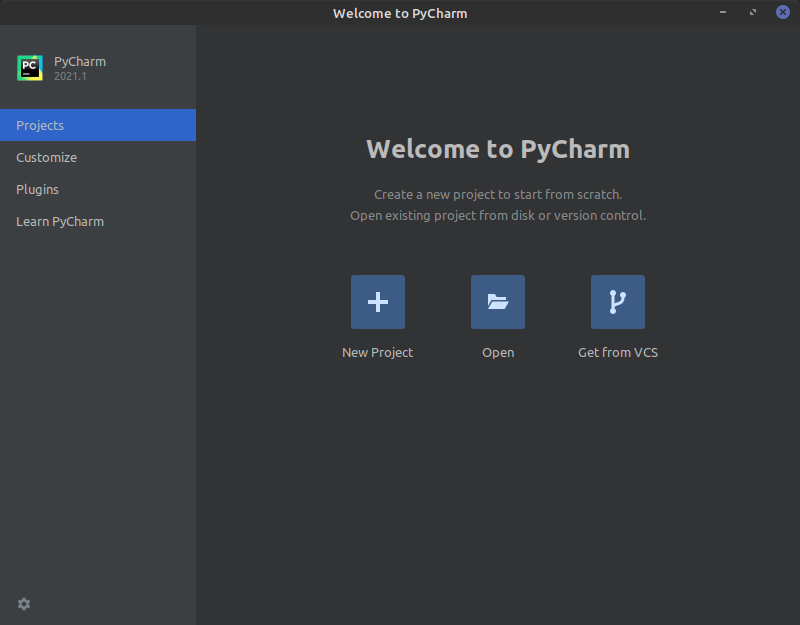
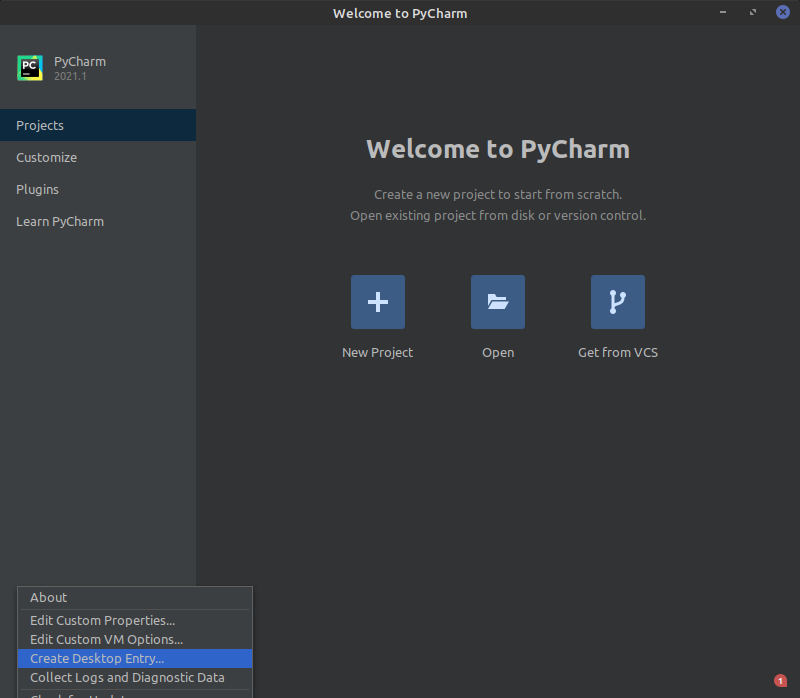
To set a desktop icon for PyCharm, click the settings gear at the bottom left of the main PyCharm window. An options menu will appear, choose Create Desktop Entry:
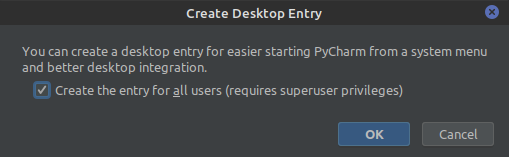
You can have it create the icon just for the current user or for all users. In this example, I want it to create the icon for all users so I check the checkbox labeled Create the entry for all users:
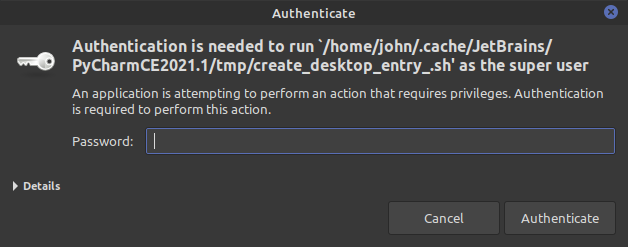
It prompts for authentication (because this will make a system-wide change), so I'll enter my password:
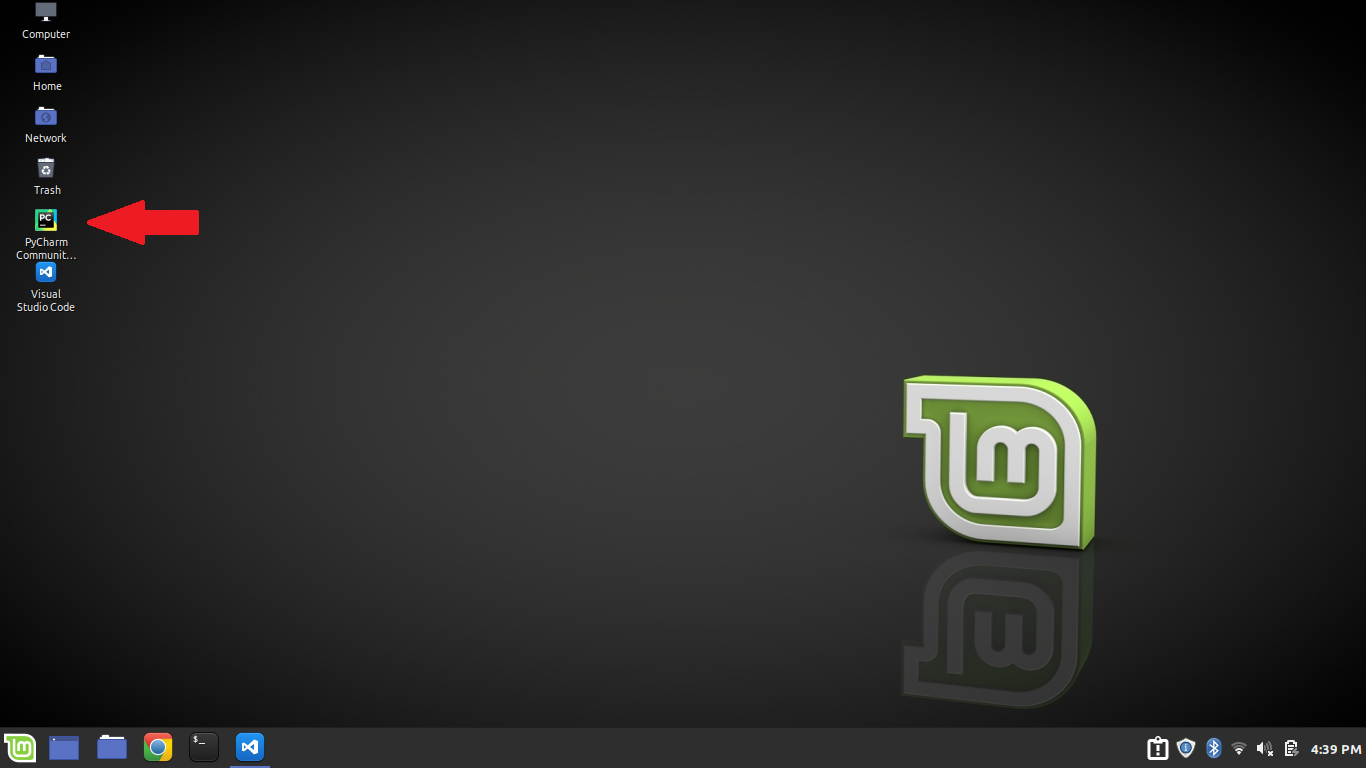
The desktop icon is created, so now we can open PyCharm from the desktop.
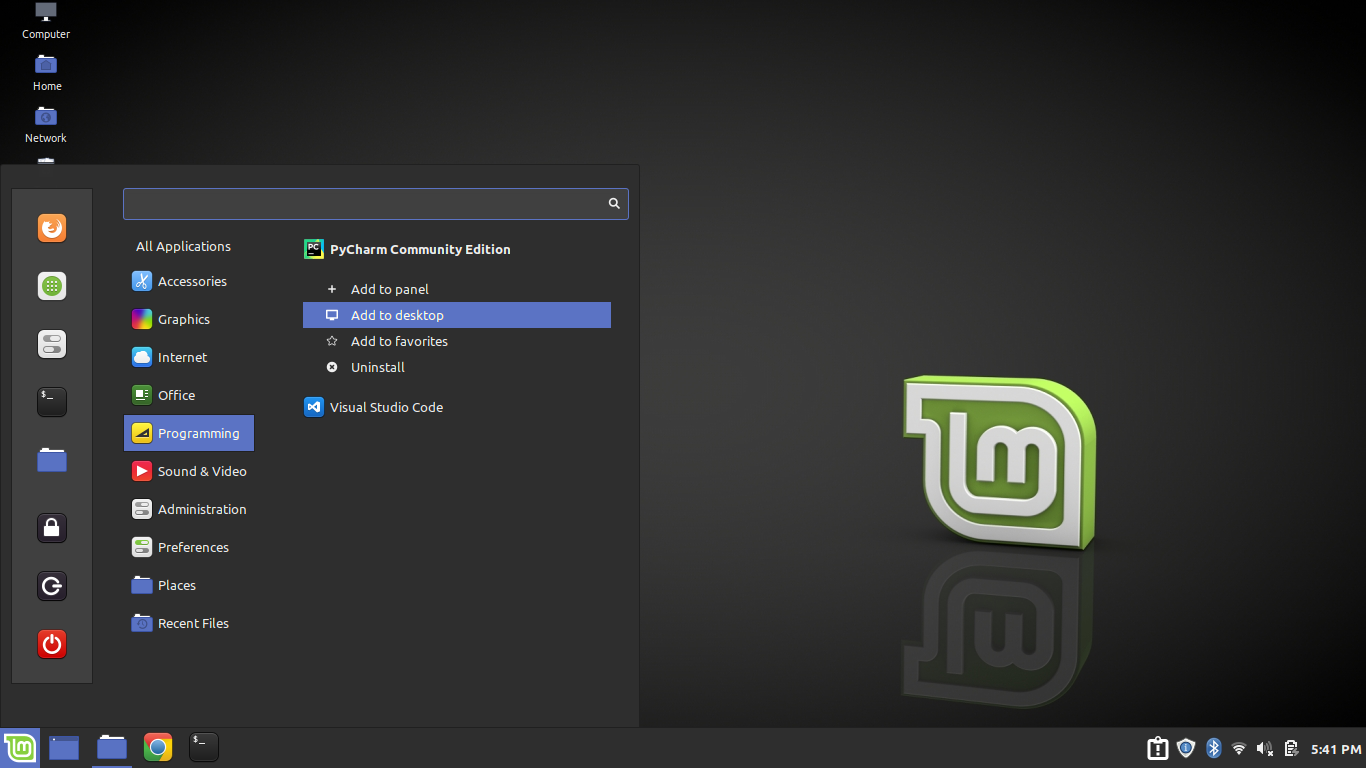
You can also launch PyCharm from the All Applications menu and the Programs menu.

When you are finished, continue with Step 2: Running & Setting Up PyCharm below.
The first time you run PyCharm, there are some things you can set up that will help you in your Python development, as outlined below:
Click Walkthrough tab for setup and walkthrough
Open PyCharm Community and following along with the steps below:
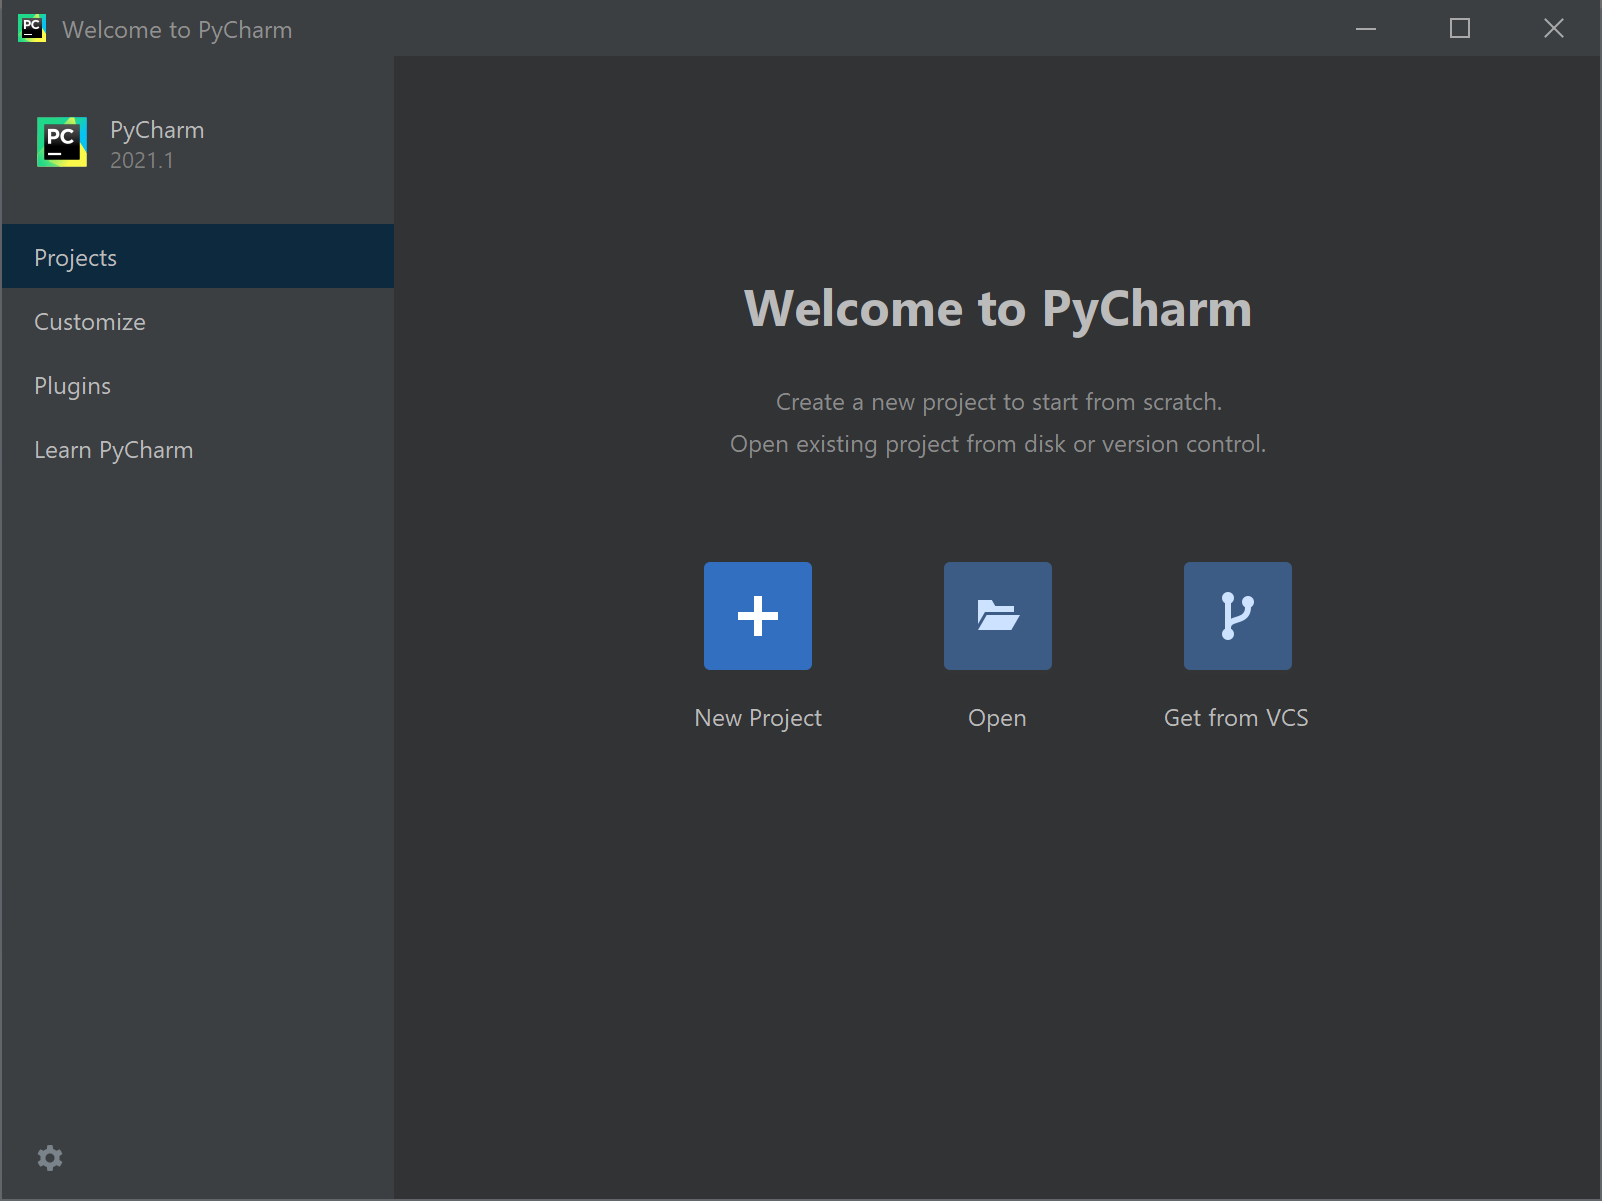
The PyCharm Welcome screen provides access to several key elements of getting started with PyCharm. Before starting a new project, let's take a look at some options available here first.
If you click the Customize option on the left-side menu, you can make changes to the appearance, font size, etc. For example, I have my Color Theme set to Darcula, so all of these screen captures are with that theme. The All Settings option on this page will open a window for all settings within PyCharm.
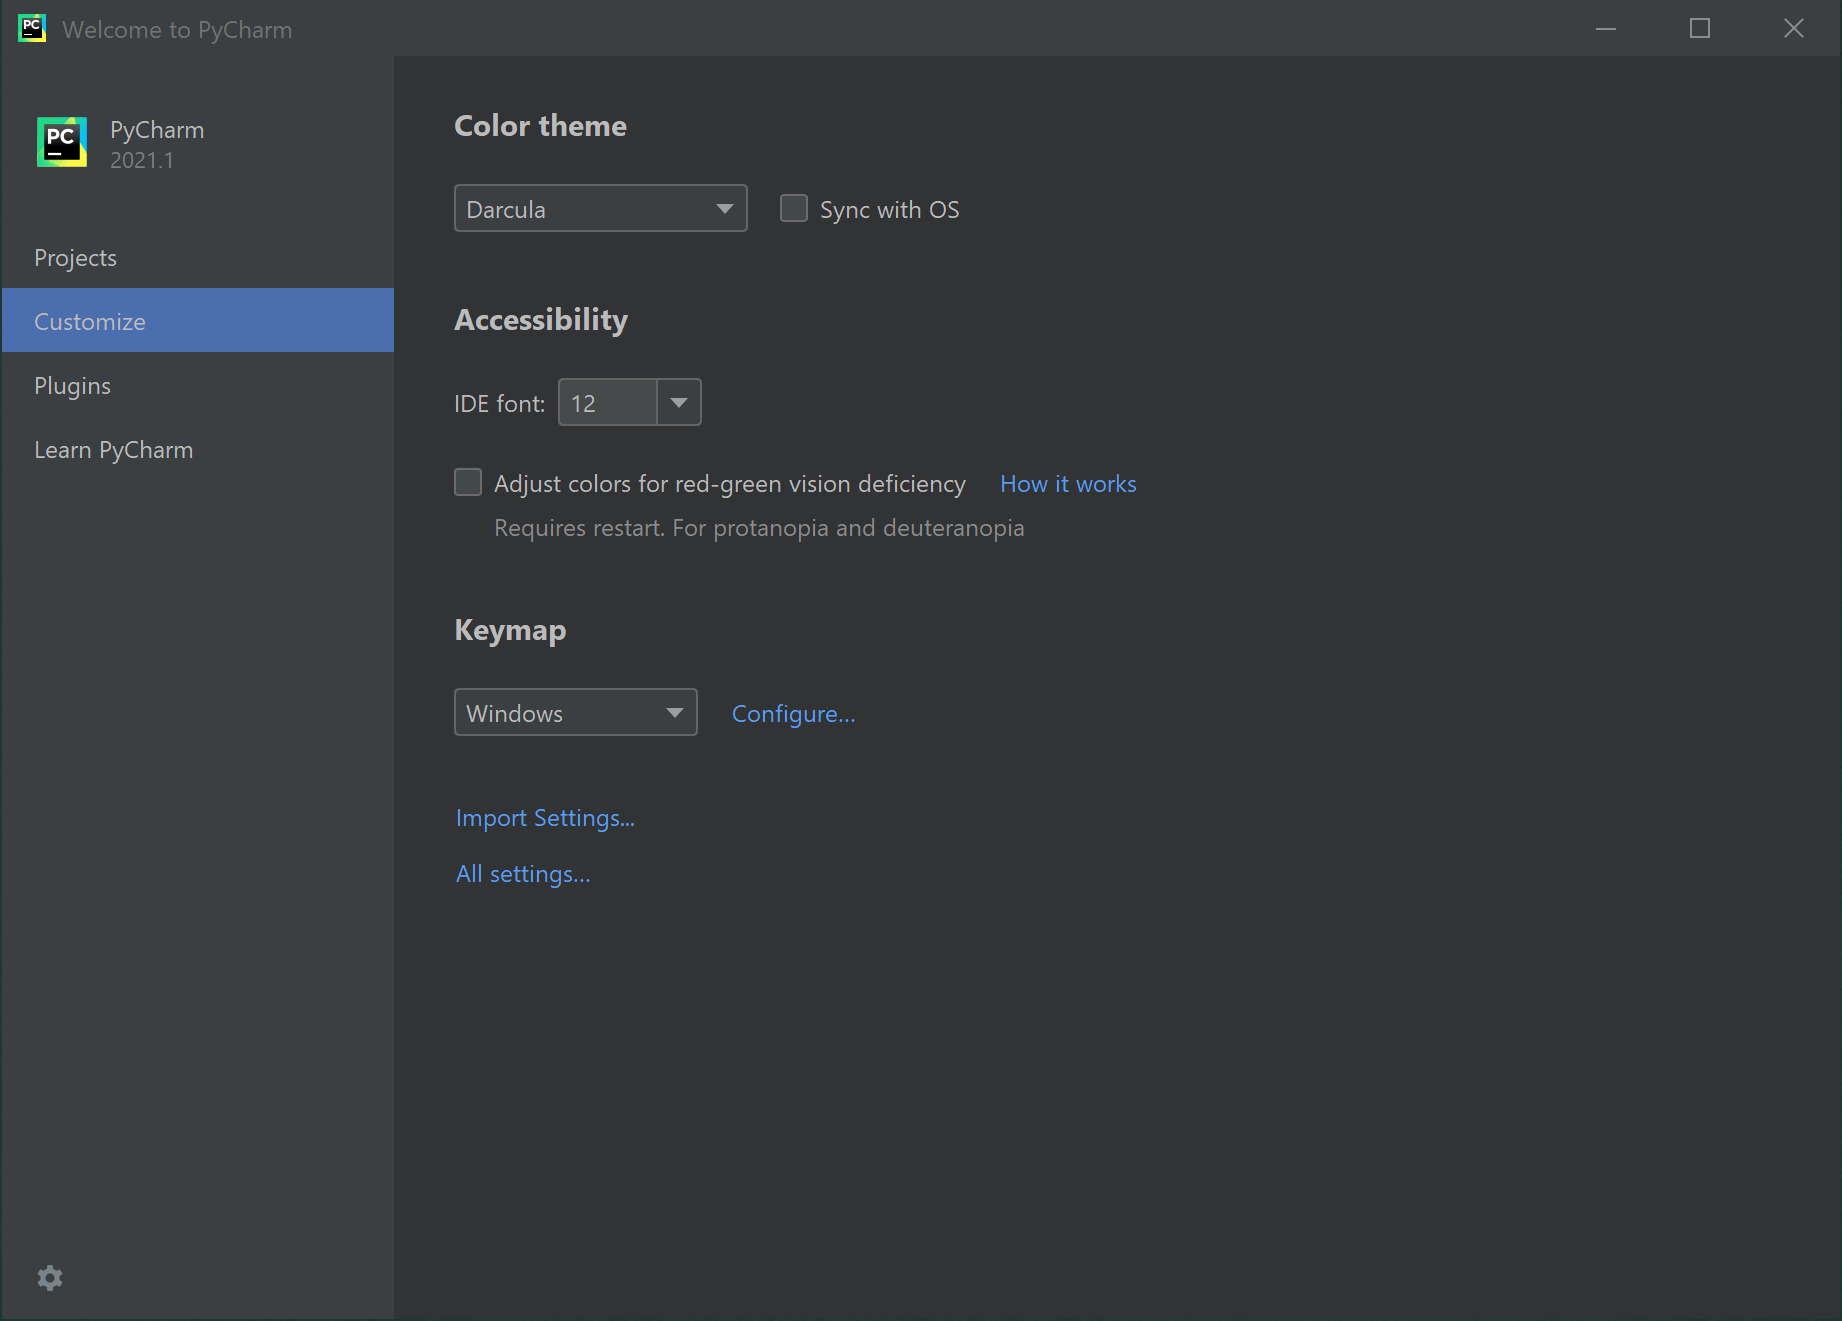
For now we'll skip the Plugin option. We'll return to plugins later.
Next, the Learn PyCharm option provides access to numerous resources to learn about PyCharm.
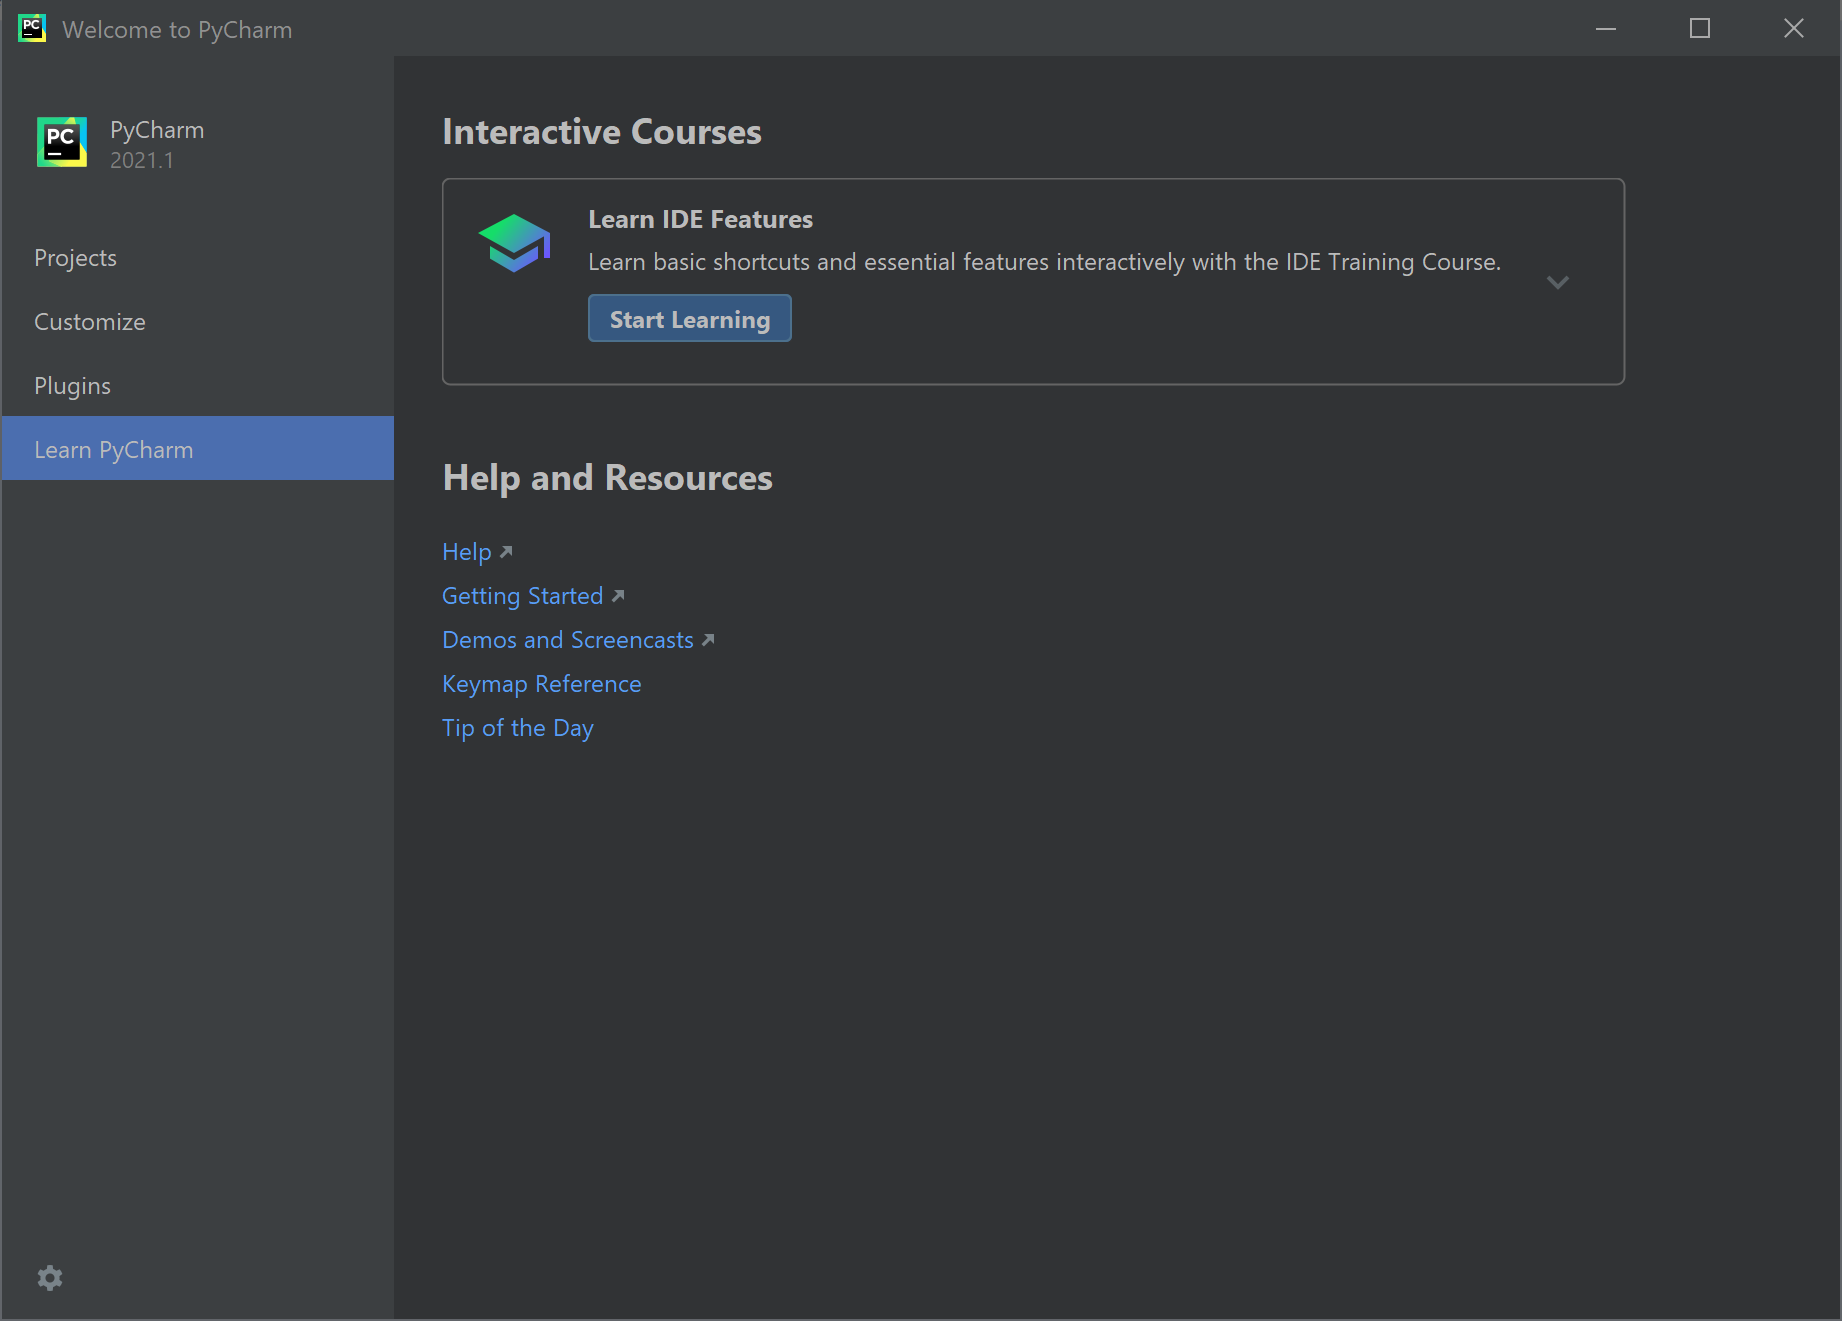
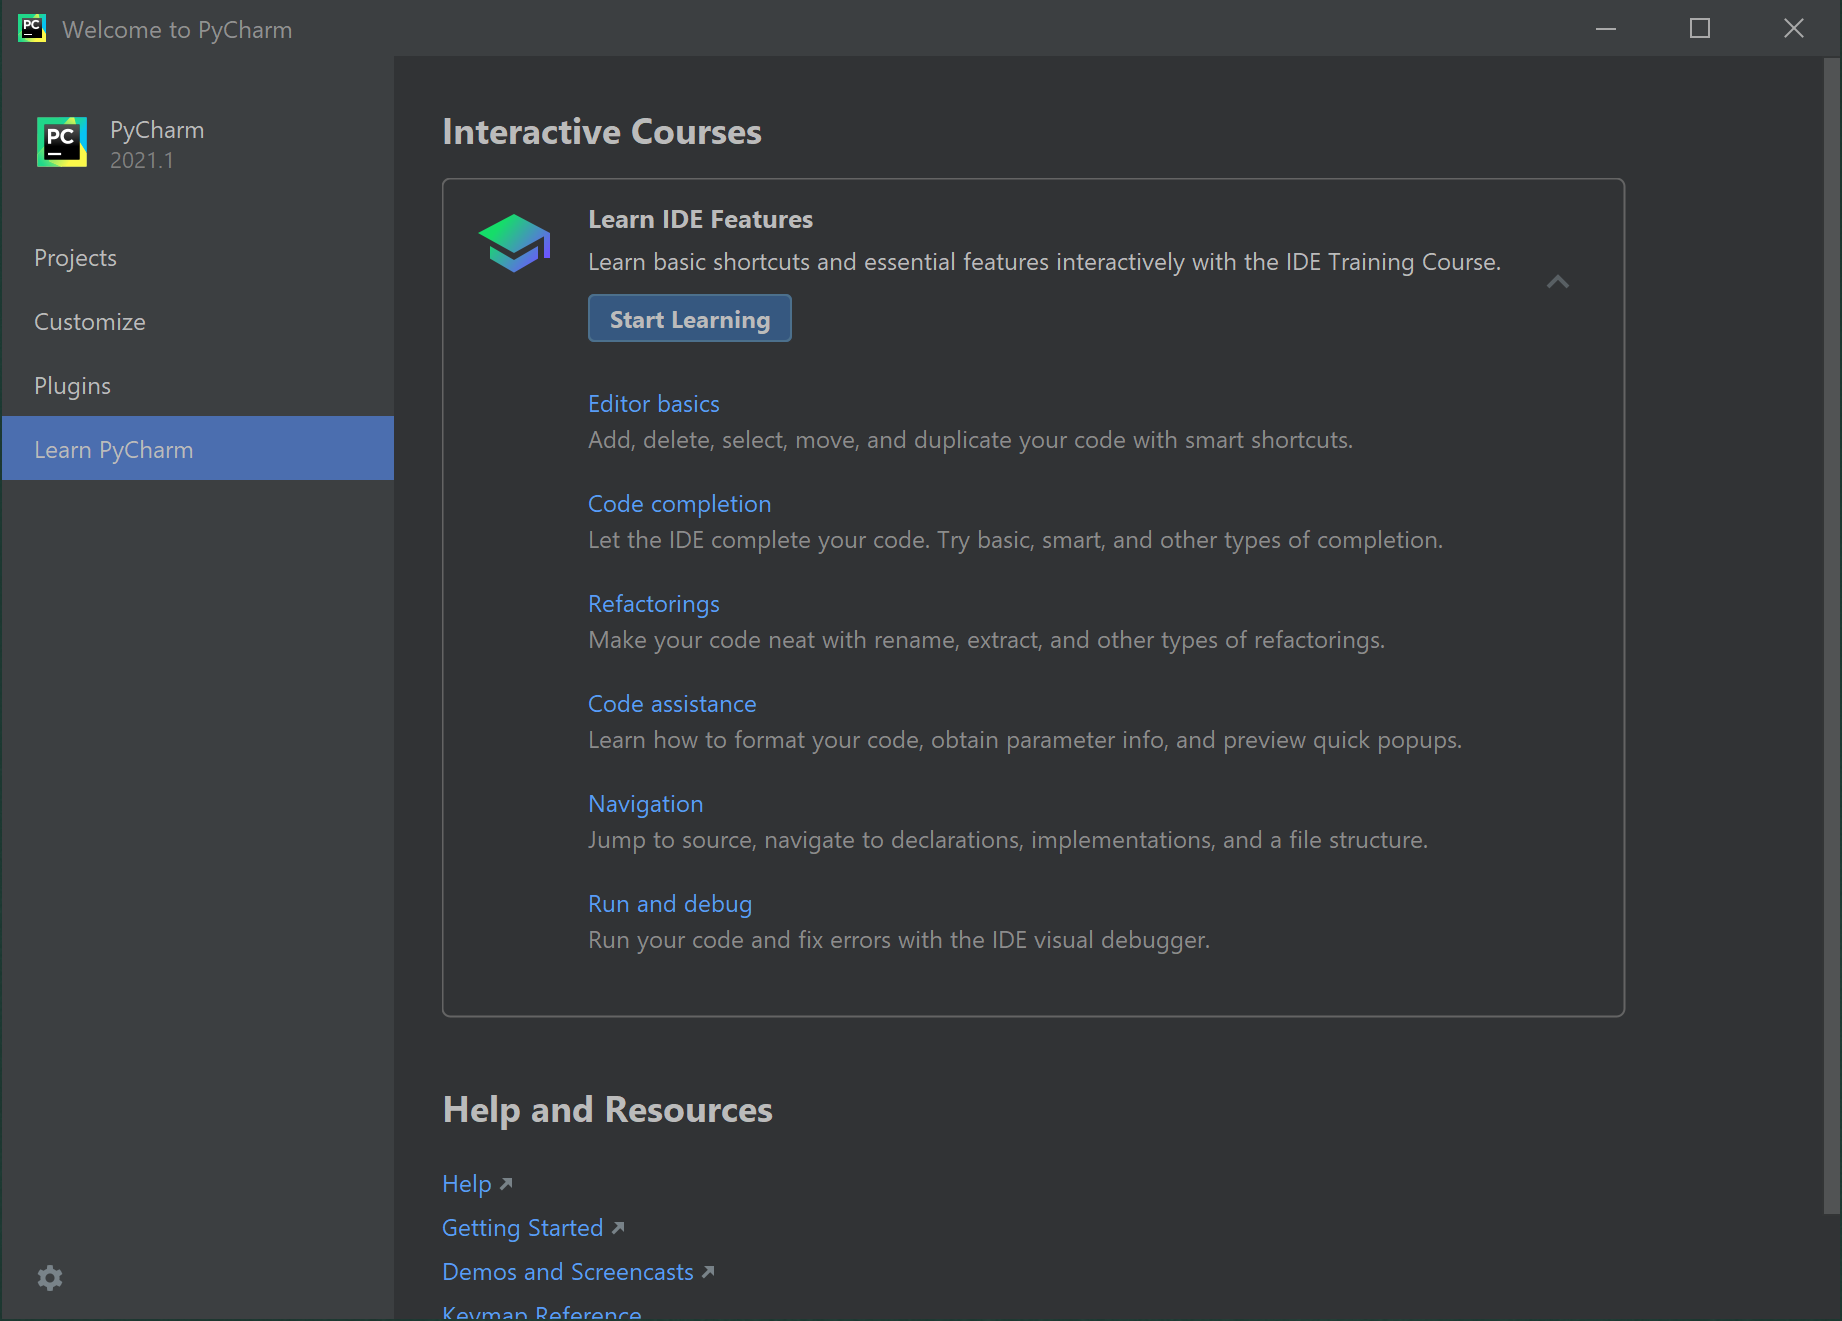
Notice the down-arrow to the right of the Learn IDE Features, it opens a list of learning information to specific areas of PyCharm. I recommend spending some time with these resources, they can be very beneficial to help you get to know PyCharm.
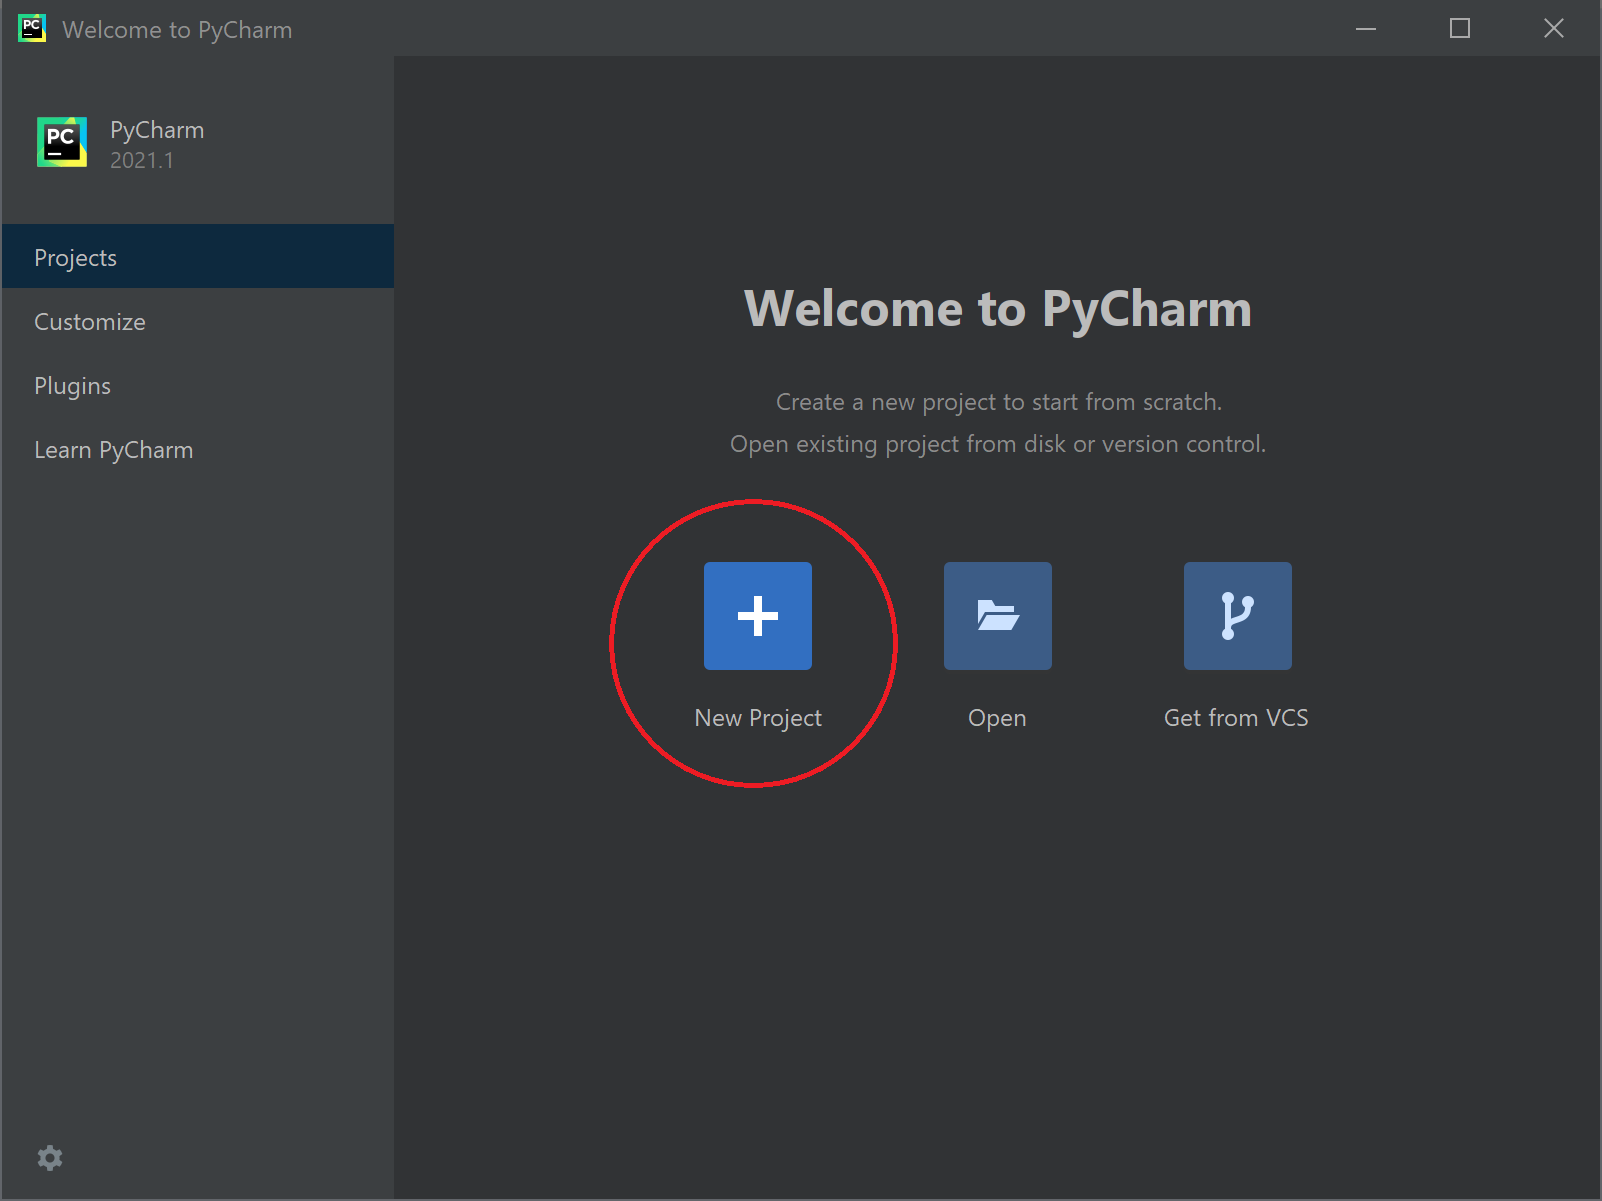
Next, return to the Projects menu option, and then click New Project.
Concept: Projects
A project in PyCharm (and most IDEs) is how we organize all of the files for a programming project. Creating a new project in PyCharm will create a set of folders for your project. When we develop software, we often create many code files, as well as fiels for data, configuration, etc. All of the files for your programming project will be stored in the project's set of folders, which makes it easy to manage, to backup and to share.
The New Project screen is where we set up our projects. There are many options here, so we'll start simple and will revisit project management more as we proceed through this book. Review the next several screen captures to see the options we'll start with for now ...
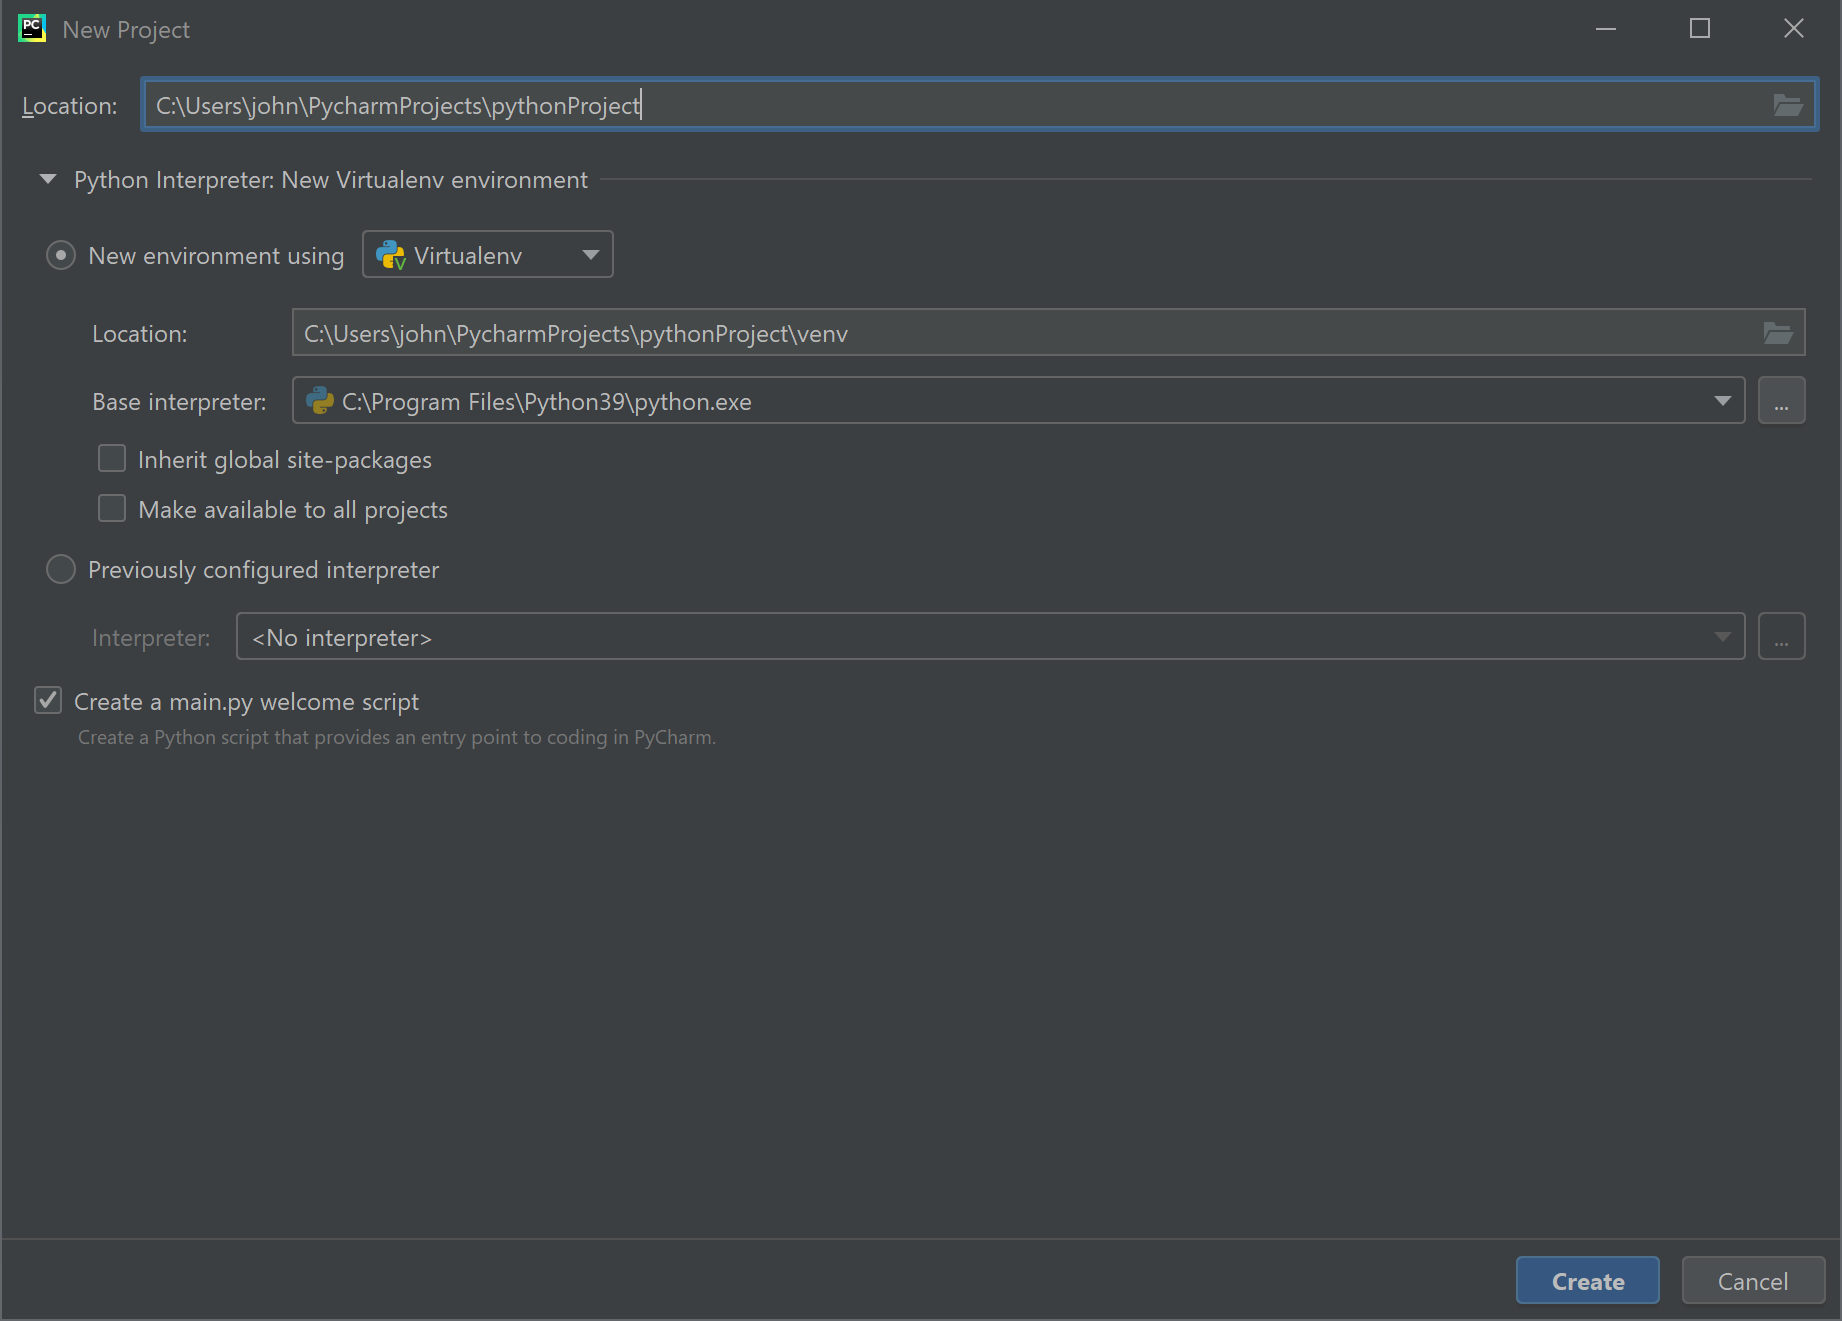
The New Project screen is where we set up our projects. There are many options here, so we'll start simple and will revisit project management more as we proceed through this book. Notice the 3 changes I've made on the following screen (marked in red) and read the notes below.
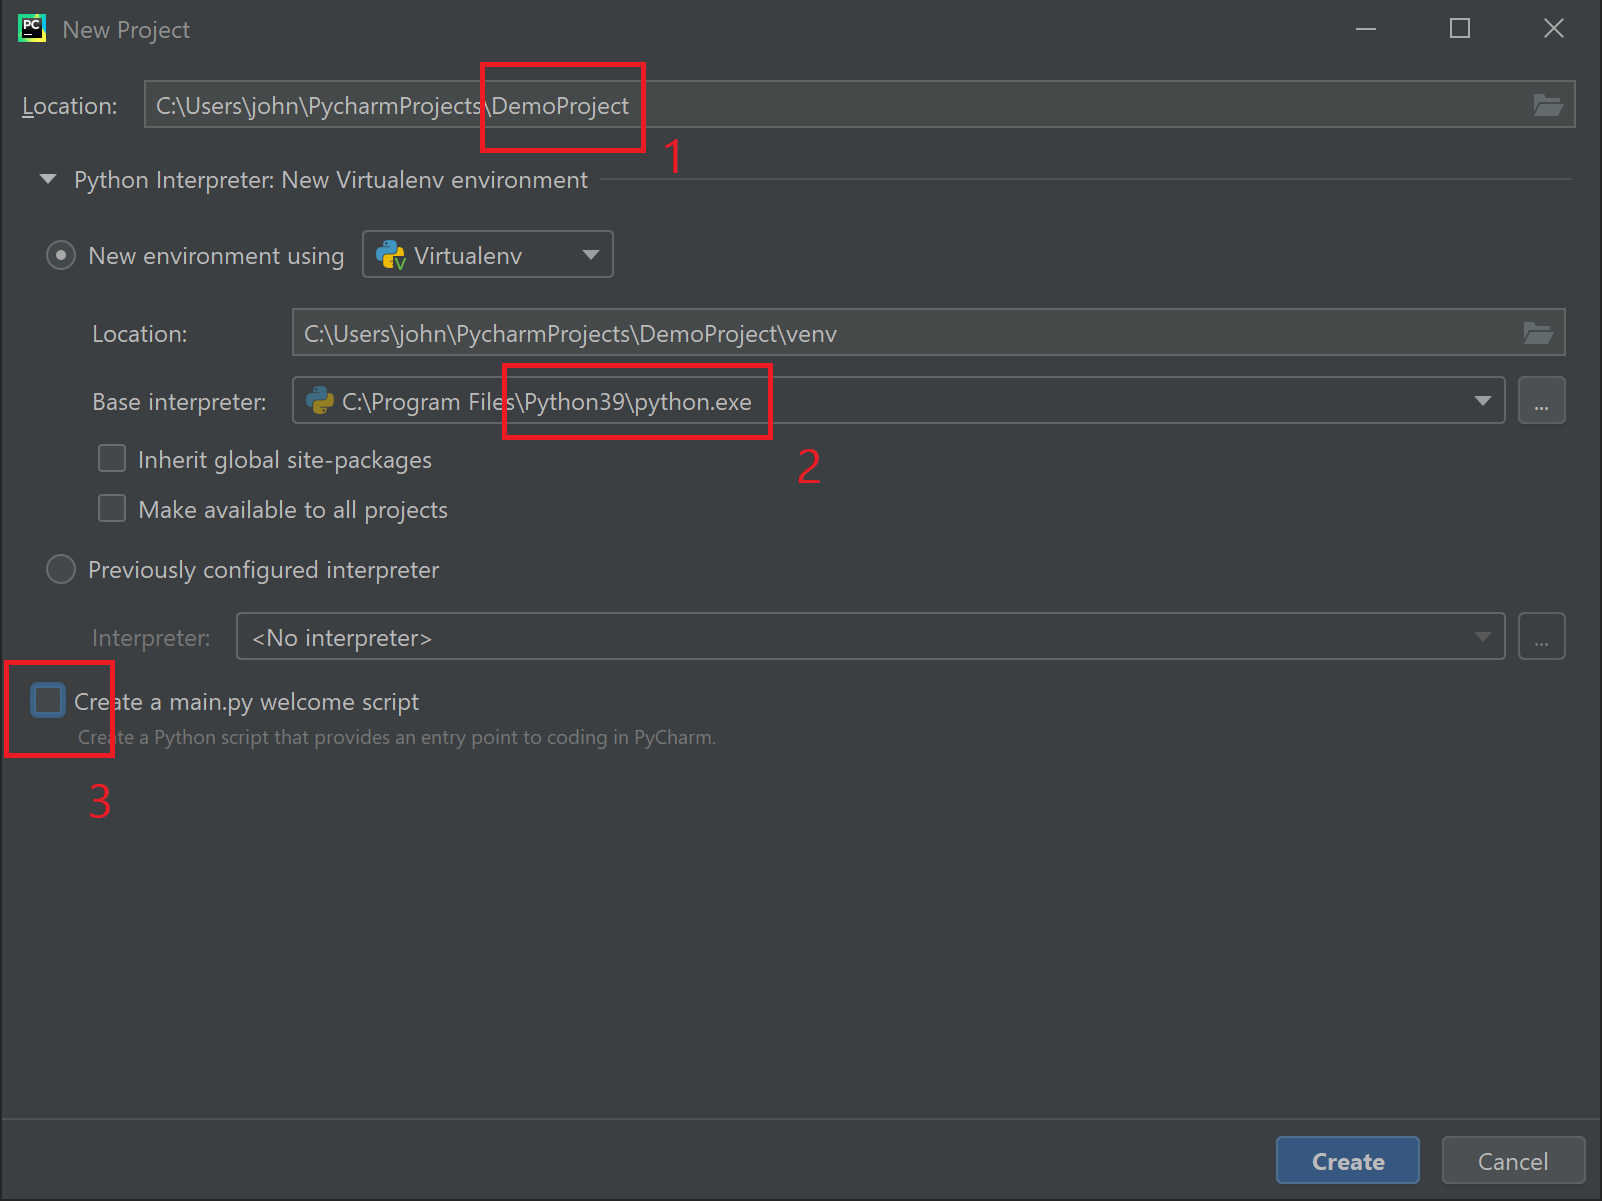
1. Notice that the path to my project is under my user folder on my computer. Also note that this example was created on a Windos computer so the path is in the format of a Windows computer, including the C:\ drive letter. On a Macintosh or Linux computer the format of the path will be different, but the concept is the same. When you create a project, the main project folder is folder you set in the Location path. In this example, I set my project folder name to DemoProject. All files for this project will be stored inside this project folder, or a sub-folder therein.
2. When developing in Python, we can have multiple versions of Python installed on the computer. When creating a new project we can choose which version (based on those installed on the computer) to use for that particular project. This also means each project can use different versions as needed. In this example, I chose Python 3.9.
3. One option available when creating a new project is to have PyCharm create a main.py script that you can use as a template for your program. In this example I have un-checked this option because I want to start with a clean project.
The PyCharm interface contains a large number options and work areas. For now we're going to just focus on the structure of the project itself.
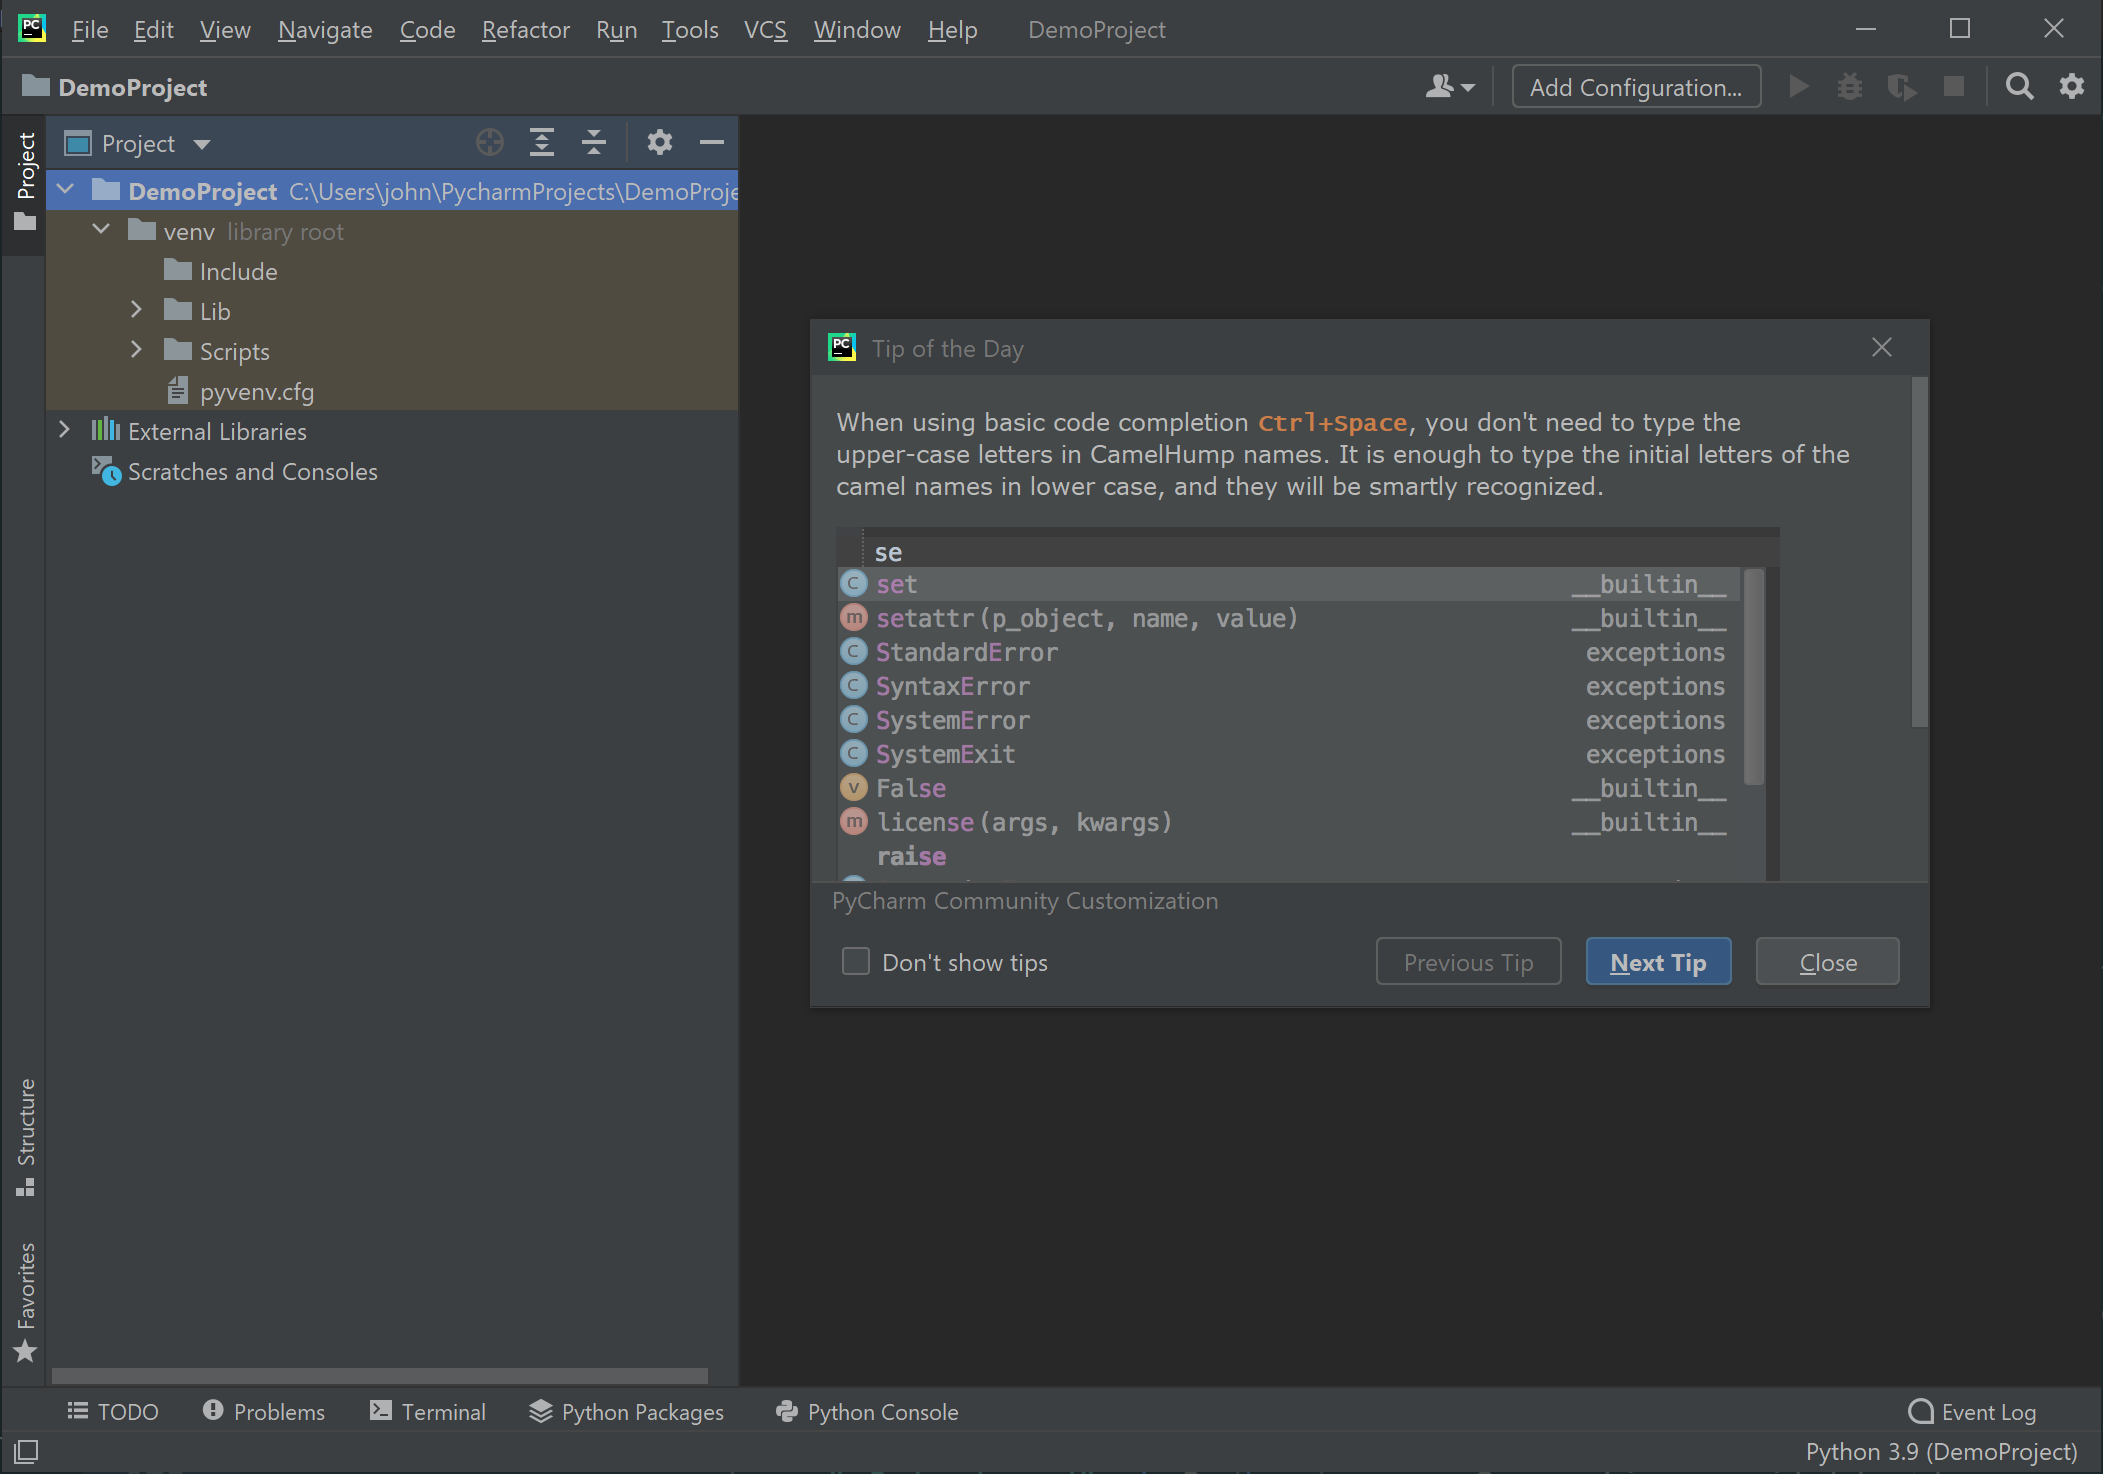
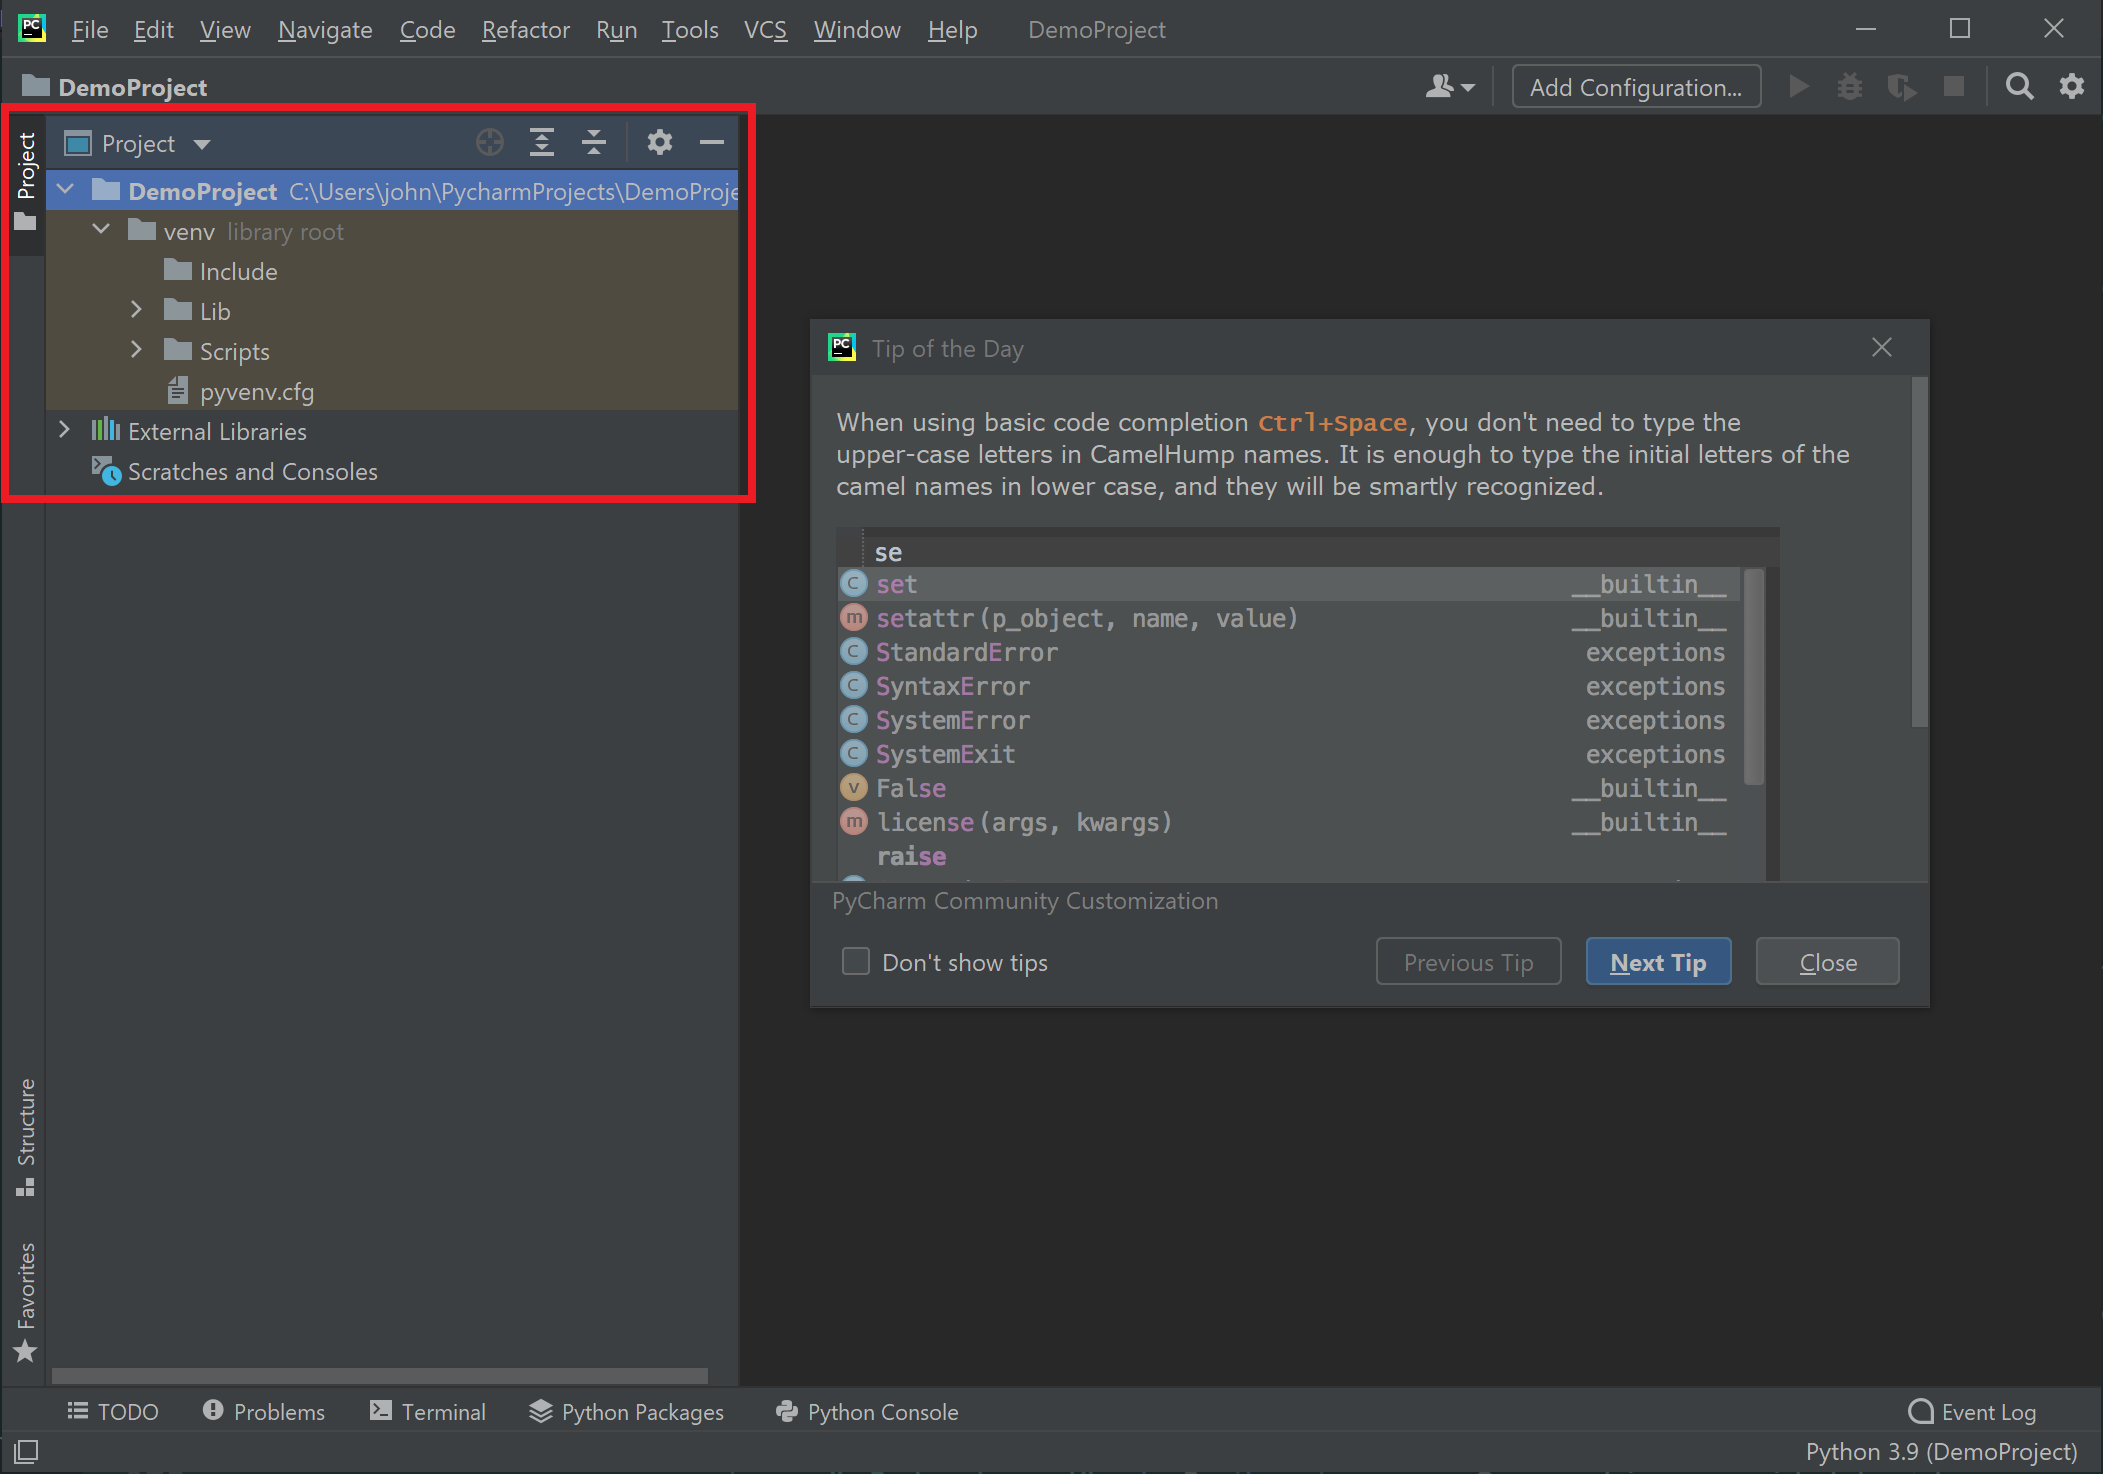
The PyCharm interface contains a large number options and work areas. For now we're going to just focus on the structure of the project itself. In the upper left of the PyCharm interface, the project folder structure is displayed. It is here where we can access and manage the files in our project.
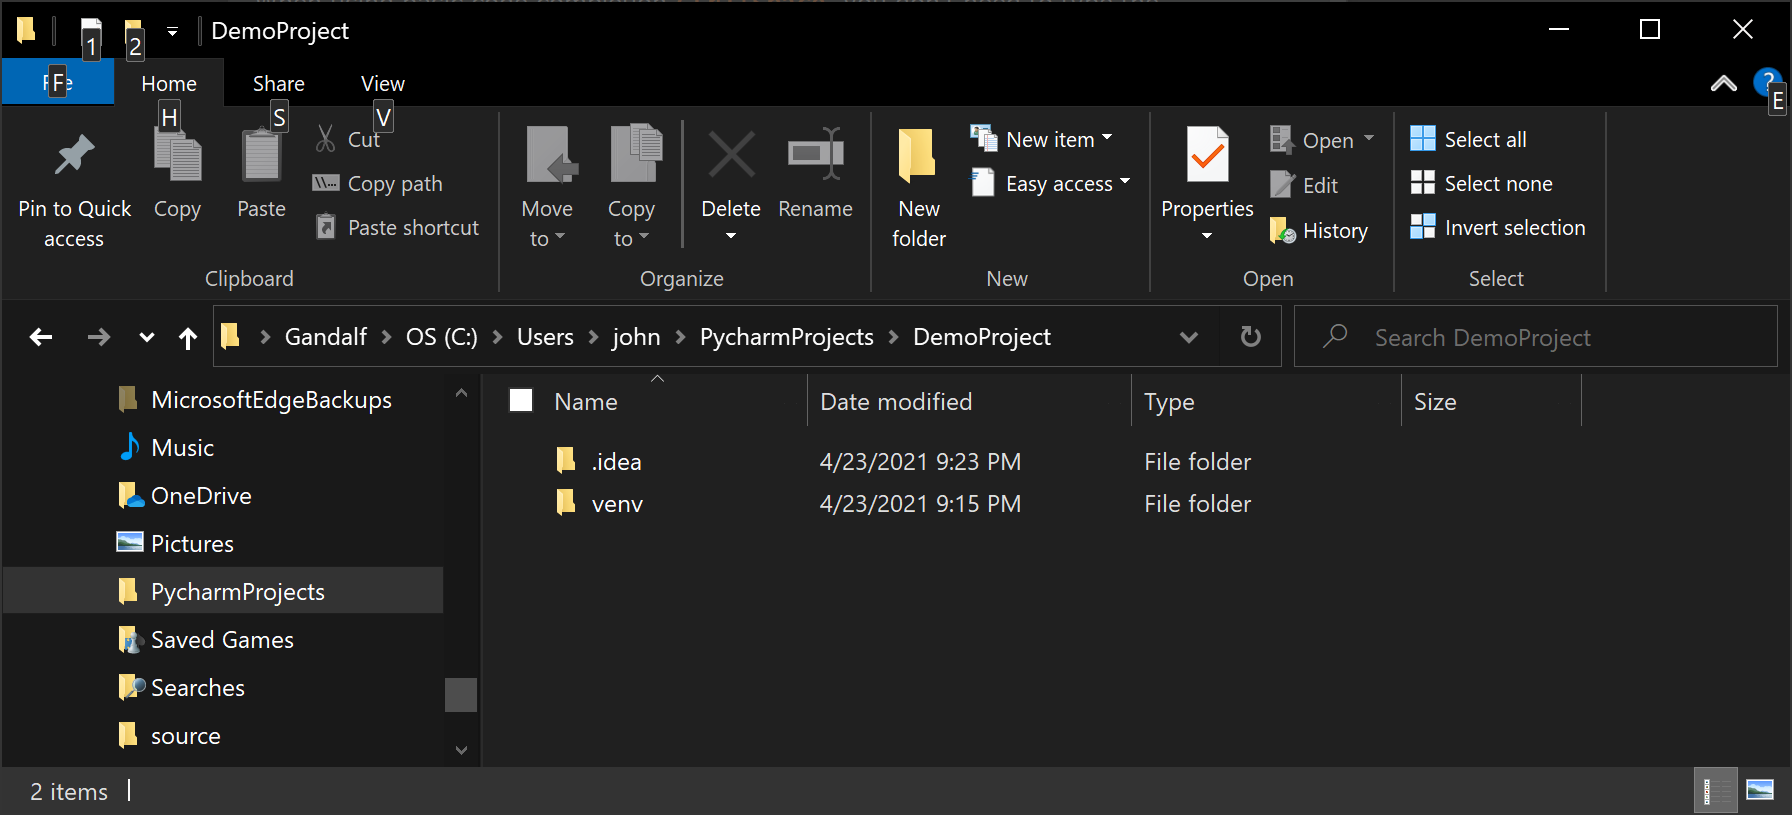
If we go to Windows Explorer (Finder on the Mac, Files on Linux) and navigate to the folder location we set when we created the project. Any time you need to access the files of your project outside of PyCharm, the folder structure is available. This is often useful when you need to send a file to a colleague, want to make backup copies, etc.
We will continue to explore features of PyCharm as we continue through this book.