Files are one of the core elements of working with a computer for users and programmers. Nearly all applications create or interact with files that are stored on a device, that is, computers, servers, cloud devices, mobile devices, tablets, hard drives, USB drives, etc. Files are the primary tools that we use to store persistent data that we want to access again and again. As a programmer, it is critical to become very familiar with files, and how files are created, manipulated, and stored. This includes developing an understanding of how operating systems handle files and storage. Python provides a full suite of tools for file handling and we will explore in this chapter.
The Python File Object
In Python programming, the primary tool we use to work with files is the Python file object. The file object is what we use to open files, create file, read files, write files, and close files.
Page Menu:
File Security & Permissions
One of the primary tasks of an operating system is providing security and permissions to the file system. Computer users are granted various permission levels to directories and files as needed based on their needs. On a computer that you own you have access to everything generally. However, in businesses and other multi-user systems, System Administrators generally have full access and then there are various user levels in addition to others. These user levels affect a user's ability to access, read and/or write files to various locations on the computer, on a computer network, or cloud system. When we run our Python programs, these access levels also apply to the program as well.
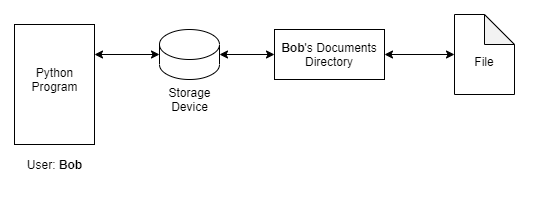
For example, say a user named Bob is running a Python program that we wrote that needs to open, read and write a file in the user's Documents directory. If Bob runs the program and he has a connection and access permissions to his Documents folder then the Python program will be able to interact with the file. This is because the Python program must adhere to the user permissions of the user running the program.
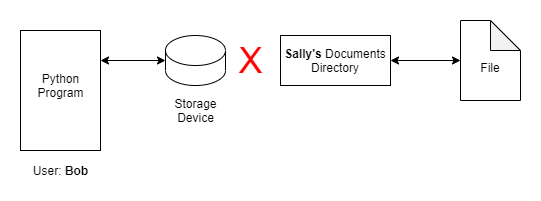
However, if Bob were to change the Python program to try to access Sally's Documents directory, but he does not have access permissions to Sally's directory, then the Python program will throw an error because Bob does not have proper permissions to that directory and file.
As programmers then, we need to take into account file security and permissions when writing file handling code. I will discuss approaches to this a little later on this page.
File Access Approaches
Another consideration when deciding how to handle files in our Python programs is whether we want to read and write files sequentially or using random access. Sequential access means that we will read or write the file one line at a time, usually starting at the top of the file. Random access is the ability to move around inside a file, and locate specific points in the file and interact with its contents non-sequentially. For now, I will focus on sequential access and address random access later in this eBook.
Opening a File
To interact with a file in our Python code, we must first open the file. Opening a file using Python code involves establishing a file object variable and assigning the result of the open() function to that variable. Inside of the open() function we specify the file we want to open and the mode (the type of access (read, write) we want to the file) to use to open it. You can find a full list of file access modes here.
The general form of the open() function is as follows:
The file_var will hold the object reference to the file object based on the result of the open() function.
The open() function is the standard function for opening files in Python.
The file_name is the path and name of the file you want to access. Recall the discussion of file paths above. We can use absolute or relative paths here. See the examples below.
The value of file_access_mode is dependent on how you want the file opened, for example, for read-only "r", for write only "w", for appending (adding) to the file "a", etc. You can find a full list of file access modes here
There are additional options available in the open() function, but for now, we'll focus on these.
Example 1
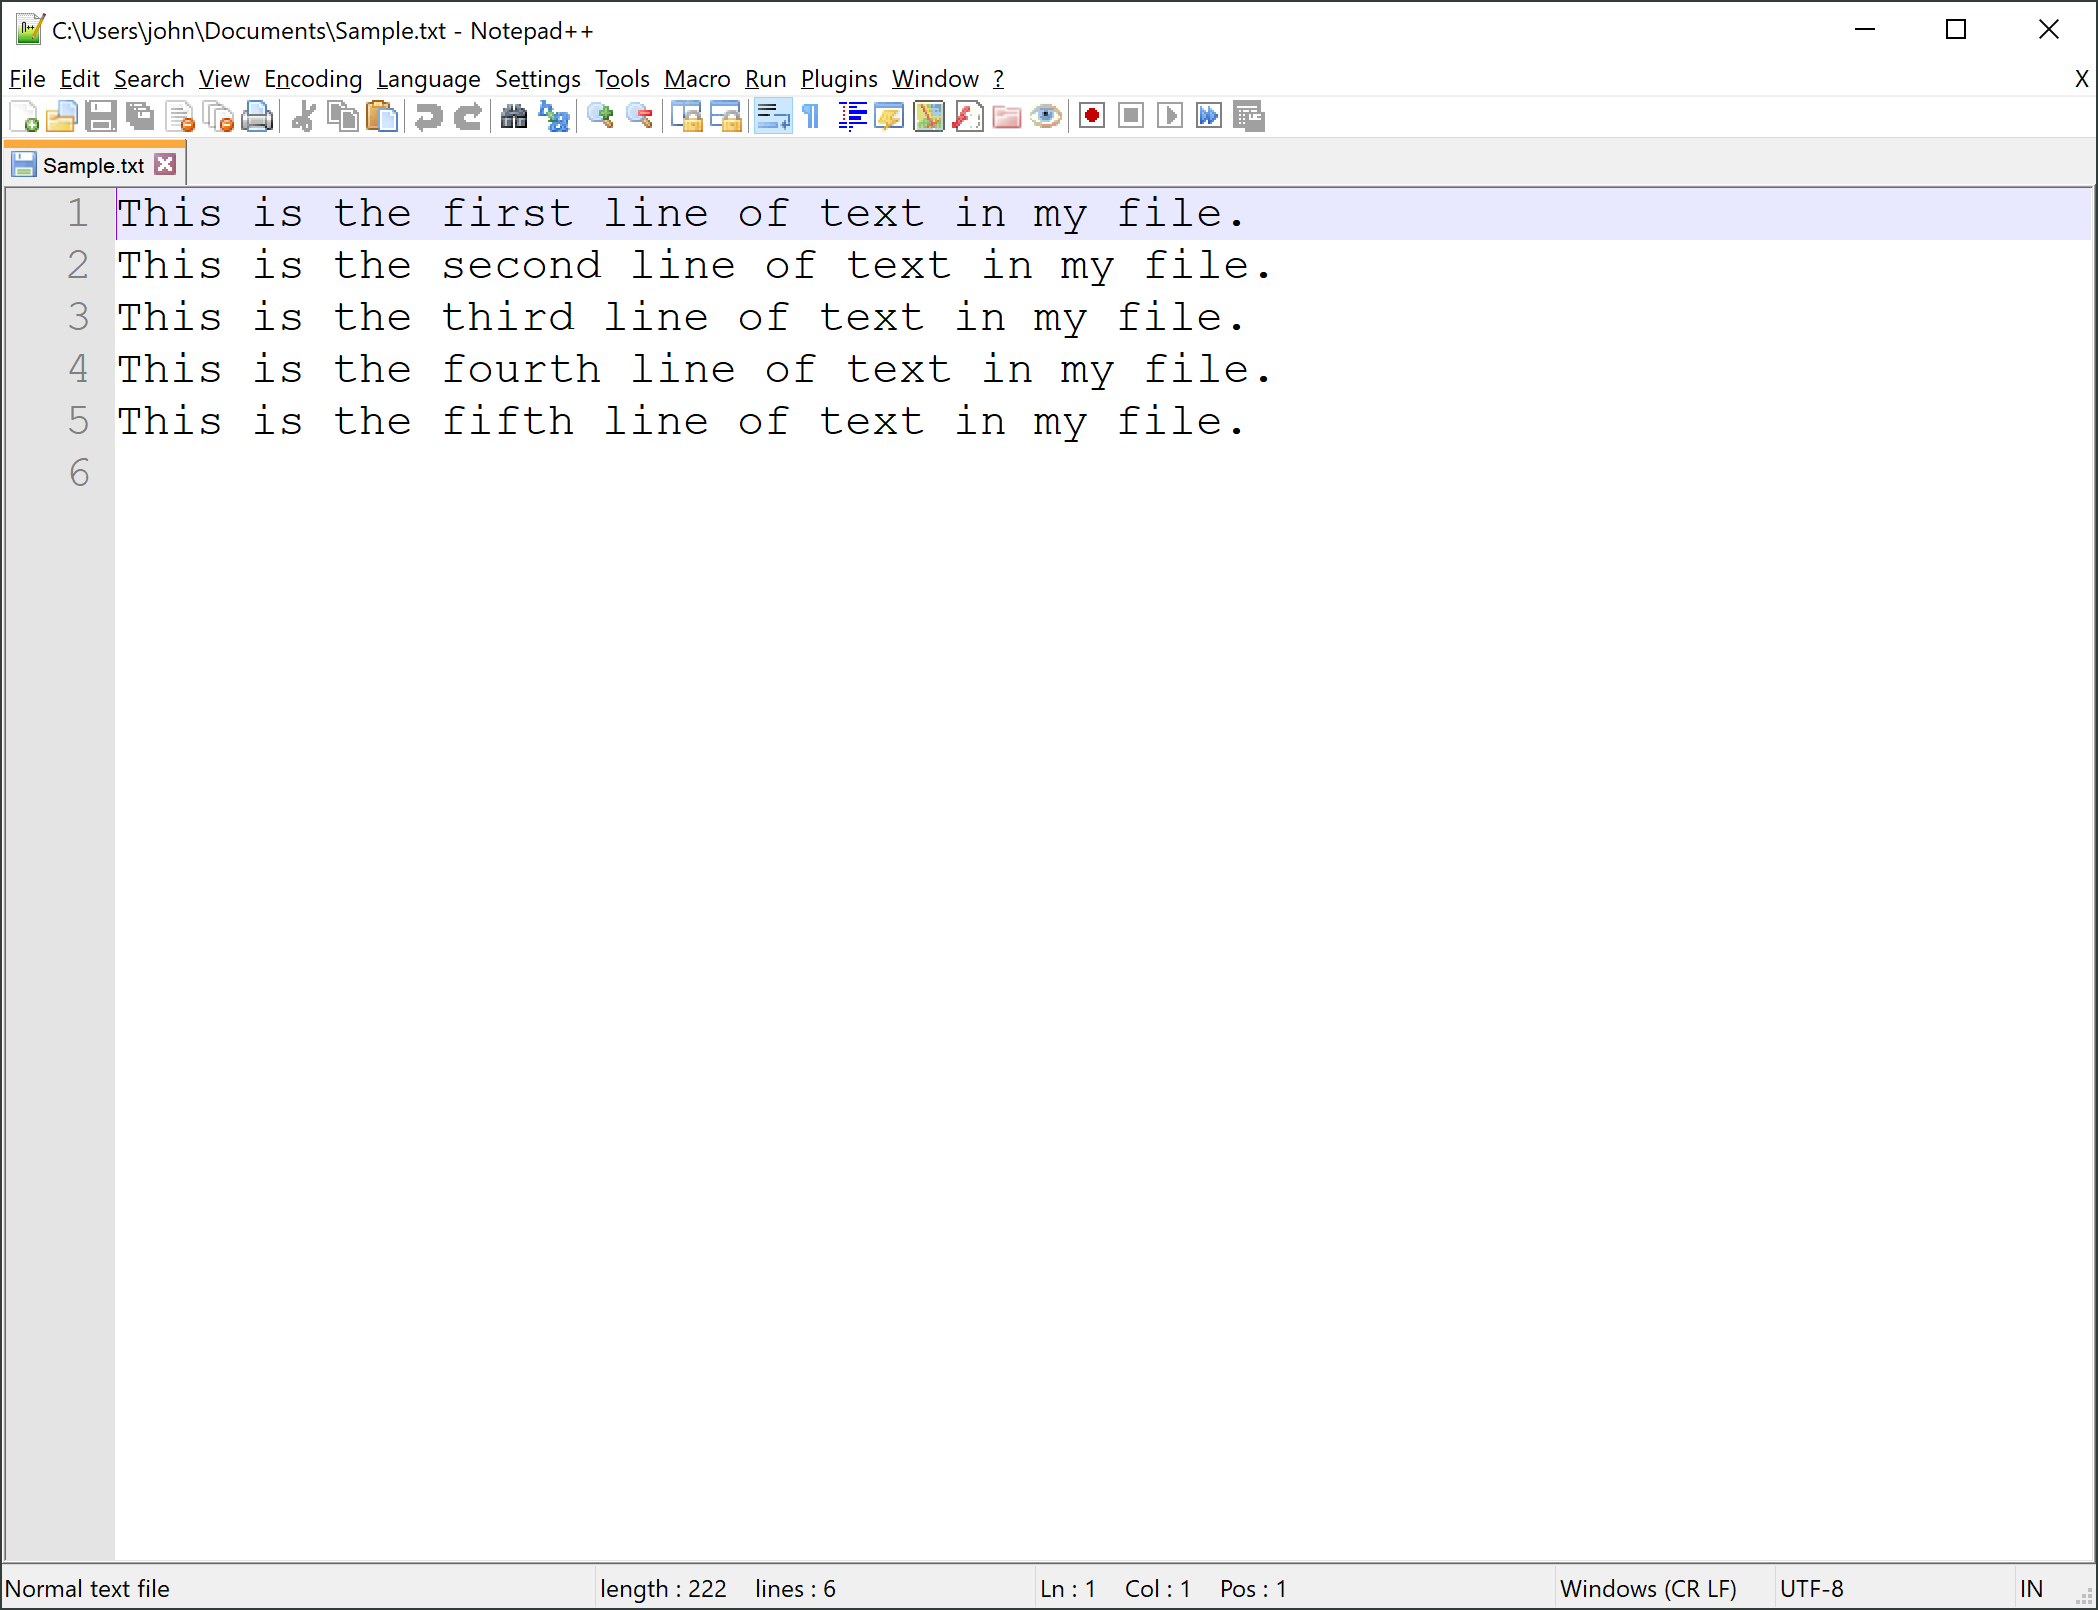
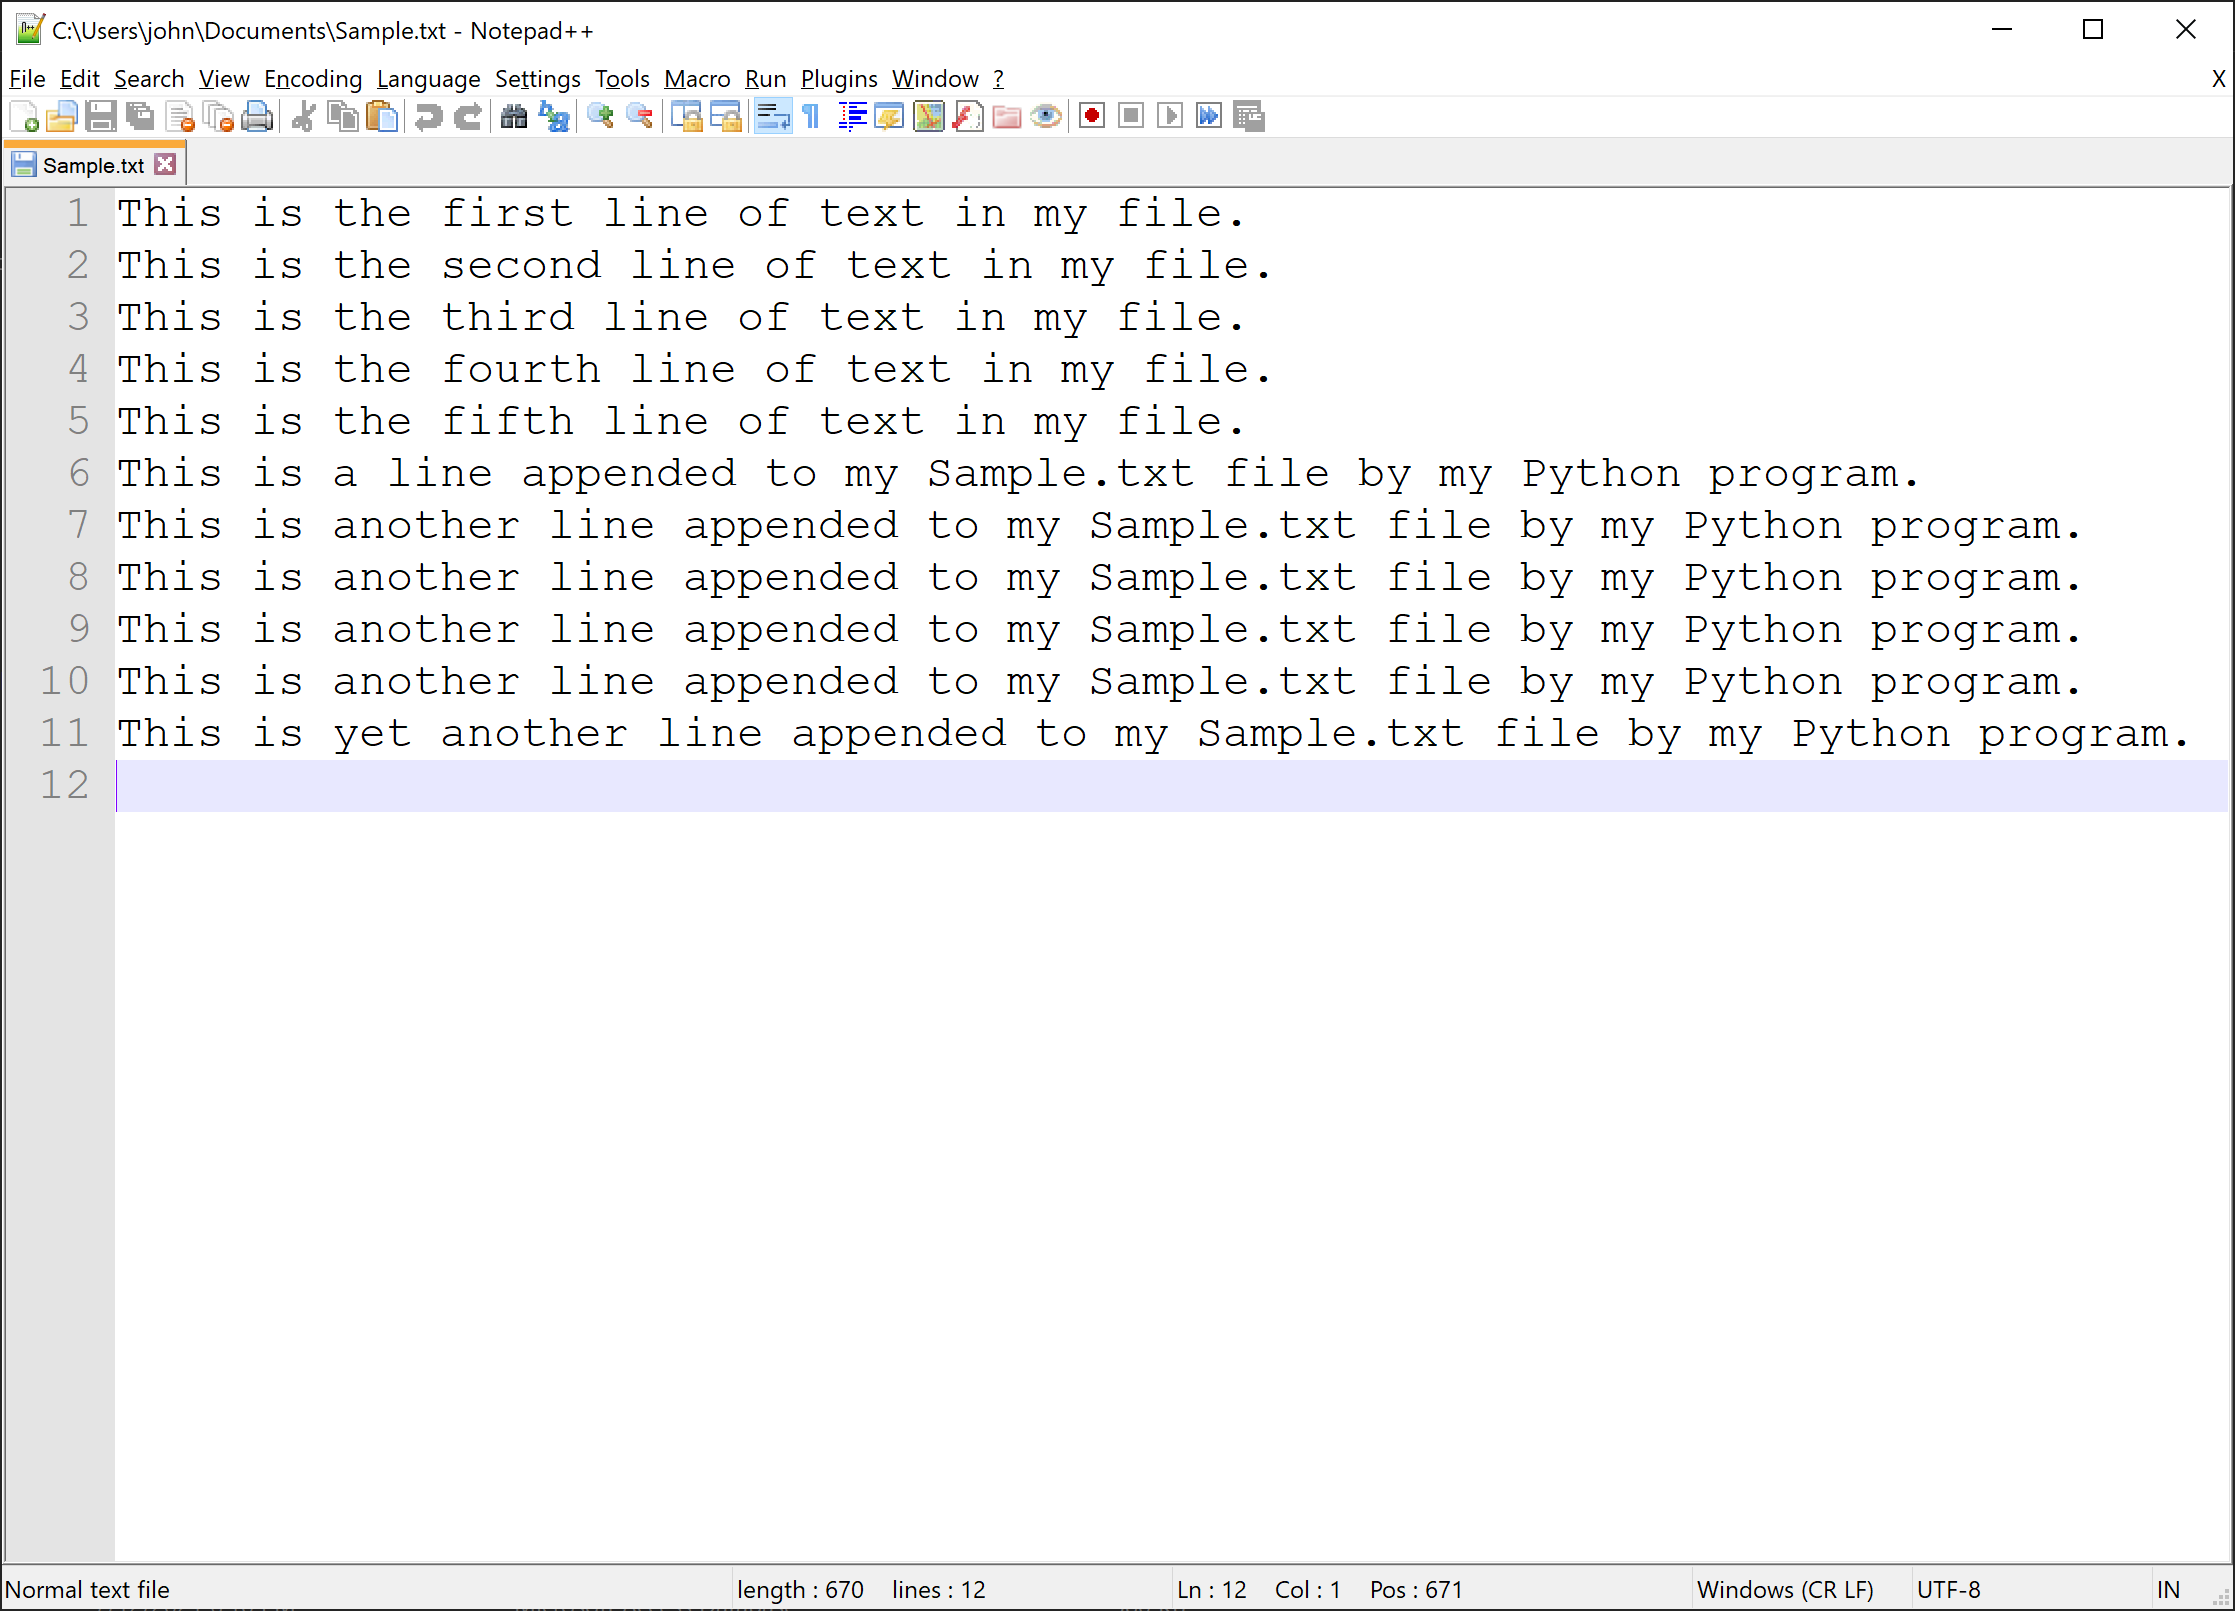
Let's say I have a file in my Documents directory called Sample.txt that I want to open to read in my Python code. If I open that file in a plain text editor it looks like this (notice the absolute path in the title bar of the screenshot window):
To open this file in Python I can write the following ...
... and, if the file exists at that location, then the variable my_file will contain an object reference to the file and it will be opened with mode "r", which means read-only access. This means I'll be able to read the file but I am not able to write to the file. At this point, nothing has happened to the file itself yet.
Reading from a File
Once I have opened the file using the open() function, I can start reading from the file. I have several options for reading from the file, I can read it all at once into a variable or I can read it one line at a time (sequentially). For this first example, let's read it all at once and then print the contents on our screen.
This is the first line of text in my file.
This is the second line of text in my file.
This is the third line of text in my file.
This is the fourth line of text in my file.
This is the fifth line of text in my file.
Now that I have read the contents of the file into a variable I can use that variable to work with that content as needed.
Closing a File
It is important to close external resources, such as files, as soon as we are finished with them. Not closing resources can cause conflicts and unexpected results otherwise. To close a file simply use the file method close(), like this...
my_file.close()
So, if we combine all of the code so far we have this ...
Notice where I placed the my_file.close() statement, on Line 3 right after I captured the contents of the file into my file_contents variable. I no longer needed the file because the file_contents variable has all of it, so I close the file right away. I can then work with the contents using my variable after that, like printing it as shown in this code.
Writing to a File
Next, to write (add content) to a file we first need to determine if the file we intend to write to will be a new file or if it is an existing file. This is an important distinction because it will determine which access mode we will use. The two modes we can use to write to a file are ...
File Access Mode
Description
w
Opens the specified file for writing only. If the file exists already at the location specified, the existing file is overwritten. If the file does not exist already, the file is created with the name specified.
a
Opens the specified file for appending. If the file exists, the file pointer is positioned at the end of the file and the file is set to append mode, that is, any new data written to the file will be appended (added) to the end of the file. If the specified file does not already exist, then the file is created using the file name specified, the file pointer will be at the beginning of the empty file and the file will be set for writing.
Examples of File Access Mode: "w":
Continuing with our Sample.txt file from above, since it is an existing file with multiple lines of content, the following code example will open the file for writing. Subsequently, when we write data to it, its content will be overwritten.
If we use the same code line with write mode, however with a file name that does not exist, that file will be created first, and then when we write data to it the data will be added beginning on the first line of the file.
If we consider our Sample.txt file again, however this time if we intend to write content to it without overwriting it, that is we want to add data to it without affecting the existing content, then we change the access mode to append "a".
my_file = open(r"C:\Users\John\Documents\Sample.txt", "w")
my_file.write("This is a line added to my Sample.txt file by my Python program.")
my_file.close()
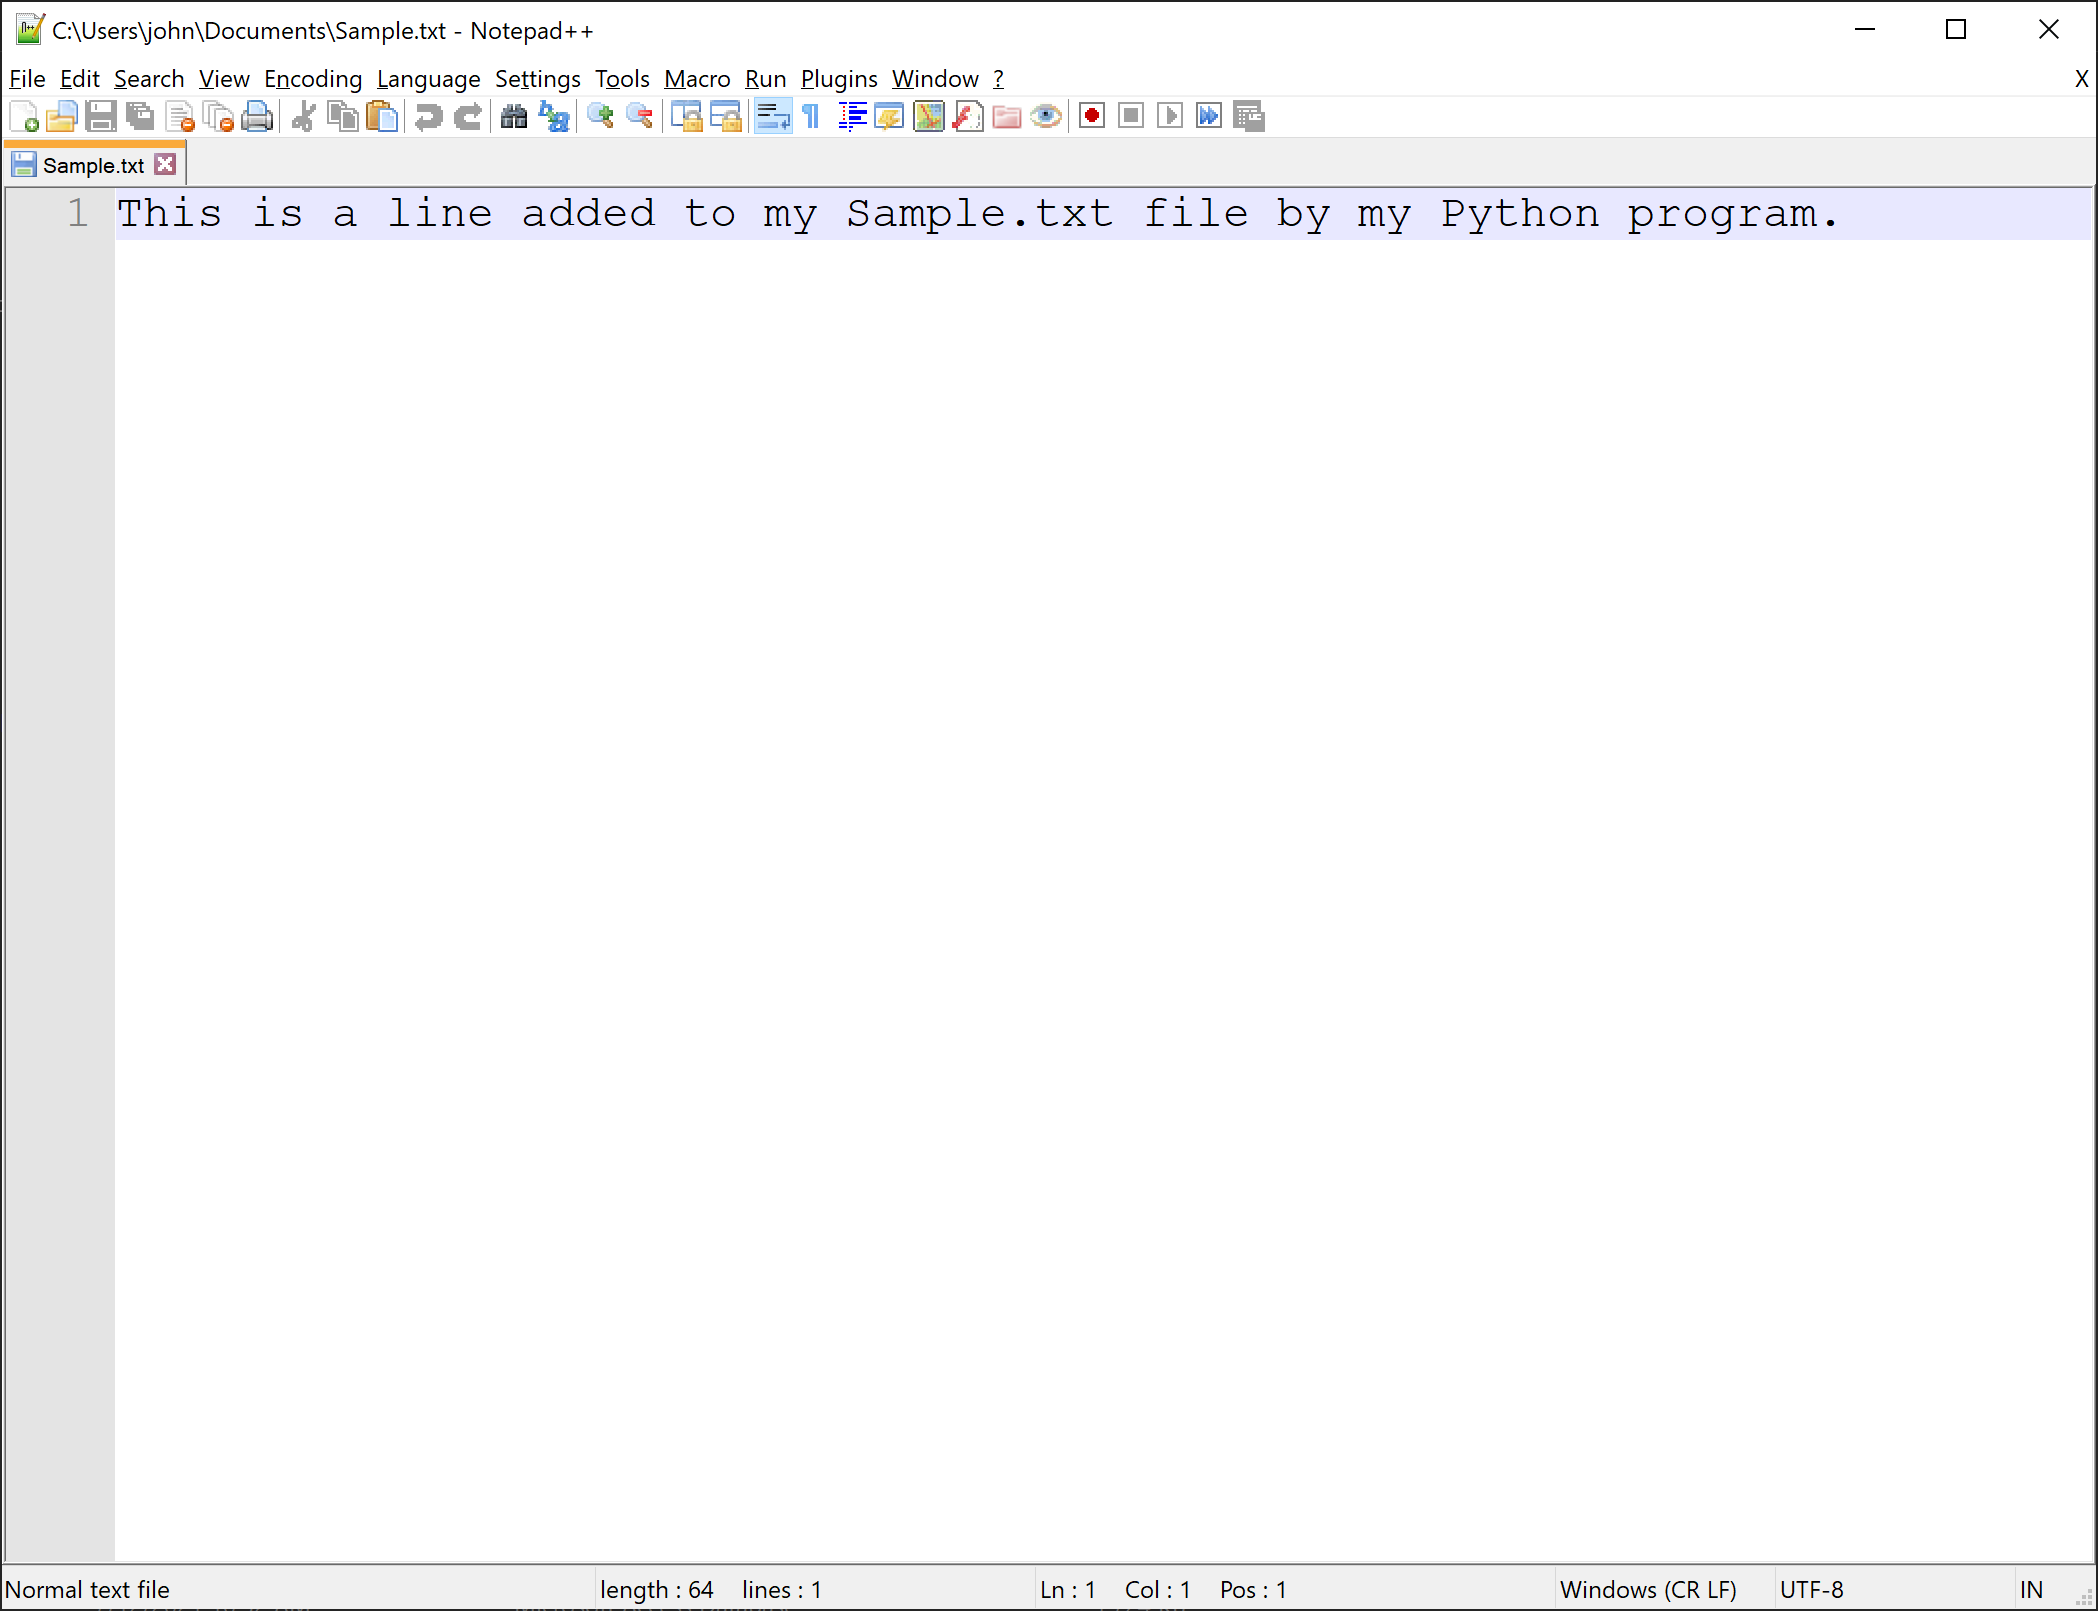
Result: Notice in the screenshot below of our Sample.txt file there is only one line in the file now, the line from our Python program above. Since this file was an existing file and we used the write "w" access mode, the original file contents were overwritten by the Python program my_file.write() statement.
Example 2::
my_file = open(r"C:\Users\John\Documents\NewFile.txt", "w")
my_file.write("This is a line added to my NewFile.txt file by my Python program.")
my_file.write("This is another line added to my NewFile.txt file by my Python program.")
my_file.close()
Result: Notice in the screenshot below that in this code example, we created a new file and wrote two lines of text to it with the two write() statements.
Example 3::
my_file = open(r"C:\Users\John\Documents\Sample.txt", "a")
my_file.write("This is a line appended to my Sample.txt file by my Python program.\n")
my_file.write("This is another line appended to my Sample.txt file by my Python program.\n")
my_file.write("This is another line appended to my Sample.txt file by my Python program.\n")
my_file.write("This is another line appended to my Sample.txt file by my Python program.\n")
my_file.write("This is another line appended to my Sample.txt file by my Python program.\n")
my_file.write("This is yet another line appended to my Sample.txt file by my Python program.\n")
my_file.close()
Result: In the screenshot below .
Reading & Writing Files with Loops
In all of the examples above, we read the entire contents of the file into one variable in one read() operation. Another common approach is to read a file one line at a time. This is frequently used when we need to process each line in a file in some way.
Example 1:
Using the Sample.txt file again, this time we'll read the file one line at a time and for each line, we'll print a line number, the length of the line, and the line itself. This is an example of reading a file sequentially so that we can do something with each line as we read them.
1: [Line Length: 43]	This is the first line of text in my file.
2: [Line Length: 44]	This is the second line of text in my file.
3: [Line Length: 43]	This is the third line of text in my file.
4: [Line Length: 44]	This is the fourth line of text in my file.
5: [Line Length: 43]	This is the fifth line of text in my file.
Code & Output Details
Code Line 1: Declare a counter variable and initialize it to zero.
Code Line 2: Declare a file variable and use the open() function to open our Sample.txt file, with the read "r" access mode.
Code Line 3: Declare a variable and assign it the result of the readline() method of the file object. This line of code reads one line (the first line) from our Sample.txt file.
Code Line 4: We start a while loop that we will use to repeatedly read lines from the file until there are no more lines to read. The while line: statement indicates that the loop will repeat while there is a line resulting from the readline() method.
Code Line 5: We increment our counter variable.
Code Line 6: We print a compound statement that includes our line counter, then the length of the line (keep in mind that a line from the file is a single string, so len() easily provides the length of the line) and then we print the line itself. We include the end="" print statement parameter so that we do not produce an extra blank line in our output. The reason for the extra blank line is that the readline() statement reads each entire line, including the (invisible) Return (\n) that is present in the file at the end of each line of text.
Code Line 7: We then read the next line. Notice that since this is inside the loop, each iteration we will read the next line until there are no more lines to read.
Code Line 8: When the loop terminates (we've read all of the lines in the file) then we close the file.
Example 2:
In this example, we will write a new file sequentially using input from the user to create each line for the file and then write each line, one at a time, to the file. The result of this example is called a comma-delimited file, notice the file extension of .csv on Code Line 3. This file format is a very common format for transmitting data records between systems.
print("Enter first names and ages.\n"
    "Press Enter with no entries to finish.\n")
my_file = open(r"C:\Users\John\Documents\NamesAges.csv", "w")
while True:
    first_name = input("First Name: ")
    age = input("Current Age: ")
    if first_name == "" and age == "":
      break
    else:
      my_file.write(first_name + "," + age + "\n")
      print()
my_file.close()
print("\nDone!")
Sample Run & Output:
Enter first names and ages.
Press Enter with no entries to finish.

First Name: Bob
Current Age: 40

First Name: Sally
Current Age: 29

First Name: Raul
Current Age: 37

First Name:
Current Age:

Done!
Code & Output Details
Code Lines 1 & 2: We print instructions for the user.
Code Line 3: Declare a file variable and use the open() function to open a new file called NamesAges.csv file, with the write "w" access mode.
Code Line 4: We start a loop using while True:. We will provide a break statement inside the loop to exit when the user indicates they are finished.
Code Lines 5 & 6: Inside the loop, we prompt the user for their first name and age. Note: Since we will be writing these values to a text file, there is no need to cast the age here to an integer.
Code Line 7: We write an if decision to determine if the user pressed Enter on the prompts with no input, which indicates they are finished and we use the break statement on Code Line 8: to exit the loop.
Code Line 9: The else: statement.
Code Line 10: We write the user entries to the file by concatenating the entries with a comma character between the user entries. This establishes our comma-delimited file format.
Code Line 11: We use an empty print() statement here to provide a blank line on the console to make the user prompts more readable.
Code Line 12: When the loop terminates (the user indicated they are finished) then we close the file.
Code Line 13: Print a parting message.
Here is the resulting .csv file in a plain text editor:
Handling Records Stored in Files
In our last example above I mentioned that .csv files are a very common format for transmitting data records between systems.
Concept:
Concept: Records
In programming and database terms, a record is a set of data elements that, together, represent some entity, such as a customer, an order, a catalog product, etc. Each record contains from 1 to many attributes that describe the entity. For example, a customer record might include a customer ID, their first name, last name, address, city, state, zip code, phone number, and email address.
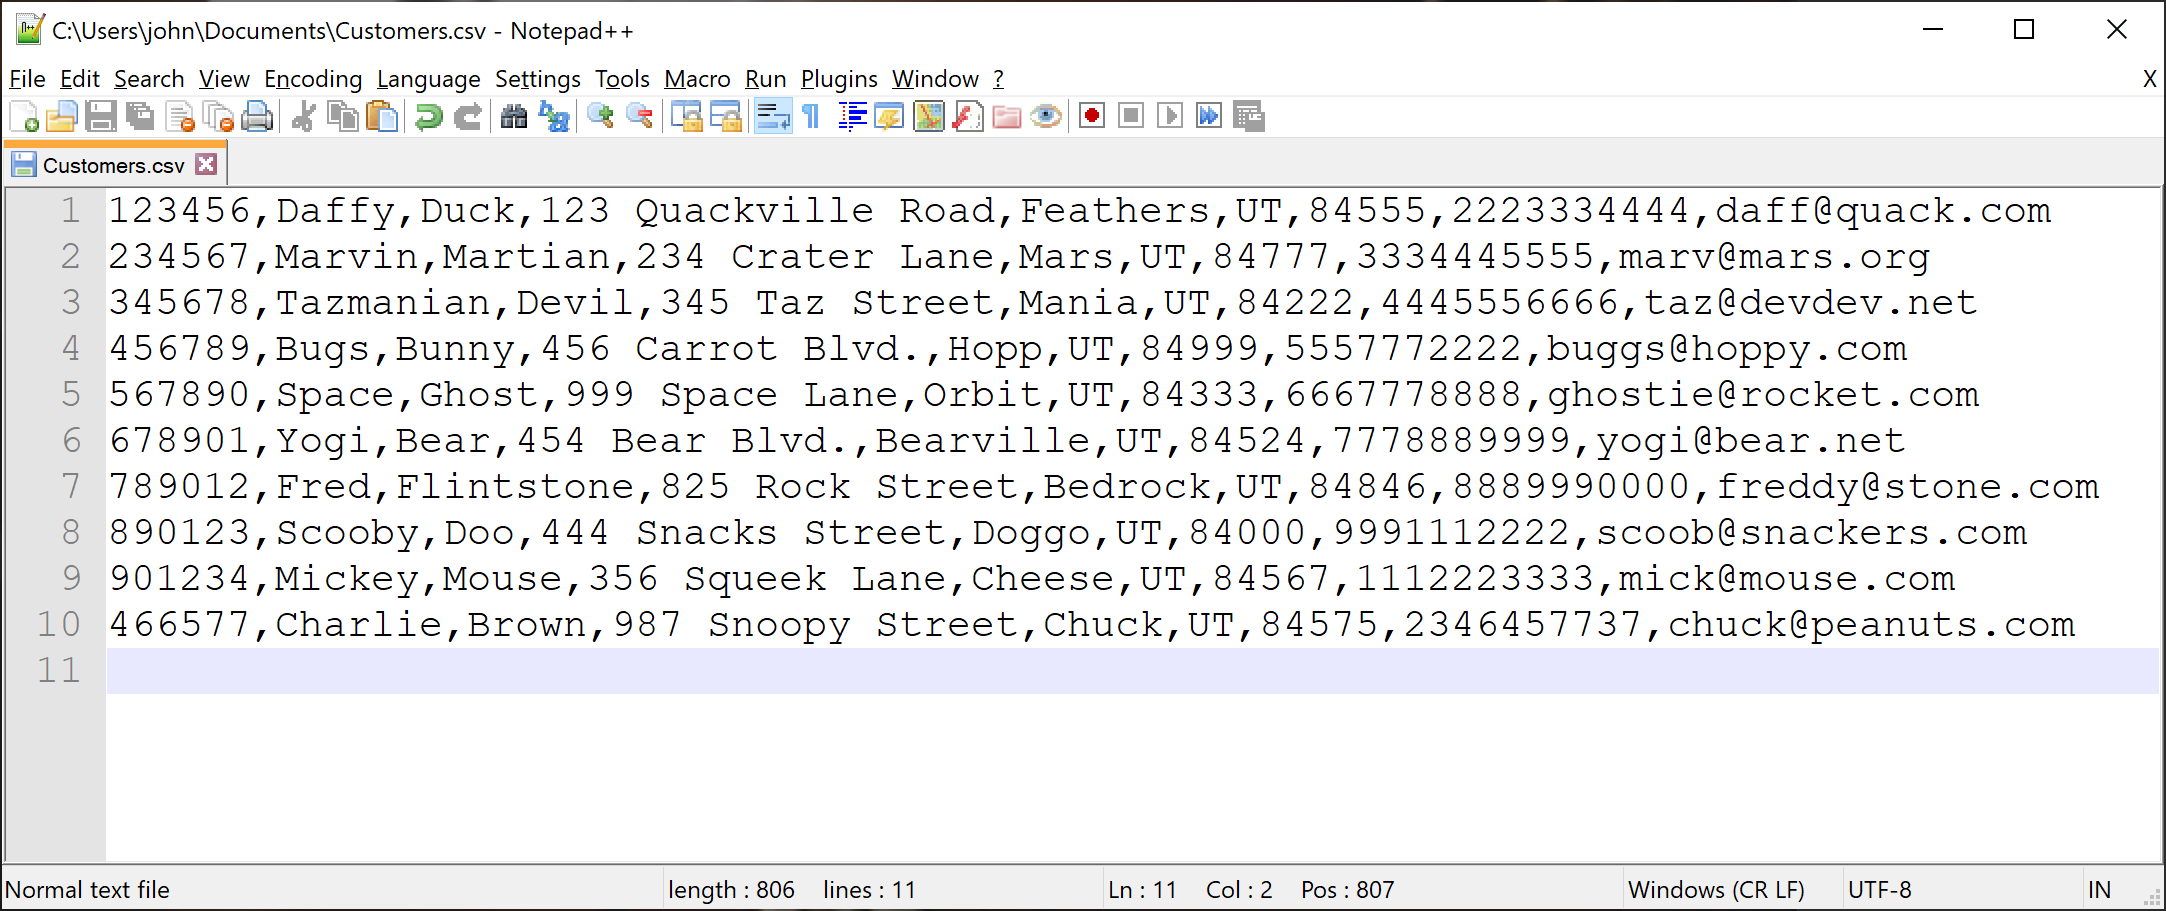
Using the Concept definition for the record above, a data file containing many customer records is often in the .csv file format where each line in the file is one record (one customer) and each of the record's attributes is separated by commas. Here's an example .csv file containing customer records:
Notice that every line is one customer and each customer has the same attributes of a customer ID, their first name, last name, address, city, state, zip code, phone number, and email address. Using a looping technique similar to those shown in the previous section above, we can read this .csv file and process the records, which might include producing a report, adding the records to a database, etc. In the following example, we'll read the file and produce a report of the customer records.
Example: This example is a bit more substantial than most we've seen thus far. It combines the current topic of reading records from a file with several other concepts we have covered previously. I recommend that you study this carefully and experiment with it in your IDE. Pay particular attention to how we are reading the records from the customer .csv file. I've included functions for the report header and footer, along with a global variable and techniques for handling slicing and concatenation that would be a good review for you as well.
This example is also a good example of a pattern you commonly see when working with files, that is, we read the file, one line at a time, then for each line we do things with the attributes in the record. In this case, we are printing each attribute and handling each separately so that we can establish proper column widths or slicing and concatenating (phone number for example). In addition, we're using a counter to count the number of records in the file so that we can print the number as a summary in the footer of the report. Be sure to read through the Code Details under the sample output below.
# Global Variables
report_width = 120


# Functions
def print_header():
    report_title = "C u s t o m e r  R e p o r t"
    print("-" * report_width)
    print(" " * int((report_width / 2) - len(report_title) / 2), end="")
    print(report_title)
    print("-" * report_width)
    print("ID".ljust(8), end="")
    print("First".ljust(12), end="")
    print("Last".ljust(12), end="")
    print("Address".ljust(25), end="")
    print("City".ljust(15), end="")
    print("ST".ljust(5), end="")
    print("Zip".ljust(7), end="")
    print("Phone".ljust(17), end="")
    print("Email".ljust(30))
    print("-" * report_width)

def print_footer(counter):
    print("-" * report_width)
    print("Number of Customers: " + str(counter))
    print("-" * report_width)

# Main Program
customer_count = 0
print_header()
my_file = open(r"Customers.csv", "r")
for line in my_file:
    customer_record = line.rstrip().split(',')
    print(customer_record[0].ljust(8), end="")
    print(customer_record[1].ljust(12), end="")
    print(customer_record[2].ljust(12), end="")
    print(customer_record[3].ljust(25), end="")
    print(customer_record[4].ljust(15), end="")
    print(customer_record[5].ljust(5), end="")
    print(customer_record[6].ljust(7), end="")
    print("(" + customer_record[7][0:3] + ")" +
          customer_record[7][3:6] + "-" +
          customer_record[7][6:].ljust(8), end="")
    print(customer_record[8].ljust(30), end="")
    print()
    customer_count += 1
print_footer(customer_count)
Output:
------------------------------------------------------------------------------------------------------------------------
                                    C u s t o m e r  R e p o r t
------------------------------------------------------------------------------------------------------------------------
ID      First       Last        Address                  City           ST   Zip    Phone            Email
------------------------------------------------------------------------------------------------------------------------
123456  Daffy       Duck        123 Quackville Road      Feathers       UT   84555  (222)333-4444    daff@quack.com
234567  Marvin      Martian     234 Crater Lane          Mars           UT   84777  (333)444-5555    marv@mars.org
345678  Tazmanian   Devil       345 Taz Street           Mania          UT   84222  (444)555-6666    taz@devdev.net
456789  Bugs        Bunny       456 Carrot Blvd.         Hopp           UT   84999  (555)777-2222    buggs@hoppy.com
567890  Space       Ghost       999 Space Lane           Orbit          UT   84333  (666)777-8888    ghostie@rocket.com
678901  Yogi        Bear        454 Bear Blvd.           Bearville      UT   84524  (777)888-9999    yogi@bear.net
789012  Fred        Flintstone  825 Rock Street          Bedrock        UT   84846  (888)999-0000    freddy@stone.com
890123  Scooby      Doo         444 Snacks Street        Doggo          UT   84000  (999)111-2222    scoob@snackers.com
901234  Mickey      Mouse       356 Squeek Lane          Cheese         UT   84567  (111)222-3333    mick@mouse.com
466577  Charlie     Brown       987 Snoopy Street        Chuck          UT   84575  (234)645-7737    chuck@peanuts.com
------------------------------------------------------------------------------------------------------------------------
Number of Customers: 10
------------------------------------------------------------------------------------------------------------------------
Code Details:
Code Line 2: Declares a global variable for the report width.
Code Line 31: First we declare a counter variable for the number of customer records (lines in the file) and initialize it to zero.
Code Line 32: We call the print_header() function:
Code Line 6: Defines the print_header() function
Code Line 7: Declares a report title variable with a title string. This is set as a variable to demonstrate flexible centering of a string (title in this example) as shown on Code Line 9.
Code Line 8: Prints a horizontal line based on the report width global variable.
Code Line 9: Prints a calculated number of blank spaces to prepare the report title so it will be centered.
Code Line 10: Prints the report title positioned by the calculated number of blank spaces on Code Line 9.
Code Line 11: Prints a horizontal line based on the report width global variable.
Code Lines 12 thru 20: Prints column headers for the attributes. Note the use of the .ljust() string method to position the headers appropriately for the report columns. The hardcoded values could be changed here to be calculated based on a programmatic evaluation of the data rather than hardcoded values.
Code Line 21: Prints a horizontal line based on the report width global variable.
Code Line 33: We declare a variable for the file and use the open() function to open the Customers.csv file, with read "r" access mode.
Code Line 34: We declare a for loop based on a line variable and the my_file file variable. The loop will repeat until the end of the file is reached no matter how many records we have in the file.
Code Line 35: We declare a list variable to store the record in the file. This list variable is constructed by using a combination of the rstrip() string method (which removes any blank spaces from the end of the line) and the split() string method (which splits the line based on a separator, which we set to "," since this is a comma separated file (.csv)). The customer_record then contains all of the attributes for the current record in any given iteration of the loop.
Code Lines 36 thru 46: Prints each customer record attribute for the current record in any given iteration of the loop. Notice the use of the .ljust() string method used to position the attribute values appropriately.
Code Lines 43 thru 45: Notice the use of slicing and concatenation to format the phone number from the all-digit version in the .csv file to the more user-friendly format for the report.
Code Line 47: Note all of the print statements above use the end="" parameter to keep the cursor position on one line so all attributes for any given record remain on the same line. We use an empty print() statement on Line 47, after all of the attributes have been printed on one line, to push the cursor position down to the next line in preparation for the next record in the next iteration of the loop.
Code Line 48: We increment the customer count that will be used in the report footer.
Code Line 49: After all records have been read from the file and the loop terminates, we then call the print_footer function.
Code Line 24: Defines the print_footer() function
Code Line 25: Prints a horizontal line based on the report width global variable.
Code Line 26: Prints a summary line to indicate the number of customer records found in the file using the customer_counter variable as an argument for the print_footer() function call. This is an example of accumulating summary values during looping that we can use later, such as in report footers.
Code Line 27: Prints a horizontal line based on the report width global variable.
After the print_footer() function completes execution is returned to the main program which ends since there are no more code lines after the function call.
Libraries for File Handling
There are numerous Python library modules available for handling different types of files (csv, json, xml, etc.) and different file operations (reading, writing, parsing, etc.). In this section I demonstrate a few of the common libraries. Keep in mind though that this is only a small sample of what is available. You can find more file handling modules by searching the Python Package Index↗.
CSV Files
CSV (Comma Separated Values) is a file format used to store and exchange data between different software applications. CSV files are plain text files that store data in a tabular format, with each row representing a record, and each column representing a field of the record. The fields in a CSV file are separated by commas, hence the name "comma-separated values. CSV files are widely used because they are simple, lightweight, and can be easily imported into and exported from a variety of software applications, including spreadsheets, databases, and programming languages. They are also human-readable, making them easy to edit and understand. They are structured as tables, with rows and columns. Each row represents a record, while each column represents a field in that record. The first row of a CSV file typically contains the headers for each column, while subsequent rows contain the data. CSV files use a delimiter, usually a comma, to separate fields. However, other characters such as semicolons or tabs can also be used as delimiters, depending on the software application used to create or read the file. To avoid any issues with the delimiter characters appearing within fields, CSV files can use quotes to enclose fields that contain them. Double quotes are typically used for this purpose. CSV files are typically encoded in ASCII or UTF-8, which are widely supported and can be read by most software applications. Each row in a CSV file is separated by a line break, which can be represented using different characters depending on the operating system. For example, Windows uses a carriage return and line feed sequence ("\r\n"), while Unix-based systems use a line feed ("\n") character. CSV files usually have a ".csv" file extension, which helps identify them as CSV files.
In Python, we can use the csv library to work with csv files. You can find full documentation for this library here↗. And here is an example of using the CSV library:
Code Line 1: First we import the csv library. This library is not part of the Python Standard Library, so the first time you try to use it you likely need to install it first, which you can do with pip install csv at the command line or in the terminal.
Code Line 3: On this line we use the with statement to open a file called Customers.csv with the w specifier, which means write. Using that specifier, if the file does not already exist it will be created and if the file already exists it will be overwritten.
Code Line 4: Here we instantiate a csv.writer object using the writer() method and pass the CSV file that we'll use to write to the file.
Code Lines 5 thru 10: Inside of the with block we write a number of records to the file. A record in this context is a row of data about an entity, in this case, we're simulating customer records. Each record has the same columns with each column separated by a comma. Note that the first row written (Code Line 5) is our column headers. Many CSV files store column headings as their first row. Then each of the remaining lines of code write a customer record to the file.
Code Line 12: On this line we use the with statement to open a file called Customers.csv with the a specifier, which means append. Using that specifier, if the file does not already exist it will be created and if the file already exists any writing to the file will append records to the bottom of the file.
Code Line 13: Here we instantiate a csv.writer object using the writer() method and pass the CSV file that we'll use to write to the file.
Code Lines 14 thru 18: Inside of the with block we write (append) a number of records to the file. A record in this context is a row of data about an entity, in this case, we're simulating customer records. Each record has the same columns with each column separated by a comma. Each of the remaining lines of code write a customer record to the file.
Code Line 20: On this line we use the with statement to open a file called Customers.csv with the r specifier, which means read. Using that specifier, the file can only be read, no writing will be allowed.
Code Line 21: Here we instantiate a csv.reader object using the reader() method and pass the CSV file that we'll use to write to the file.
Code Line 22: On this line we establish a for loop that will iterate over the reader object so that we can work with each row in the file.
Code Line 23: For this example, we simply print each row which produce Output Lines 1 thru 11.
Code Lines 25 thru 27: To demonstrate accessing columns on a row, these lines show printing a record in a formatted manner. We can access each column using the index values of the row.
JSON Files
JSON (JavaScript Object Notation) is a file format used as a lightweight data interchange format that is easy for humans to read and write, and easy for machines to parse and generate. JSON files are text files that contain data in the JSON format. JSON is widely used for transmitting data between a client and a server in web applications, and is also used as a data storage format in many applications. JSON data is composed of key-value pairs, where each key is a string and the value can be a string, number, boolean, array, or another JSON object. JSON objects are enclosed in curly braces {} and consist of zero or more key-value pairs, separated by commas. JSON files can be created and edited using a simple text editor or an integrated development environment (IDE). Many programming languages provide built-in support for working with JSON data, including parsing and generating JSON files.
In Python, we can use the json library to work with json files. You can find full documentation for this library here↗.
XML Files
XML (Extensible Markup Language) is a markup language that is widely used for data exchange and storage on the web. XML files are plain text files that contain data in a structured format. The data is enclosed in tags, which are similar to HTML tags, but have no predefined meaning. XML files can be used to represent a variety of data, including documents, configuration files, and data records. They are widely used in web services, as well as in software applications that require data exchange and interoperability between different systems. XML files are hierarchical in nature, with each tag representing a node in a tree-like structure. The root node is the top-level node, and all other nodes are its descendants. Each node can have one or more child nodes, and may also have attributes that provide additional information about the node. XML files typically start with an XML declaration, which identifies the version of the XML standard being used and any other special features of the document. After the XML declaration, the document typically contains a root element, which encloses all other elements in the document. Elements can contain other elements, as well as text data. They can also have attributes, which are enclosed in the opening tag and provide additional information about the element. XML files can be created and manipulated using various programming languages, including Python. The Python standard library provides several modules for working with XML files, including xml.etree.ElementTree, which provides a lightweight and easy-to-use API for parsing and creating XML files.
In Python, we can use the xml library to work with xml files. You can find full documentation for this library here↗.
Practice Problems
Problem 1
Write a Python program that performs the following tasks based on a text file:
Read the contents of the given text file.
Report the number of words in the file.
Remove all punctuation from the content (do this after reading the file, not in the file itself).
Create a list of unique words from the file contents.
Report the longest word in the file and its length
Report the number of unique words in the file.
Sort the list of unique words.
Print a columnar list of unique words with their number of occurrences.
Note 1: If you would like to follow along with the provided Solution to this Practice Problem you can download the text file I use for the solution code here.
Python Code
print("-" * 80)
print("Simple Analysis of File: DeclarationOfIndependence.txt")
print("-" * 80)
# Create list of punctuation characters we'll use to remove punctuation from the content
punctuation = ['~', '!', '@', '#', '$', '%', '^', '&', '*', '(', ')', '_', '+', '`',
            '-', '=', '{', '}', '|', '[', ']', '\\', ':', '"', ';', '<', '>', '?',
            ',', '.', '/']
# Connect to our text file
file_contents = open(r"C:\Users\John\Documents\declarationofindependence.txt", "r")
# Read file contents into string variable
declaration = file_contents.read()
# Set everything to lower case
declaration = declaration.lower()
# Remove punctuation from string
for i in punctuation:
declaration = declaration.replace(i, ' ')
# Split string into individual words into list
words = declaration.split()
# The number of words in the file is the length of the words list
print("Number of words in the file: " + str(len(words)))
# Gather list of unique words in the content
# Create an empty list to store unique words
unique_words = []
# Loop through the words list and add each word to
# the unique_words list just once
for word in words:
    if word not in unique_words:
        unique_words.append(word)
print("Number of unique words in the file: " + str(len(unique_words)))
# Sort the list
unique_words.sort()
# Set counter variables we will use to identify the list index,
# the longest word length and index
list_index = 0
longest_word_length = 0
longest_word_index = 0
for w in unique_words:
    # Determine the longest word in the unique list
    if len(w) > longest_word_length:
        longest_word_index = list_index
        longest_word_length = len(w)
    # Replace the word string with the string plus the number of
    # occurrences in the words list in parenthesis
    unique_words[list_index] = w + " (" + str(words.count(w)) + ")"
    list_index += 1
print("-" * 80)
print("Longest Word: " + unique_words[longest_word_index] +
" Length: " + str(longest_word_length))
print("-" * 80)
print("Unique Words and Number of Occurrences Each:")
print("-" * 120)
list_index = 0
line_count = 1
for w in unique_words:
    print(unique_words[list_index].ljust(20) + "  ", end="")
    if line_count % 5 == 0:
        print()
    list_index += 1
    line_count += 1
print()
print("-" * 120)
Output
--------------------------------------------------------------------------------
Simple Analysis of File: DeclarationOfIndependence.txt
--------------------------------------------------------------------------------
Number of words in the file: 1326
Number of unique words in the file: 534
--------------------------------------------------------------------------------
Longest Word: representatives (1) Length: 15
--------------------------------------------------------------------------------
Unique Words and Number of Occurrences Each:
------------------------------------------------------------------------------------------------------------------------
a (16)                abdicated (1)         abolish (1)           abolishing (3)        absolute (3)
absolved (1)          abuses (1)            accommodation (1)     accordingly (1)       accustomed (1)
acquiesce (1)         act (1)               acts (2)              administration (1)    affected (1)
after (1)             against (2)           ages (2)              all (10)              allegiance (1)
alliances (1)         alone (1)             already (1)           alter (2)             altering (1)
america (1)           among (5)             amongst (1)           amount (1)            an (5)
and (57)              annihilation (1)      another (1)           answered (1)          any (2)
appealed (1)          appealing (1)         appropriations (1)    arbitrary (1)         are (9)
armed (1)             armies (2)            arms (1)              as (4)                assembled (1)
assent (4)            assume (1)            at (4)                attempts (1)          attend (1)
attentions (1)        authority (1)         away (1)              bands (1)             barbarous (1)
be (9)                bear (1)              become (1)            becomes (2)           been (4)
begun (1)             benefits (1)          between (1)           beyond (1)            bodies (2)
boundaries (1)        brethren (2)          bring (1)             britain (2)           british (2)
burnt (1)             but (1)               by (13)               called (1)            candid (1)
captive (1)           cases (2)             cause (1)             causes (2)            certain (1)
changed (1)           character (1)         charters (1)          circumstances (2)     citizens (1)
civil (1)             civilized (1)         coasts (1)            colonies (4)          combined (1)
commerce (1)          commit (1)            common (1)            complete (1)          compliance (1)
conclude (1)          conditions (2)        congress (1)          conjured (1)          connected (1)
connection (1)        connections (1)       consanguinity (1)     consent (3)           constitution (1)
constrained (1)       constrains (1)        contract (1)          convulsions (1)       correspondence (1)
country (1)           course (1)            created (1)           creator (1)           crown (1)
cruelty (1)           cutting (1)           dangers (1)           deaf (1)              death (1)
decent (1)            declaration (2)       declare (2)           declaring (2)         define (1)
denounces (1)         dependent (1)         depository (1)        depriving (1)         deriving (1)
design (1)            desolation (1)        despotism (1)         destroyed (1)         destruction (1)
destructive (1)       dictate (1)           direct (1)            disavow (1)           disposed (1)
dissolutions (1)      dissolve (1)          dissolved (2)         distant (1)           districts (1)
divine (1)            do (3)                domestic (1)          duty (1)              each (1)
earth (1)             eat (1)               effect (1)            elected (1)           emigration (1)
encourage (1)         endeavored (2)        endowed (1)           ends (1)              enemies (1)
english (1)           enlarging (1)         entitle (1)           equal (2)             erected (1)
establish (1)         established (1)       establishing (2)      establishment (1)     events (1)
every (2)             evident (1)           evils (1)             evinces (1)           example (1)
excited (1)           executioners (1)      exercise (1)          experience (1)        exposed (1)
extend (1)            facts (1)             fall (1)              fatiguing (1)         fellow (1)
firm (1)              firmness (1)          fit (1)               for (29)              forbidden (1)
foreign (2)           foreigners (1)        form (2)              former (1)            formidable (1)
forms (2)             fortunes (1)          foundation (1)        free (4)              friends (2)
from (6)              frontiers (1)         full (1)              fundamentally (1)     future (1)
general (1)           giving (1)            god (1)               good (2)              governed (1)
government (6)        governments (3)       governors (1)         great (2)             guards (1)
hands (1)             happiness (2)         harass (1)            has (21)              have (11)
having (1)            he (19)               head (1)              here (2)              high (1)
his (9)               history (2)           hither (2)            hold (3)              honor (1)
houses (1)            human (1)             humble (1)            immediate (1)         impel (1)
importance (1)        imposing (1)          in (19)               incapable (1)         indeed (1)
independence (1)      independent (4)       indian (1)            inestimable (1)       inevitably (1)
inhabitants (2)       injuries (1)          injury (1)            institute (1)         instituted (1)
instrument (1)        insurrections (1)     intentions (1)        interrupt (1)         into (2)
introducing (1)       invariably (1)        invasion (1)          invasions (1)         invested (1)
is (10)               it (6)                its (3)               judge (1)             judges (1)
judiciary (1)         jurisdiction (2)      jury (1)              just (1)              justice (3)
kept (1)              kindred (1)           king (1)              known (1)             lands (1)
large (4)             laws (9)              laying (1)            legislate (1)         legislation (1)
legislative (2)       legislature (2)       legislatures (2)      let (1)               levy (1)
liberty (1)           life (1)              light (1)             likely (1)            lives (2)
long (3)              made (1)              magnanimity (1)       mankind (3)           manly (1)
many (1)              marked (1)            may (2)               meantime (1)          measures (1)
men (2)               mercenaries (1)       merciless (1)         migrations (1)        military (1)
mock (1)              more (1)              most (5)              multitude (1)         murders (1)
must (1)              mutually (1)          name (1)              nation (1)            native (1)
naturalization (1)    nature (1)            nature’s (1)        necessary (2)         necessity (2)
neglected (1)         neighboring (1)       new (4)               nor (1)               not (1)
now (1)               object (2)            obstructed (1)        obstructing (1)       obtained (1)
of (77)               off (2)               offenses (1)          officers (1)          offices (2)
on (8)                once (1)              one (1)               only (2)              operation (1)
opinions (1)          opposing (1)          oppressions (1)       or (2)                organizing (1)
other (3)             others (3)            ought (2)             our (26)              out (2)
over (2)              own (1)               paralleled (1)        parts (1)             pass (3)
patient (1)           payment (1)           peace (3)             people (10)           perfidy (1)
petitioned (1)        petitions (1)         places (1)            pledge (1)            plundered (1)
political (2)         population (1)        power (3)             powers (5)            present (1)
pressing (1)          pretended (2)         prevent (1)           prince (1)            principles (1)
protecting (1)        protection (2)        prove (1)             provide (1)           providence (1)
province (1)          prudence (1)          public (2)            publish (1)           punishment (1)
purpose (2)           pursuing (1)          pursuit (1)           quartering (1)        raising (1)
ravaged (1)           records (1)           rectitude (1)         redress (1)           reduce (1)
refused (3)           refusing (2)          reliance (1)          relinquish (1)        remaining (1)
reminded (1)          render (2)            repeated (3)          repeatedly (1)        representation (1)
representative (1)    representatives (1)   requires (1)          respect (1)           rest (1)
returned (1)          right (7)             rights (3)            rule (2)              ruler (1)
sacred (1)            safety (1)            salaries (1)          same (2)              savages (1)
scarcely (1)          seas (3)              secure (1)            security (1)          seem (1)
self (1)              sent (1)              separate (1)          separation (2)        settlement (1)
sexes (1)             shall (1)             should (4)            shown (1)             so (2)
sole (1)              solemnly (1)          stage (1)             standing (1)          state (2)
states (7)            station (1)           subject (1)           submitted (1)         substance (1)
such (6)              suffer (1)            sufferable (1)        sufferance (1)        superior (1)
support (1)           supreme (1)           suspended (2)         suspending (1)        swarms (1)
system (1)            systems (1)           taken (1)             taking (1)            taxes (1)
tenure (1)            terms (1)             than (1)              that (13)             the (77)
their (20)            them (15)             themselves (3)        therefore (2)         therein (1)
these (13)            they (7)              things (1)            this (3)              those (1)
throw (1)             thus (1)              ties (1)              till (1)              time (4)
times (1)             to (65)               together (1)          too (1)               totally (2)
towns (1)             trade (1)             train (1)             transient (1)         transporting (2)
trial (2)             tried (1)             troops (1)            truths (1)            tyranny (2)
tyrant (1)            tyrants (1)           unacknowledged (1)    unalienable (1)       uncomfortable (1)
under (1)             undistinguished (1)   unfit (1)             united (2)            unless (2)
unusual (1)           unwarrantable (1)     unworthy (1)          us (11)               usurpations (3)
utterly (1)           valuable (1)          voice (1)             waging (1)            wanting (1)
war (3)               warfare (1)           warned (1)            we (11)               whatsoever (1)
when (3)              whenever (1)          whereby (1)           which (10)            while (1)
wholesome (1)         whose (2)             will (2)              with (9)              within (1)
without (3)           works (1)             world (3)             would (2)
------------------------------------------------------------------------------------------------------------------------